Now, besides Zoom and ClickMeeting you can use integration with MS Teams.
In addition to communicating with participants, using Microsoft Teams you can, among others: add presentations, co-create boards with meeting participants, or create thematic channels.
Below you will find detailed step-by-step instructions on how to do this.
How to start?
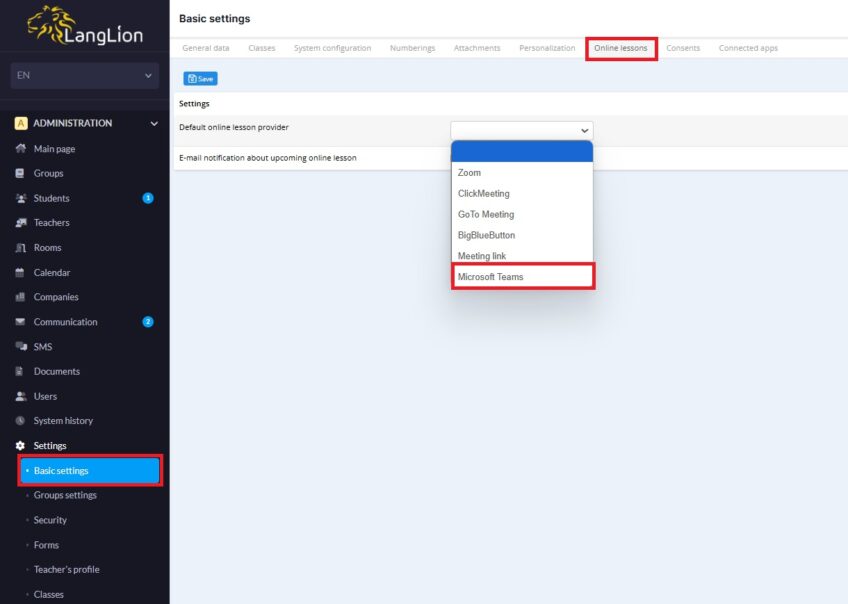
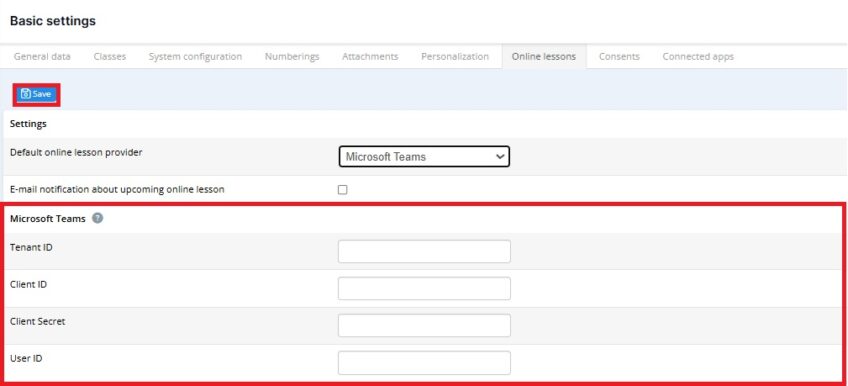
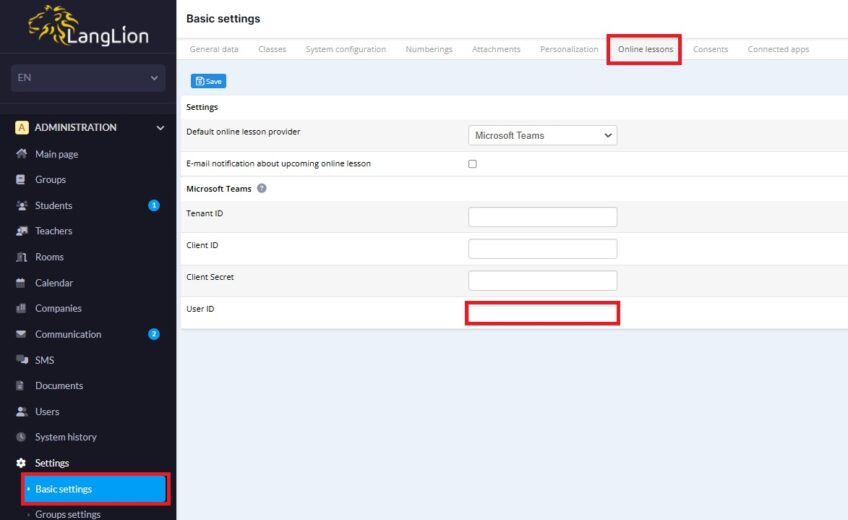
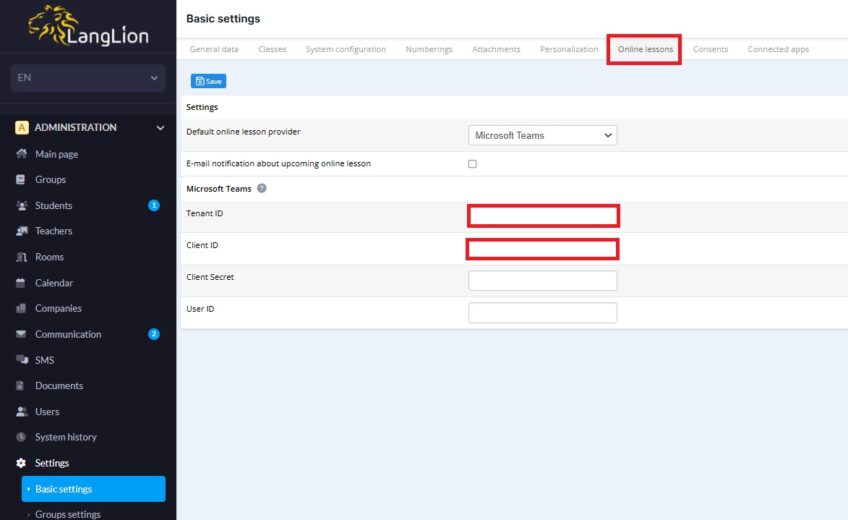
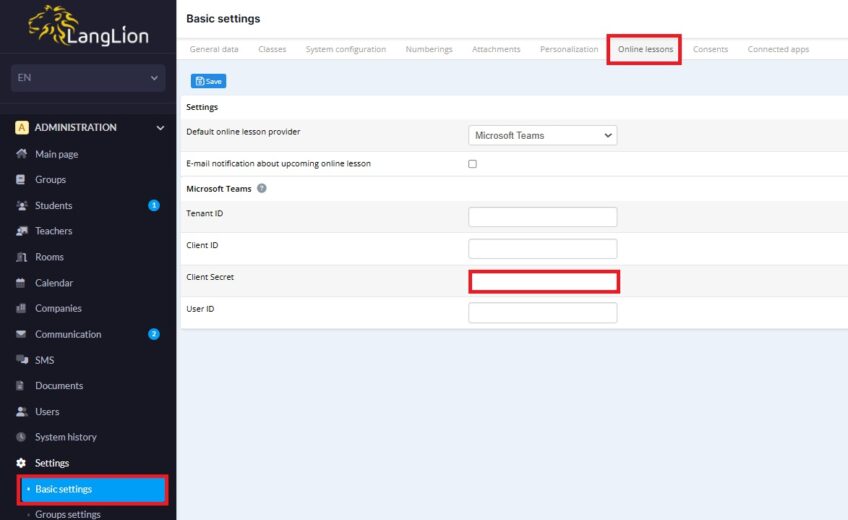
In the first step go to the „Settings” – „Basic settings” tab in the „Administrator” module and then to the „Online lessons” tab. Then, from the drop-down list, select Microsoft Teams as the default online lesson provider in the system and confirm by clicking „Save„.
- Tenant ID: Your organization’s unique identifier in Microsoft Azure Active Directory (Azure AD). This is a unique tenant (organization) identifier that is used in the context of applications using Azure AD.
- Client ID: The unique identifier of the application registered in Azure AD. This identifier allows you to recognize a specific application that wants to access resources in Microsoft 365 (e.g. Microsoft Teams).
- Client Secret: The password or key used by the application for authorization in Azure AD. Acts as a credential for the application and is required when attempting to obtain an access token on behalf of the application.
- User ID: A unique user ID in the system. In the context of Microsoft Azure AD or Teams, it is a unique person identifier that can be used to identify users in the API, e.g. when creating Teams meetings for a specific user.
To integrate LangLion with Microsoft Teams, you need a business account with the Teams package (Microsoft 365 & Microsoft Teams).
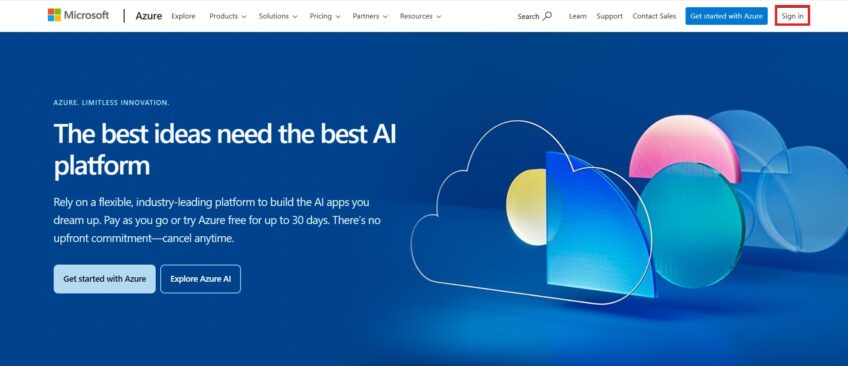
Sign in to your Microsoft Azure account click here
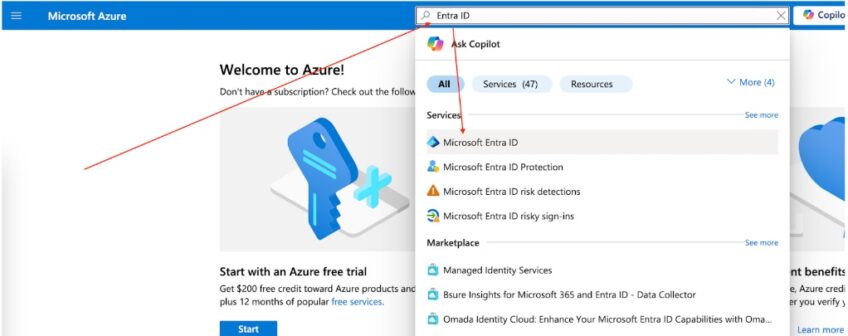
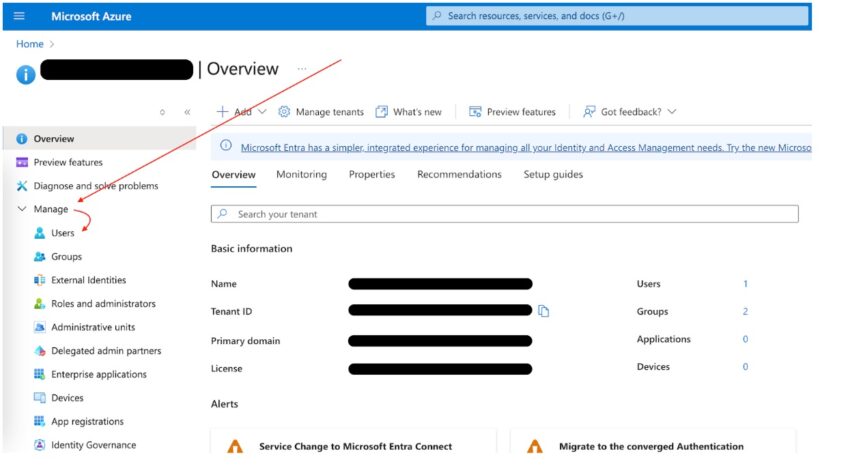
In the search engine, enter: Entra ID and select from the list „Microsoft Entra ID”
Then go to the tab: „Manager” —> „Users”
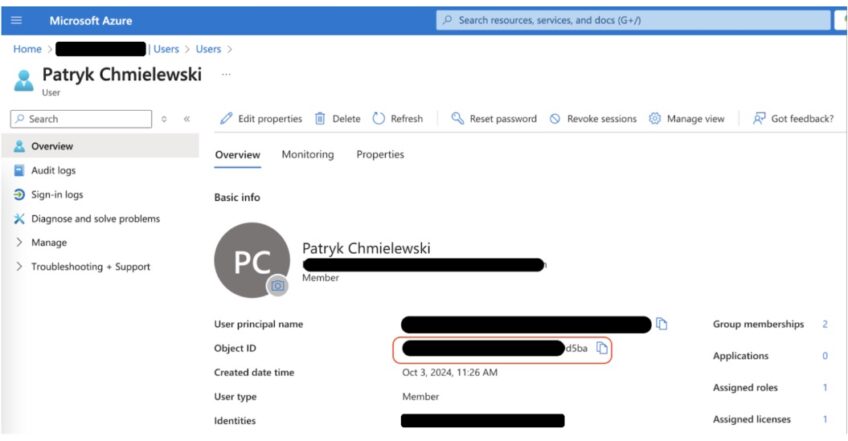
Copy the data from the „Object ID” field and paste it into the Configuration on the platform in the „User ID” field:
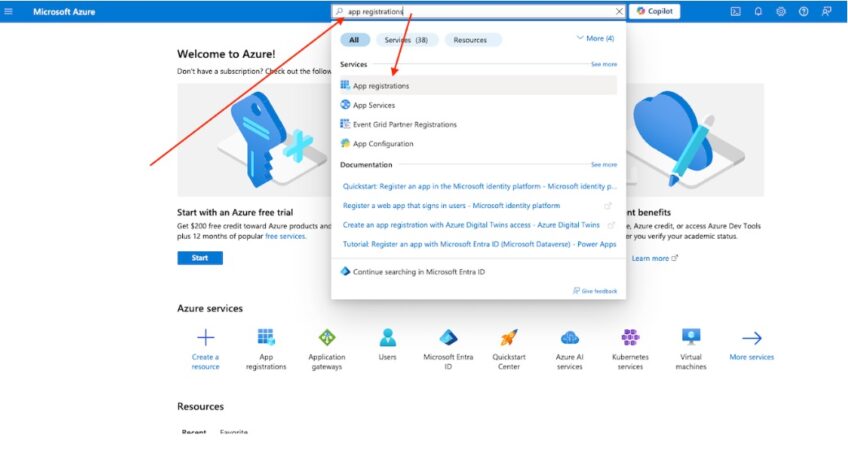
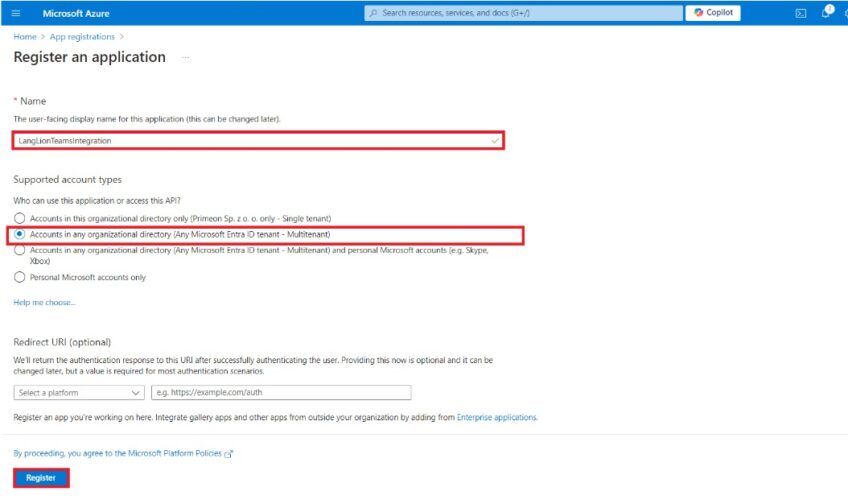
To run online meetings you need to create an application in Microsoft Azure to handle creating meetings without user context. To do that log into Azure, and search for “App registrations”.
Then click: „+ New registration”
Complete the fields of the form below:
- Name – application display name—–> for example “LanglionTeamsIntegration”
- Supported account types—> Accounts in any organizational directory (Any Microsoft Entra ID tenant – Multitenant)
- Redirect URI ——> leave empty for now.
Then click: „Register”
Now you will see your new added app in the list below:
Next enter in the platform configuration:
Application (client) ID => Client ID
Directory (tenant) ID => Tenant ID
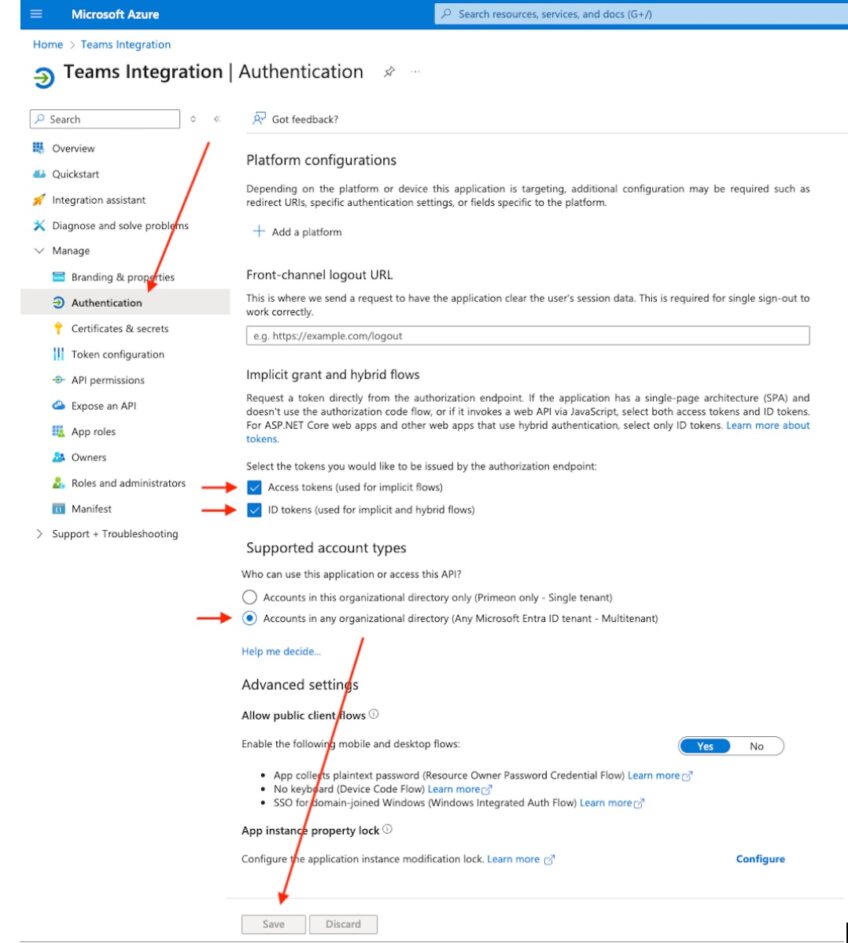
Authentication
Go to “Manage — > „Authentication”, click “Add a platform” (to do this, scroll down the page) mark the fields as in the photo below and then save using the „Save” button.
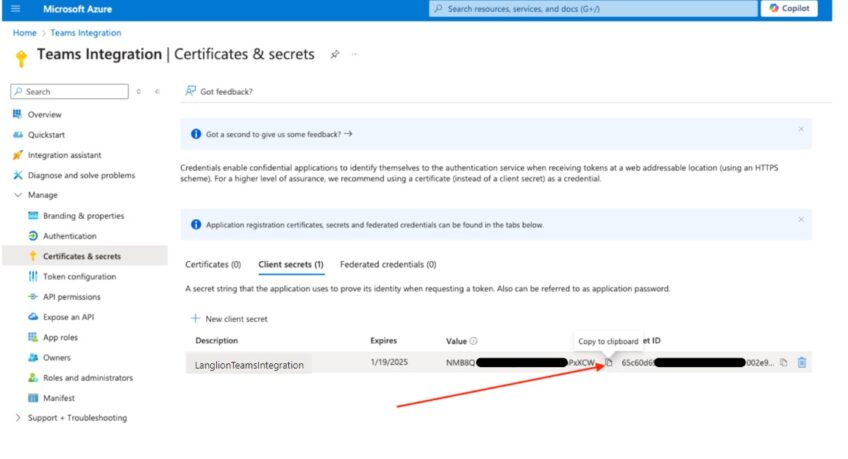
In the “Manage” tab, select “Certificates & secrets” and click on the “Client secrets” tab——-> “+ New client secret” and fill it in with the data:
complete the form: Description:——->Team Integration Secret
Expires ————->24 months
and at the bottom of the page click „Add„
The newly created secret is visible in the list below. Click „Copy to Clipboard” and save it somewhere safe as you will only see it once.
Open in Langlion Teams Integration options and paste:
“Value” => Client Secret and then click „Save” button.
The next step will be Permissions
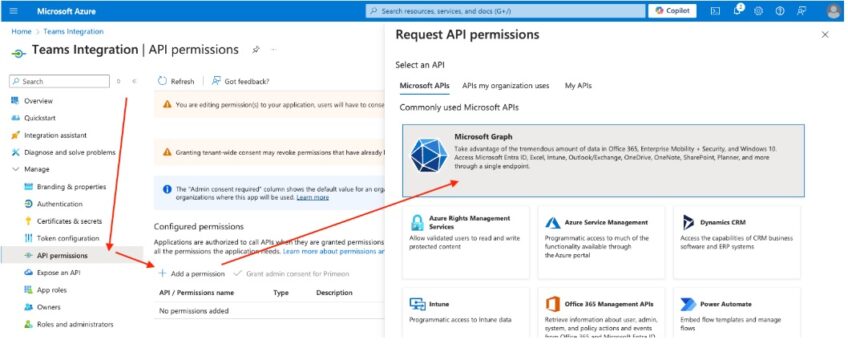
In the “Manage” tab, select “API Permission” and click “+ Add a permission” then select “Microsoft APIs” -> “Microsoft Graph”
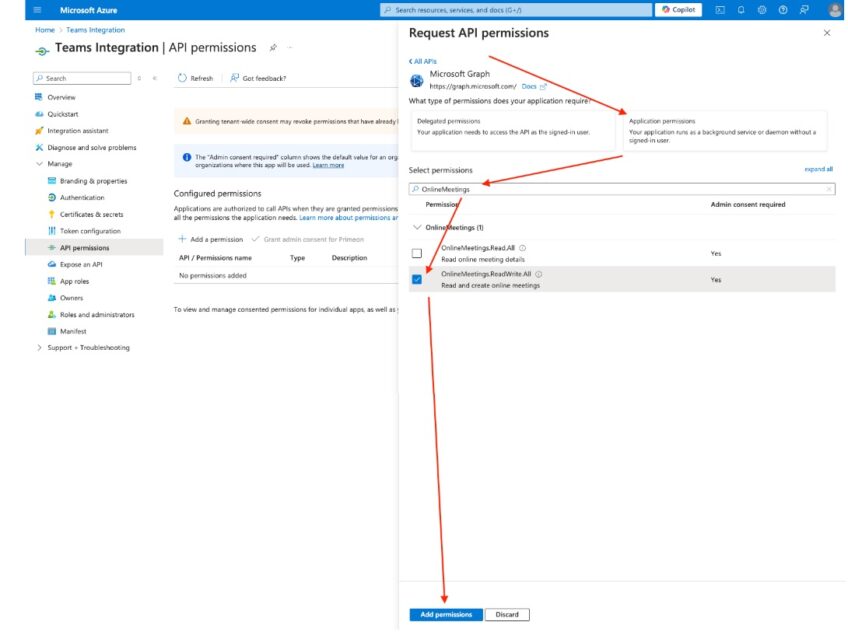
Select „Application Permissions” in the search box, enter „OnlineMeetings” then check the „OnlineMeetings.ReadWrite.All” option and click „Add permissions„.
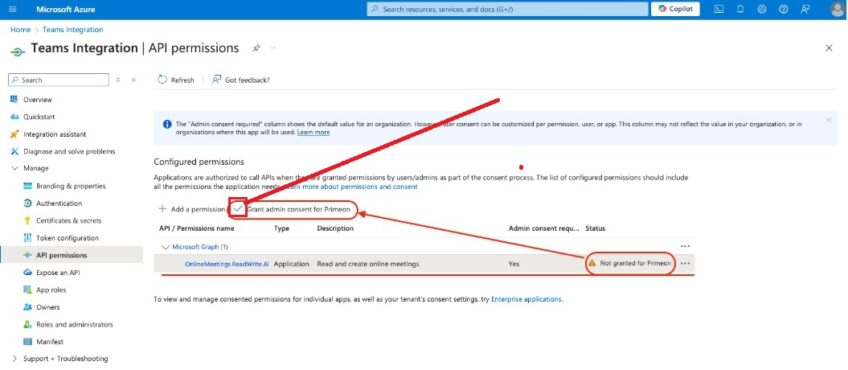
Newly added permissions require administrator consent – to do so, click on the place marked in the photo below:
Set Access Policy
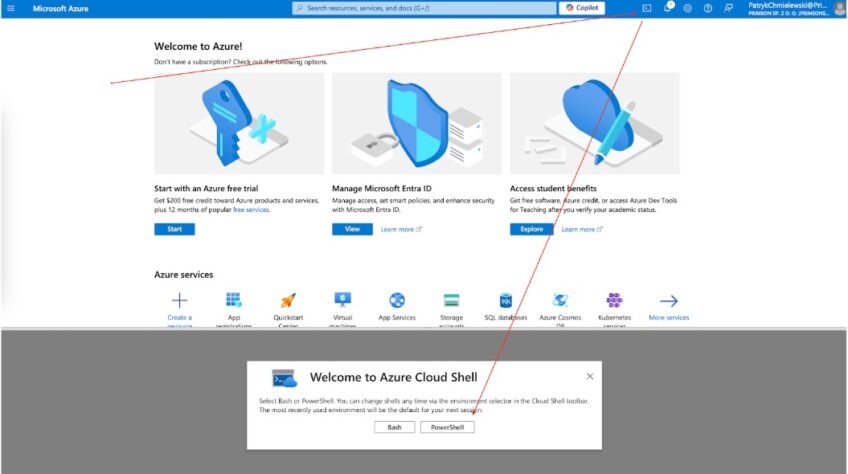
To do this, go to „Cloud Shell„
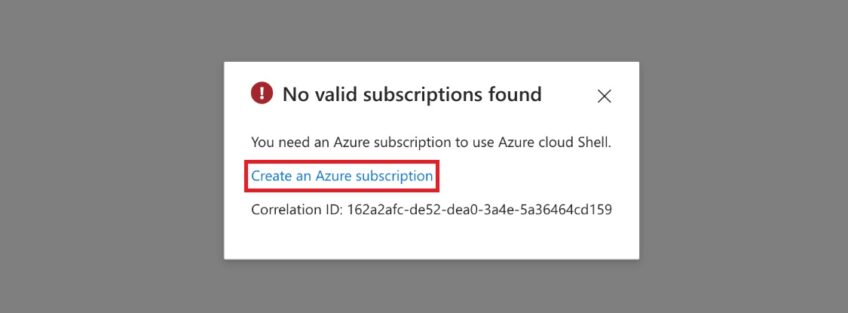
If a notification like the one in the photo below appears, click on the place marked in the photo and purchase the subscription according to the instructions on the Azure website.
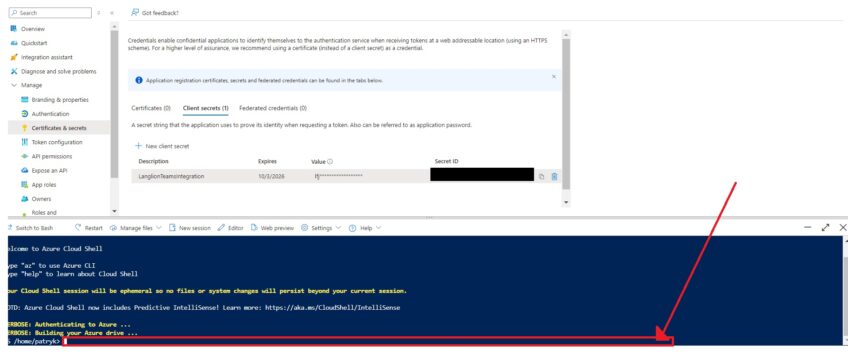
After selecting the „Cloud Shell” option, a window will open at the bottom, and a cursor icon will appear after the information is loaded.
Step 1. Installing Modules
Enter the commands below: (each time you enter a command, press the „Enter” key on your keyboard).
1: Install-Module -Name PowerShellGet -Force -AllowClobber
2. Install-Module -Name MicrosoftTeams -Force -AllowClobber
Step 2 – this will be a Teams connection – enter the following commands:
a) $userCredential = Get-Credential
Connect-MicrosoftTeams -Credential $userCredential
and second:
Grant-CsApplicationAccessPolicy -PolicyName langlion-teams-policy -Global
If everything is OK after entering this command, go to step 3.
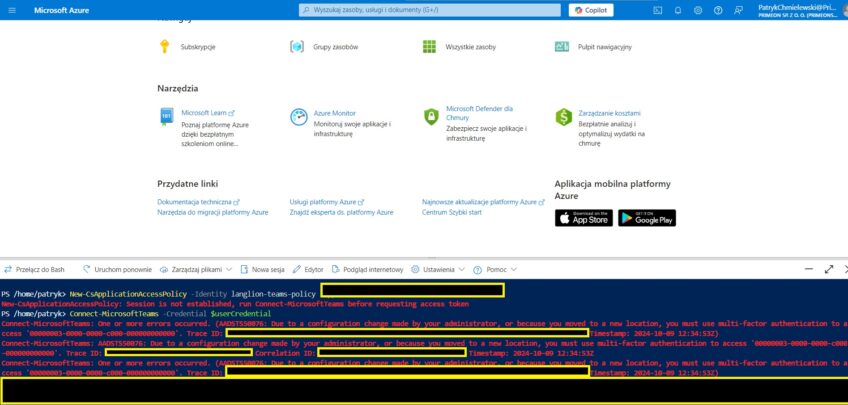
if you encounter an error like in the photo below – (error related to two-factor device authentication):
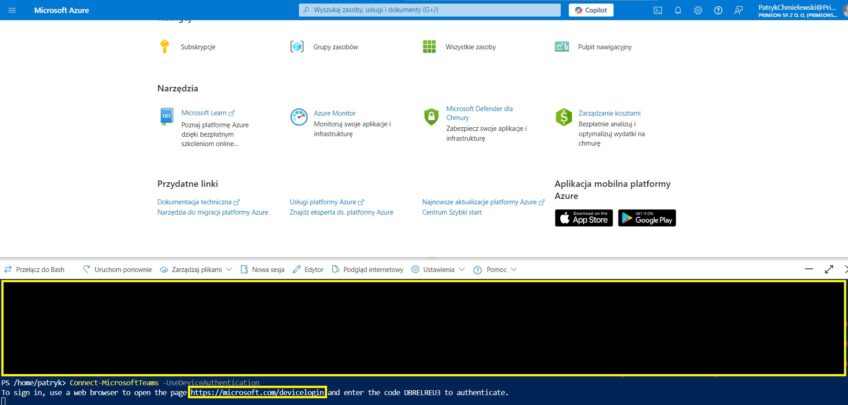
in case of this error, enter the next command from point
b: Connect-MicrosoftTeams -UseDeviceAuthentication
and second
Grant-CsApplicationAccessPolicy -PolicyName langlion-teams-policy -Global
and then click on the link that appears after entering the command (marked in the photo below) and complete the two-step authentication process:
Step 3. Add and assign an access policy
Entering the last command:
New-CsApplicationAccessPolicy -Identity langlion-teams-policy -AppIds „11111111-2222-3333-4444-555555555555” – here, instead of numbers, enter your ClientID.
It’s ready!

