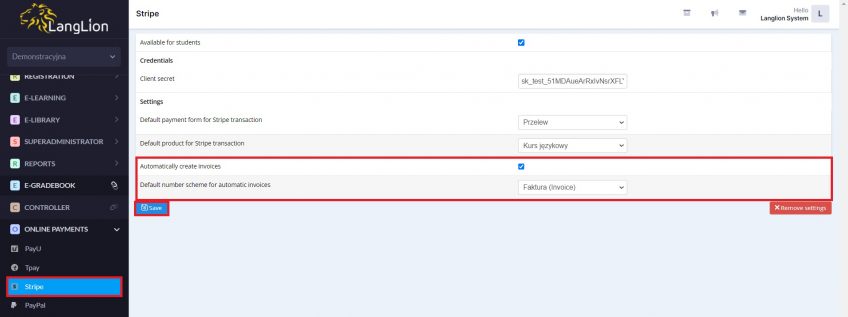
Stripe
If you use Stipe to receive online payments from your clients you can integrate it with LangLion Platform.
How to set up online payments in LangLion?
For integration, you need data that you can get by signing up for your Stripe account:
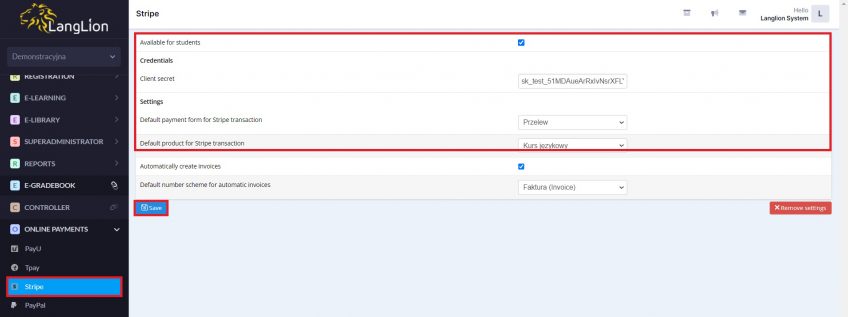
- Client secret
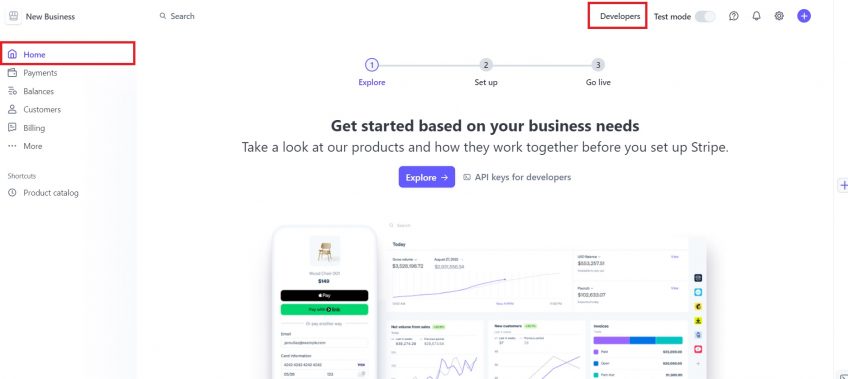
To get them, go to https://dashboard.stripe.com and log in using the access data to your Stripe profile.
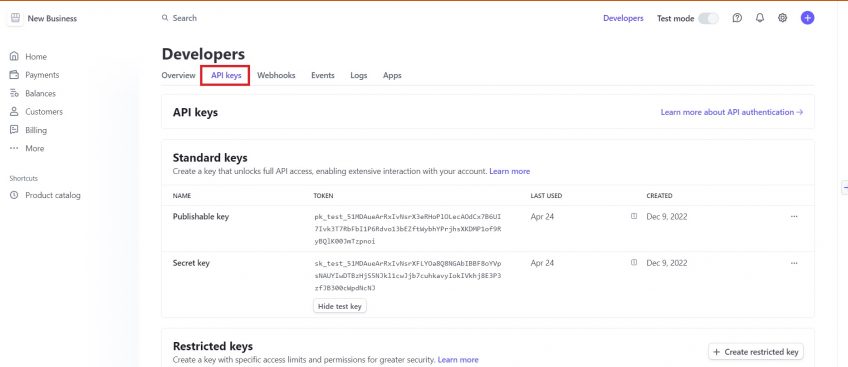
Go to the Developers tab and then API Keys and click on the Create App button.
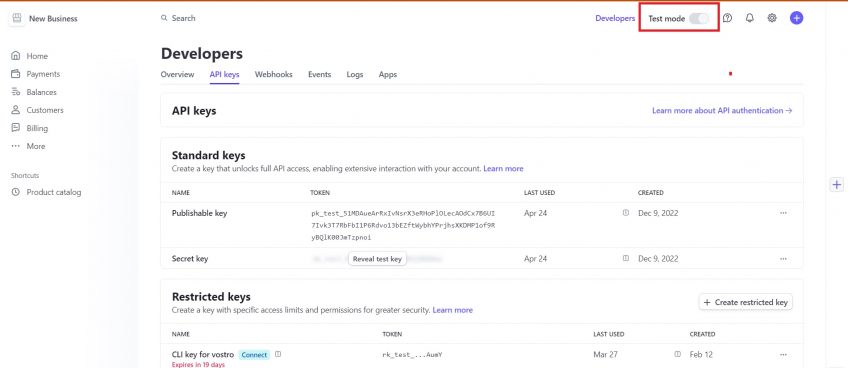
Wait for the page to refresh and deselect on the Test mode in the upper right corner. Here you will find the hidden key (Secret) necessary for integration. To see the key, click Reveal key.
- Default payment form for Stripe transaction – in this field, you can choose from the available payment methods that will be integrated with the Stripe payment option. Saved Stripe transactions will have a selected form of payment. This configuration allows for automatic creation of cash documents.
- Default product for Stripe transaction – choose a product from the list that will be automatically assigned to the transaction with Stripe
- Available for students – enabling this option will launch a button in the student’s account (Payments tab) allowing her or him to pay the instalment using Stripe
To save your settings click Save.
Done, your Stripe account has been integrated with the LangLion Platform. From now on, your students can use online payments in addition to a traditional bank transfer or cash payment.
Automatic creation and sending of invoices
If you issue invoices to your students, now the system can do it for you! Immediately after a student makes an online payment, they will also be invoiced.
All you have to do is check the Automatically create invoices option and choose a default number scheme for automatic invoices.
After making changes, click Save.
Additionally, the system can send the invoices to the student’s email address automatically. You need only go to the Finance module and Settings -> Additional options tab and check the Automatic sending of invoices/cash documents to the user’s email address option.
Click the Save button to save the changes.

