CRM – Customer Relationship Management
This module is used for managing communication with current, archived and potential students. Allows to create notes, plan and register your calls and meetings with customers.
The module is divided into two tabs:
- Tasks – here you will find a list of tasks and create new ones
- People – here you will find a list of people, add a new person, add a task and a note to them. Active, new and archived students, as well as company managers, will automatically appear in the list. You will easily distinguish between them in the list – each person has a user type, such as the Student, Company, Archived (these will be displayed on a grey background).
The data in the Peopletab is displayed similarly to other places in the system. In the main window, there is a list of people. You can customize the list by changing its settings – the number of columns displayed, their order and layout. There are also filters that allow you to search for a certain person in a simple way. It is also possible to send messages to selected or all people, as well as export the list to an xls file.
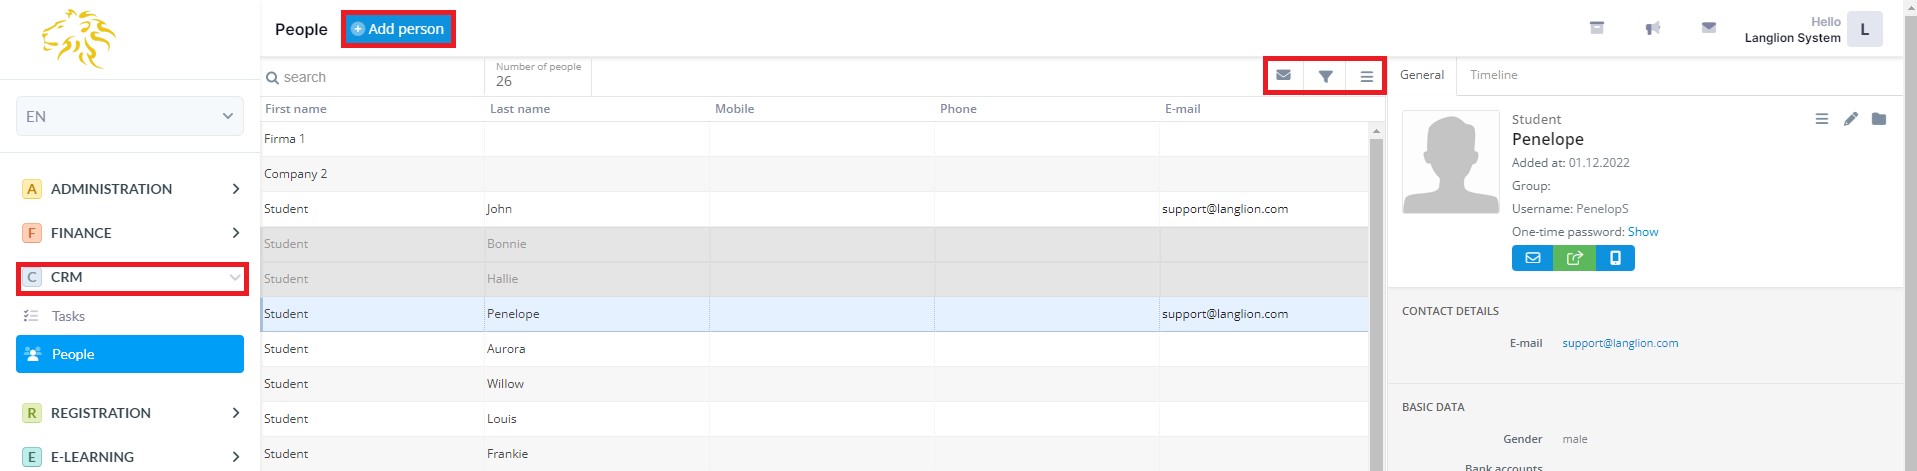
How to add a person to the CRM list?
To add a new person, just go to CRM, select the People tab, then click Add person. Fill in the form fields and press Enter or click Save and close to complete.
Users added in this way are assigned a CRM user type.
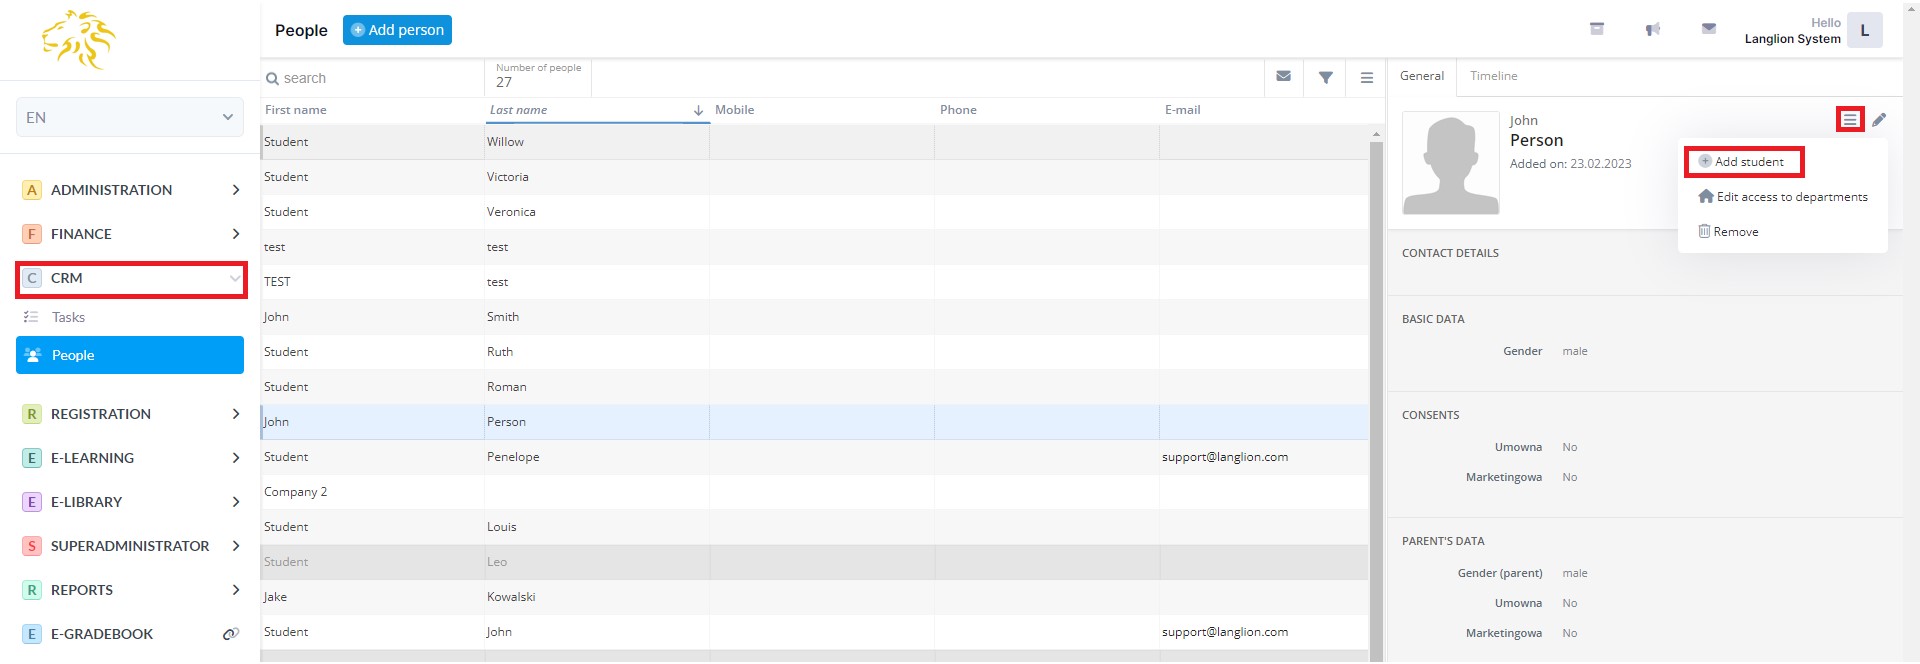
How can I add a person from the CRM list to the list of active students?
It is very easy. Select a user from the list and then, in the General tab on the right, click More and then Add student. Confirm the system message that appears at the top of the screen. Once the data has been saved, the system will automatically move you to the Students tab in the Secretariat module, so you can finish editing the student. From now on, the user will be shown both as a student in the Administration and as a CRM contact.
What is the timeline?
This is where the history of the user – notes, tasks, meetings and contacts – is located. From here you can also add these individual elements.
Tasks on the timeline are sorted from the newest (top) to the oldest. In addition, overdue tasks, until they are completed, are shown in the first place.
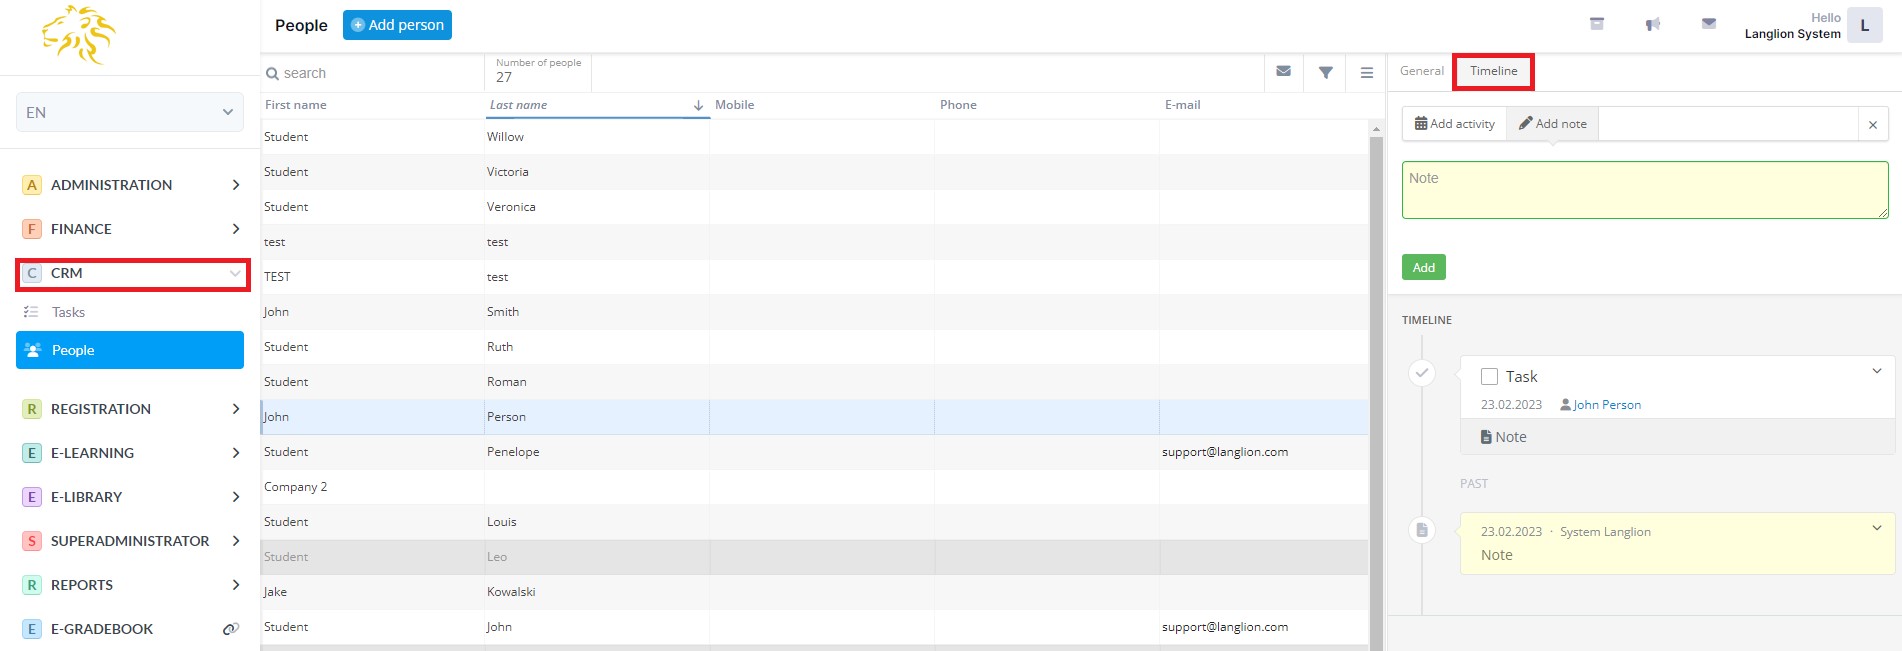
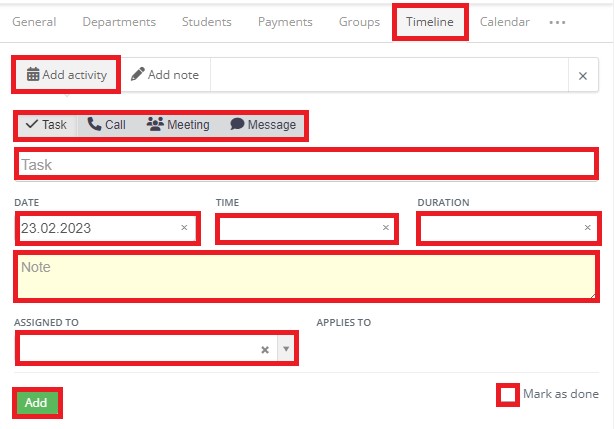
If you want to add a task relating to that particular user, click the Add activity field and select Task. You can also schedule meetings, phone calls or messages.
Complete additional information – a topic of the task or contact, date and duration, and a note if needed. The task will be assigned to you by default, but you can choose which one of the Secretariat user should be responsible for completing it. You can also specify that the task has already been done.
When finished, click Add.
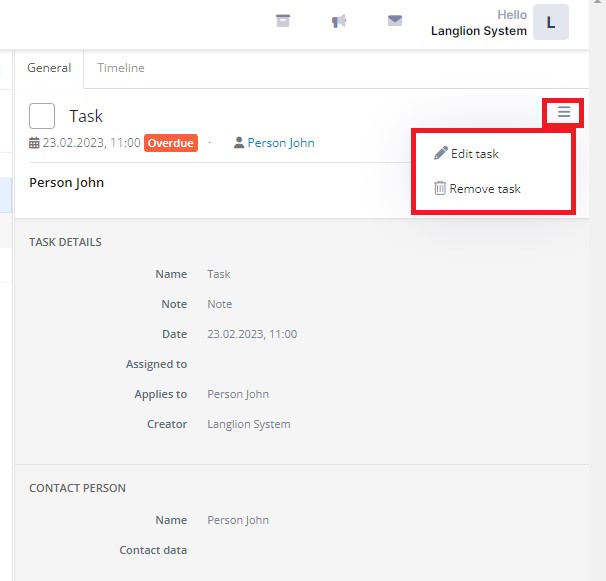
The task will be displayed on the timeline. Already added the task, can be edited or removed.

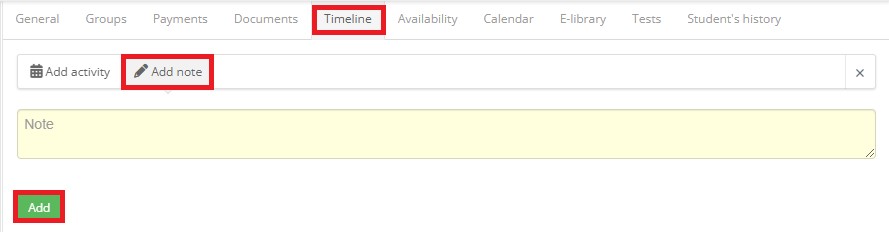
You can also add a simple note to a user. It will appear on the timeline. There will also be the ability to edit or delete it.
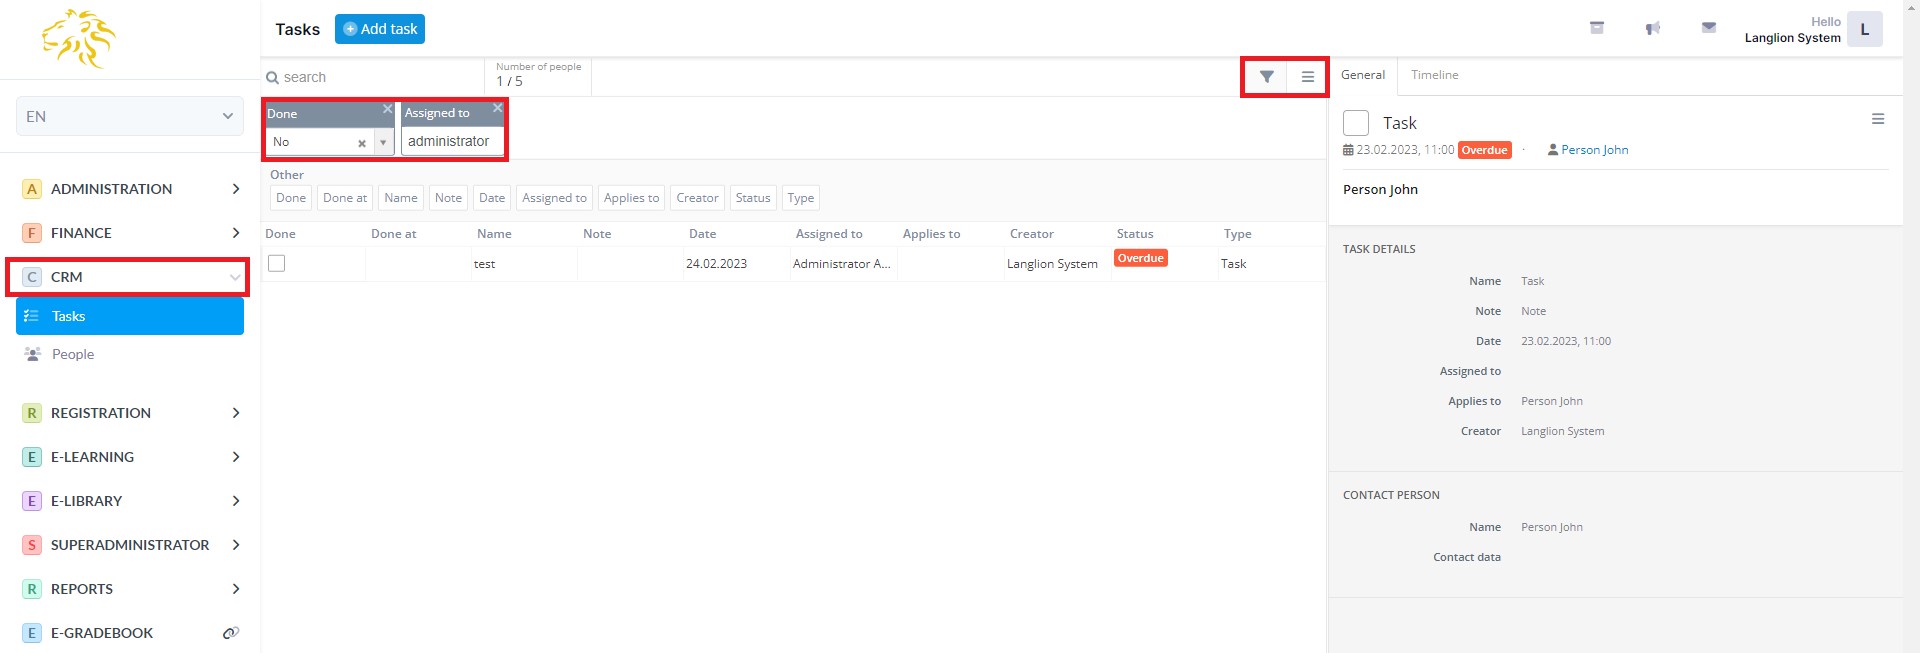
Adding and controlling tasks
The Tasks tab displays a list of all tasks created. By default, filters are applied to them, so tasks that are not completed and assigned to you are displayed on the task list. To display the full list, remove the default filters.
You can modify and filter the list according to your needs and export it to an xls file.
How to add a new task?
Just click on Add task and a new window will pop up. Fill in the fields. They are exactly the same as when adding an activity from the People tab. Click Save and close or press Enter to save changes.
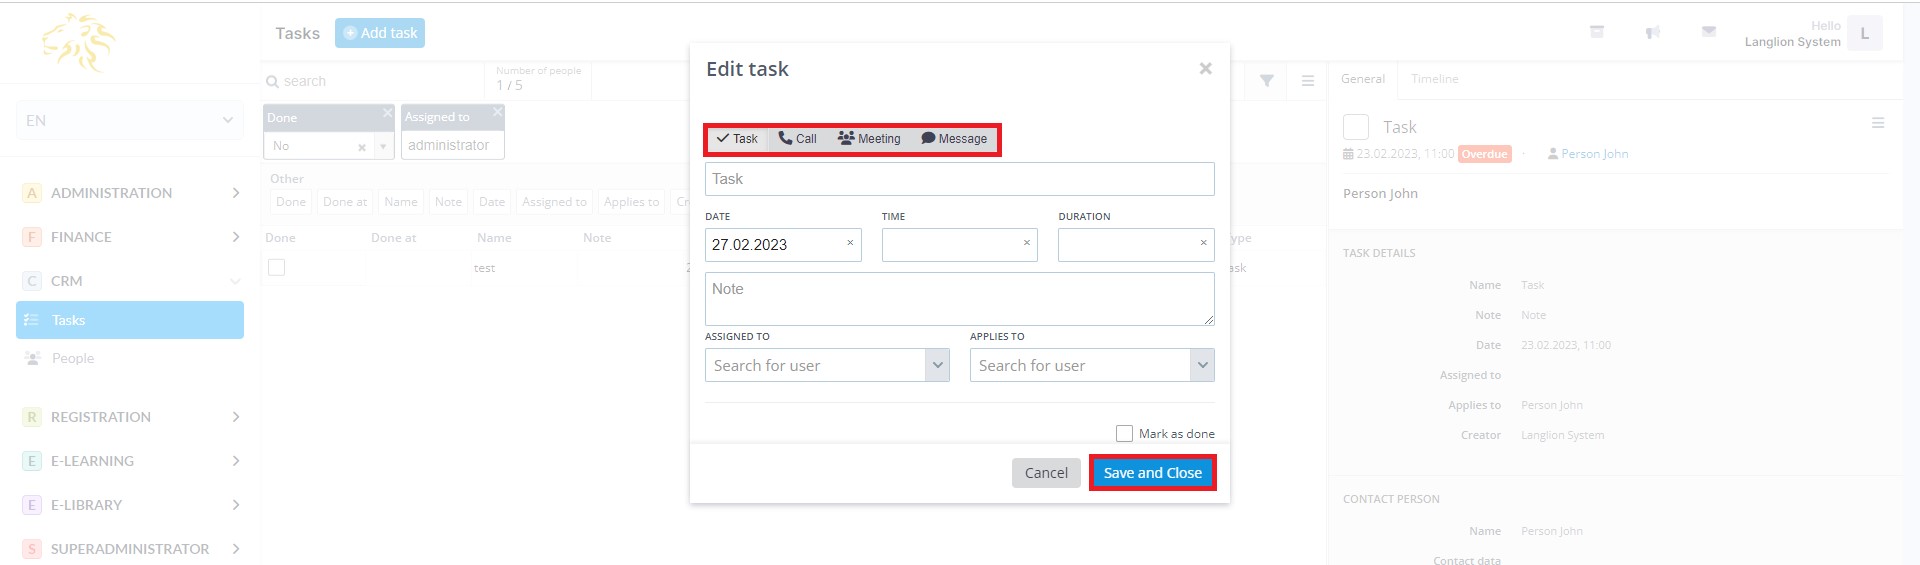
The task can also be edited or deleted.
To mark a task as completed, click in the checkbox next to its name. Or you can use a checkbox in the column Done on the list of tasks.
If you accidentally marked a task as completed, just click the checkbox again.

Any added tasks that are associated with students or other people added to CRM will also be displayed on their timeline.
If you want to edit the archived student's data from the CRM People tab, he will be restored to the list of active students during the editing period (of course only if you confirm that you want to restore student). Adding a note or task to an archived student in CRM is possible without the need to restore him.