Student’s settlement per hour
Hourly billing of the student is based on the price calculation base, base price, and the number of classes for a given period, e.g. monthly settlement.
What is the price calculation base?
The price calculation base is the unit by which the system will calculate the amount to be paid by the student. It can be the:
- Unit – the Default lesson length in the group
- Lesson – the generated classes.
Note that the Unit is not usually equal to the Lesson. In addition, by choosing the Unit as a price calculation base, you decide that the system is to proportionally convert the cost of classes depending on the class’s length. If you choose Lesson as a base, the fee will be fixed regardless of the class length.
Where can I set the price calculation base?
You can set it when creating a group, then all the students assigned to it will automatically have this type of settlement. You can also set them for each student separately. You can find more information in our instructions:
How to settle the student?
You can do it in three ways:
1. Settle all students simultaneously from all or selected hourly-billed groups
2. Settle the whole group at once
3. Settle the student individually
Settle all students simultaneously from all or selected hourly-billed groups
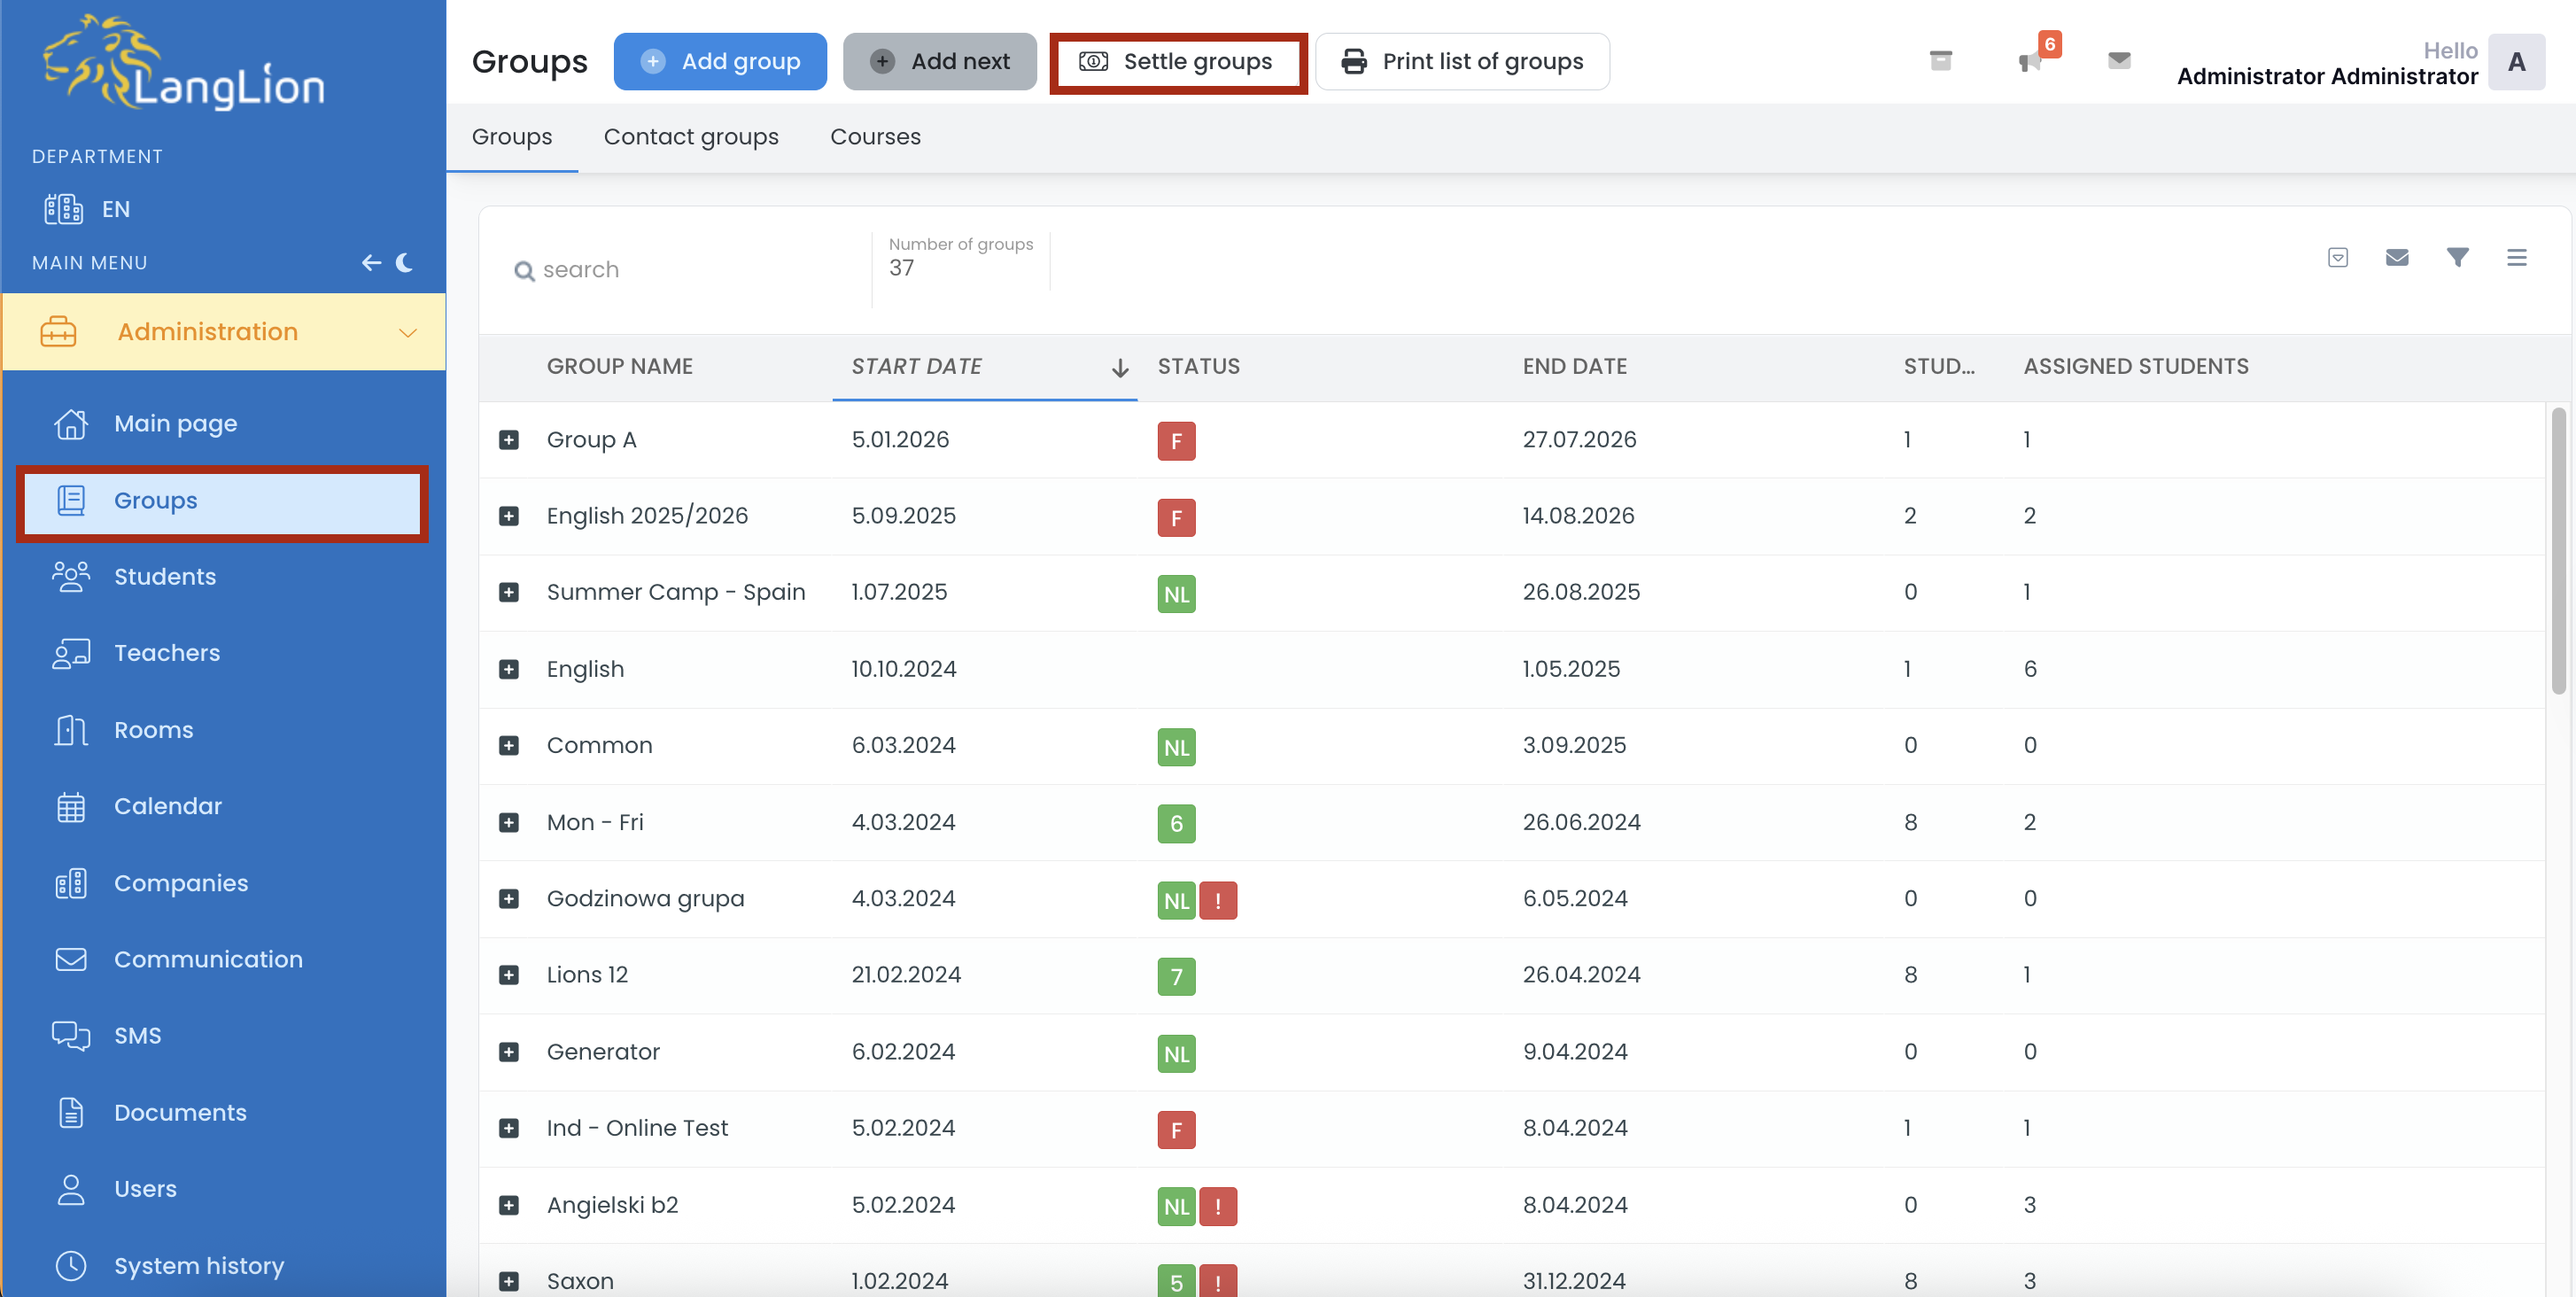
1. In the Administration module, go to the Groups tab.
2. Click Settle groups.
3. Select the time period for which you want to settle the students and enter the payment due date by which they should complete the payment.
By default, all hourly-billed groups are selected. If there is a group you do not want to include, simply deselect it.
After making your changes, click the Settle groups button.

A message will appear at the top of the page indicating that the settlements are being created. Once it disappears, it means all settlements have been generated.
The settlement will be visible for each student in the Students -> Payments tab.
Settle the whole group at once
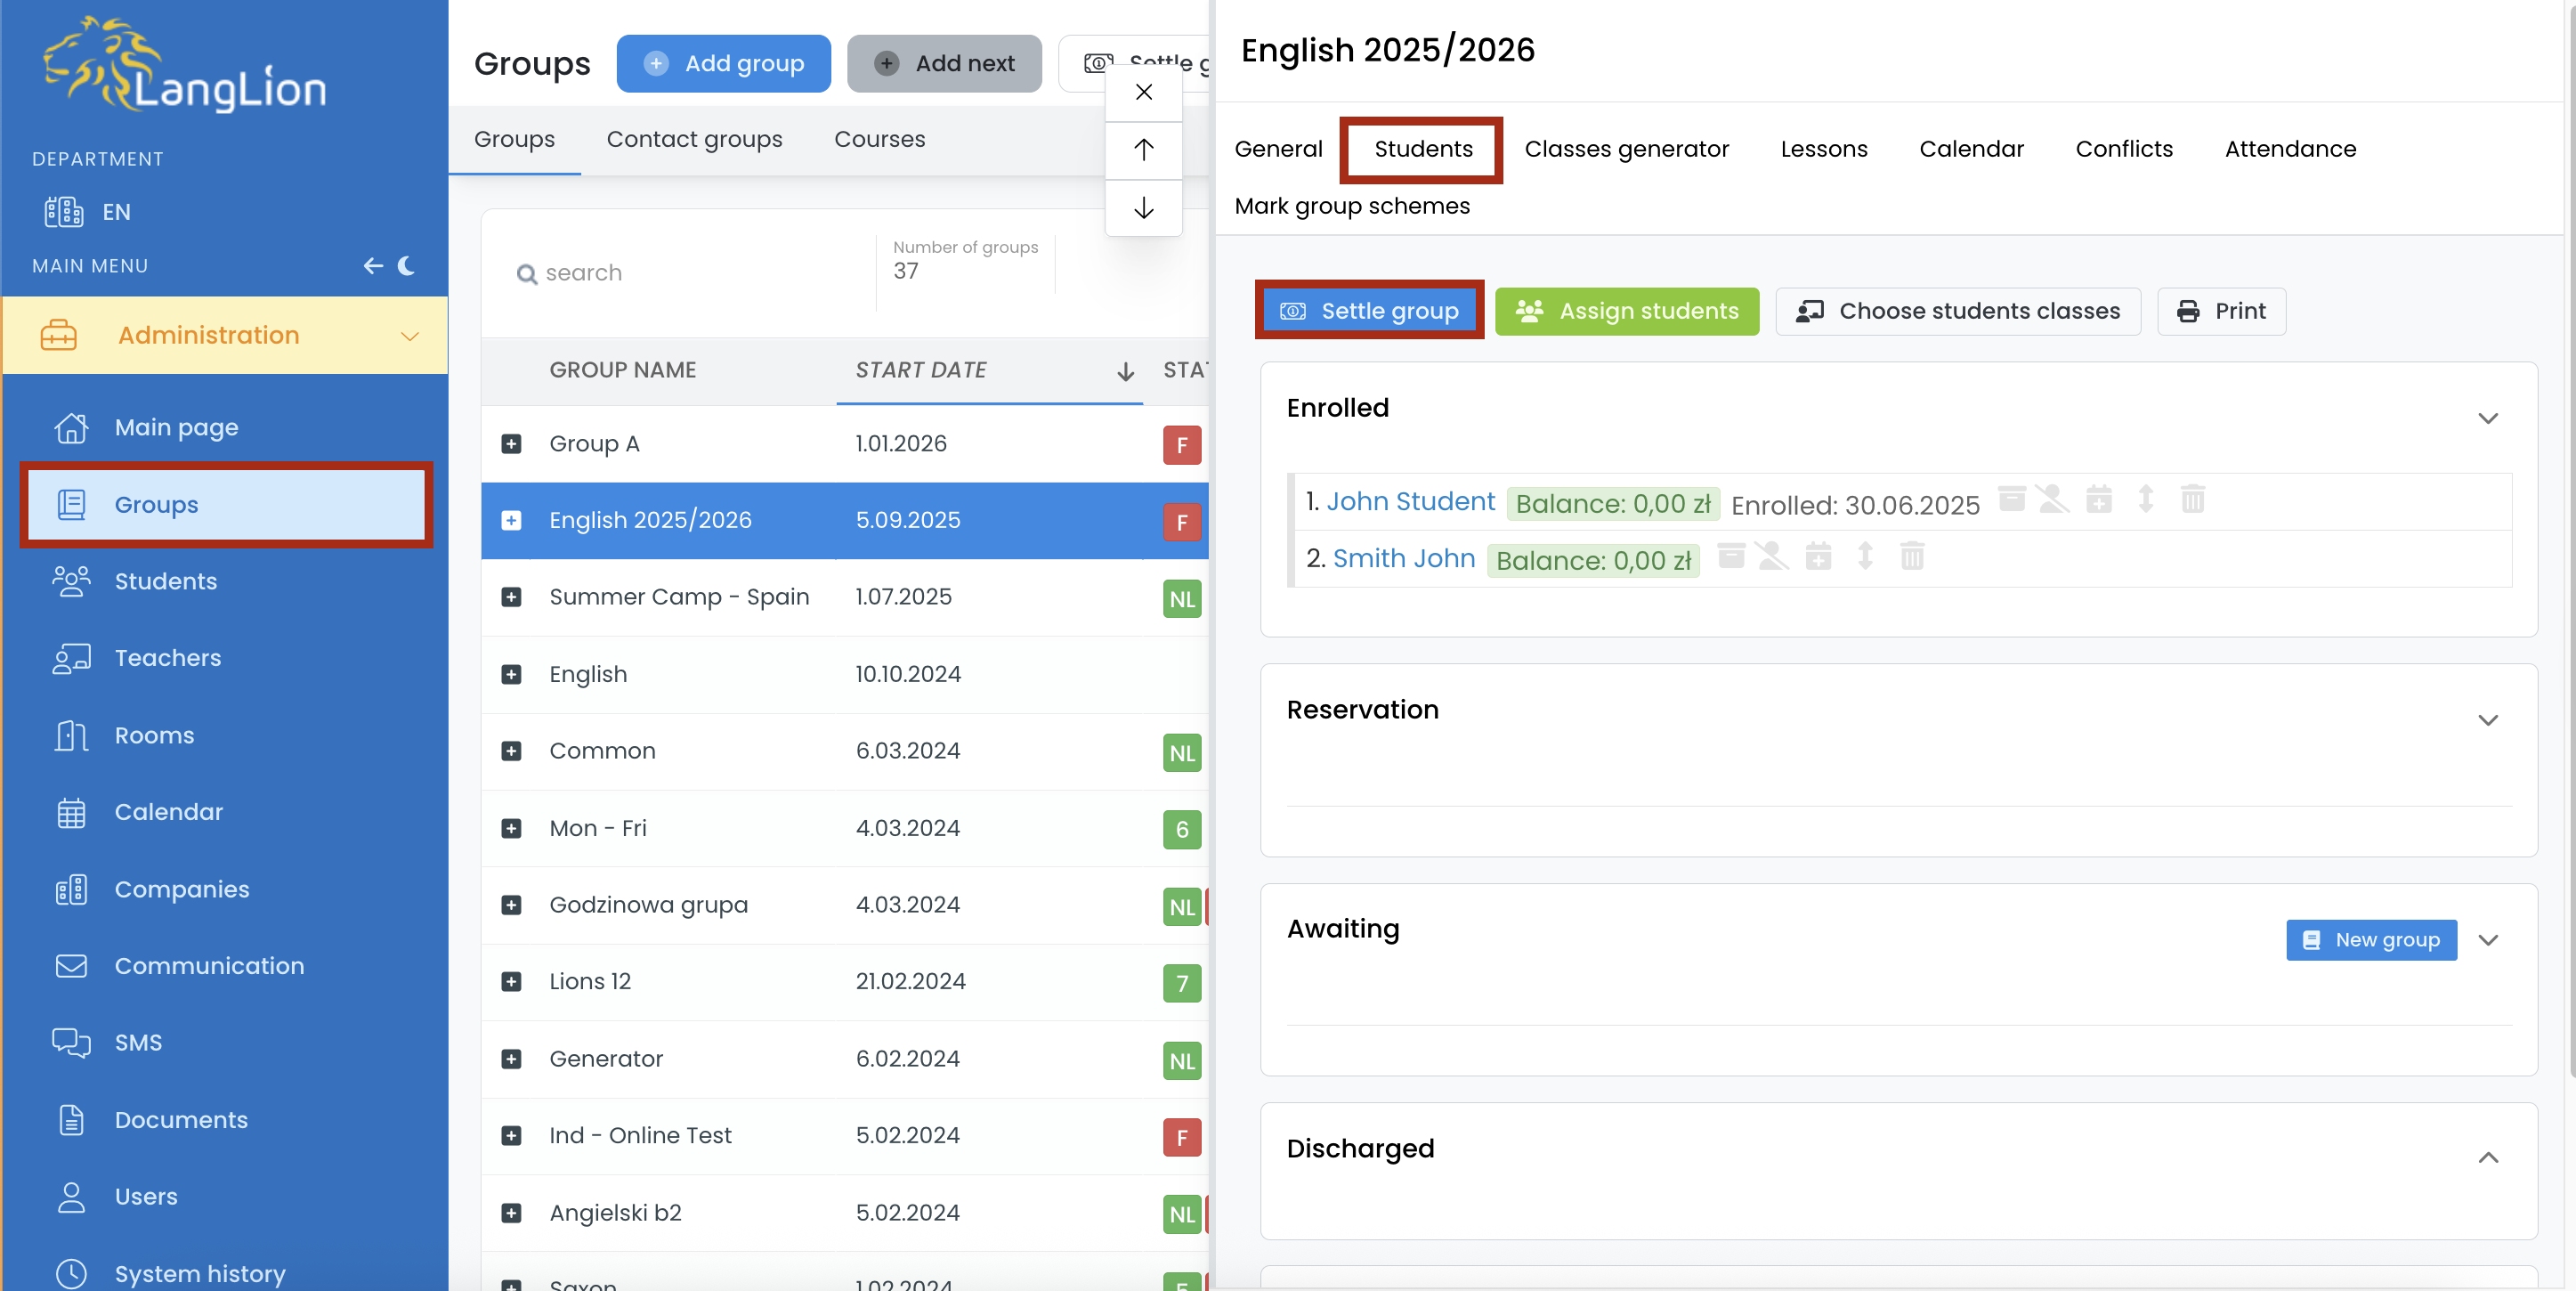
1. Go to the Groups tab in the Administration module.
2. Choose the group, and click on the Students tab.
3. Click on the Settle group button.
4. Choose the time range for which you want to settle students and enter the payment date by which they should make the payment.
All the students settled hourly are ticked by default. If you don’t want to settle a certain student, uncheck it.
After making the changes, click on the Settle group button.

On the top of the page will appears a message informing you that settlements are being created.
When it disappears it means that the settlements have been created.
The settlement will appear for each student in the Students -> Payments tab.
Settle the student individually
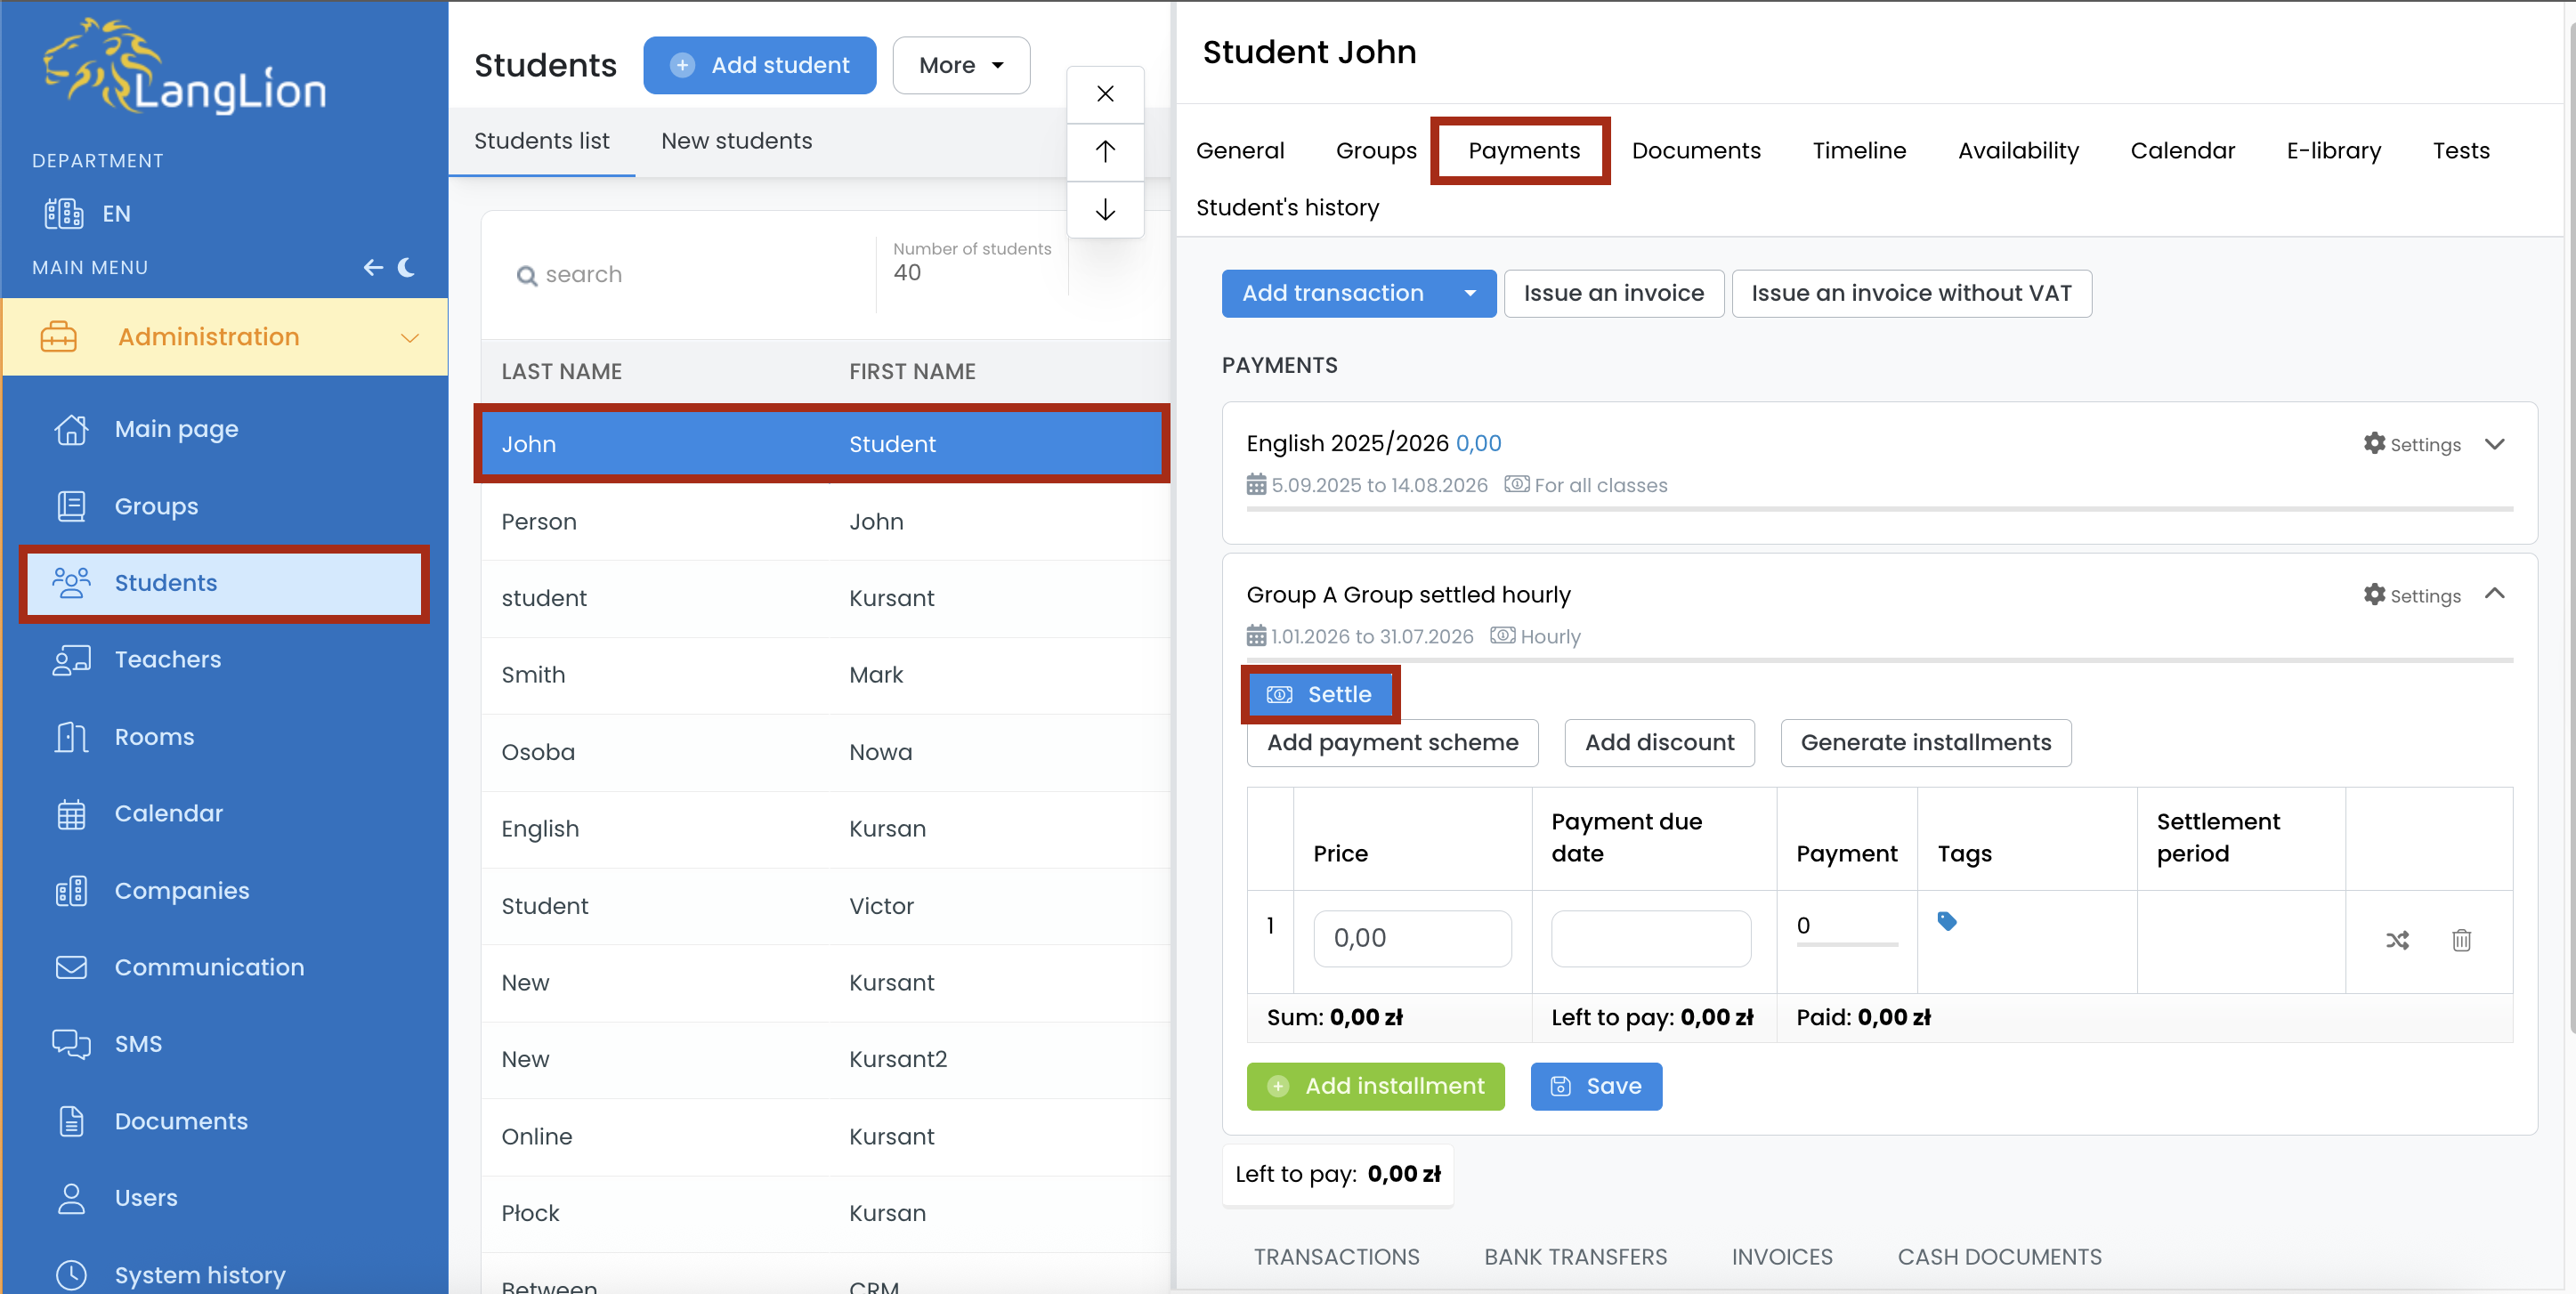
1. Go to the Students tab in the Administration module.
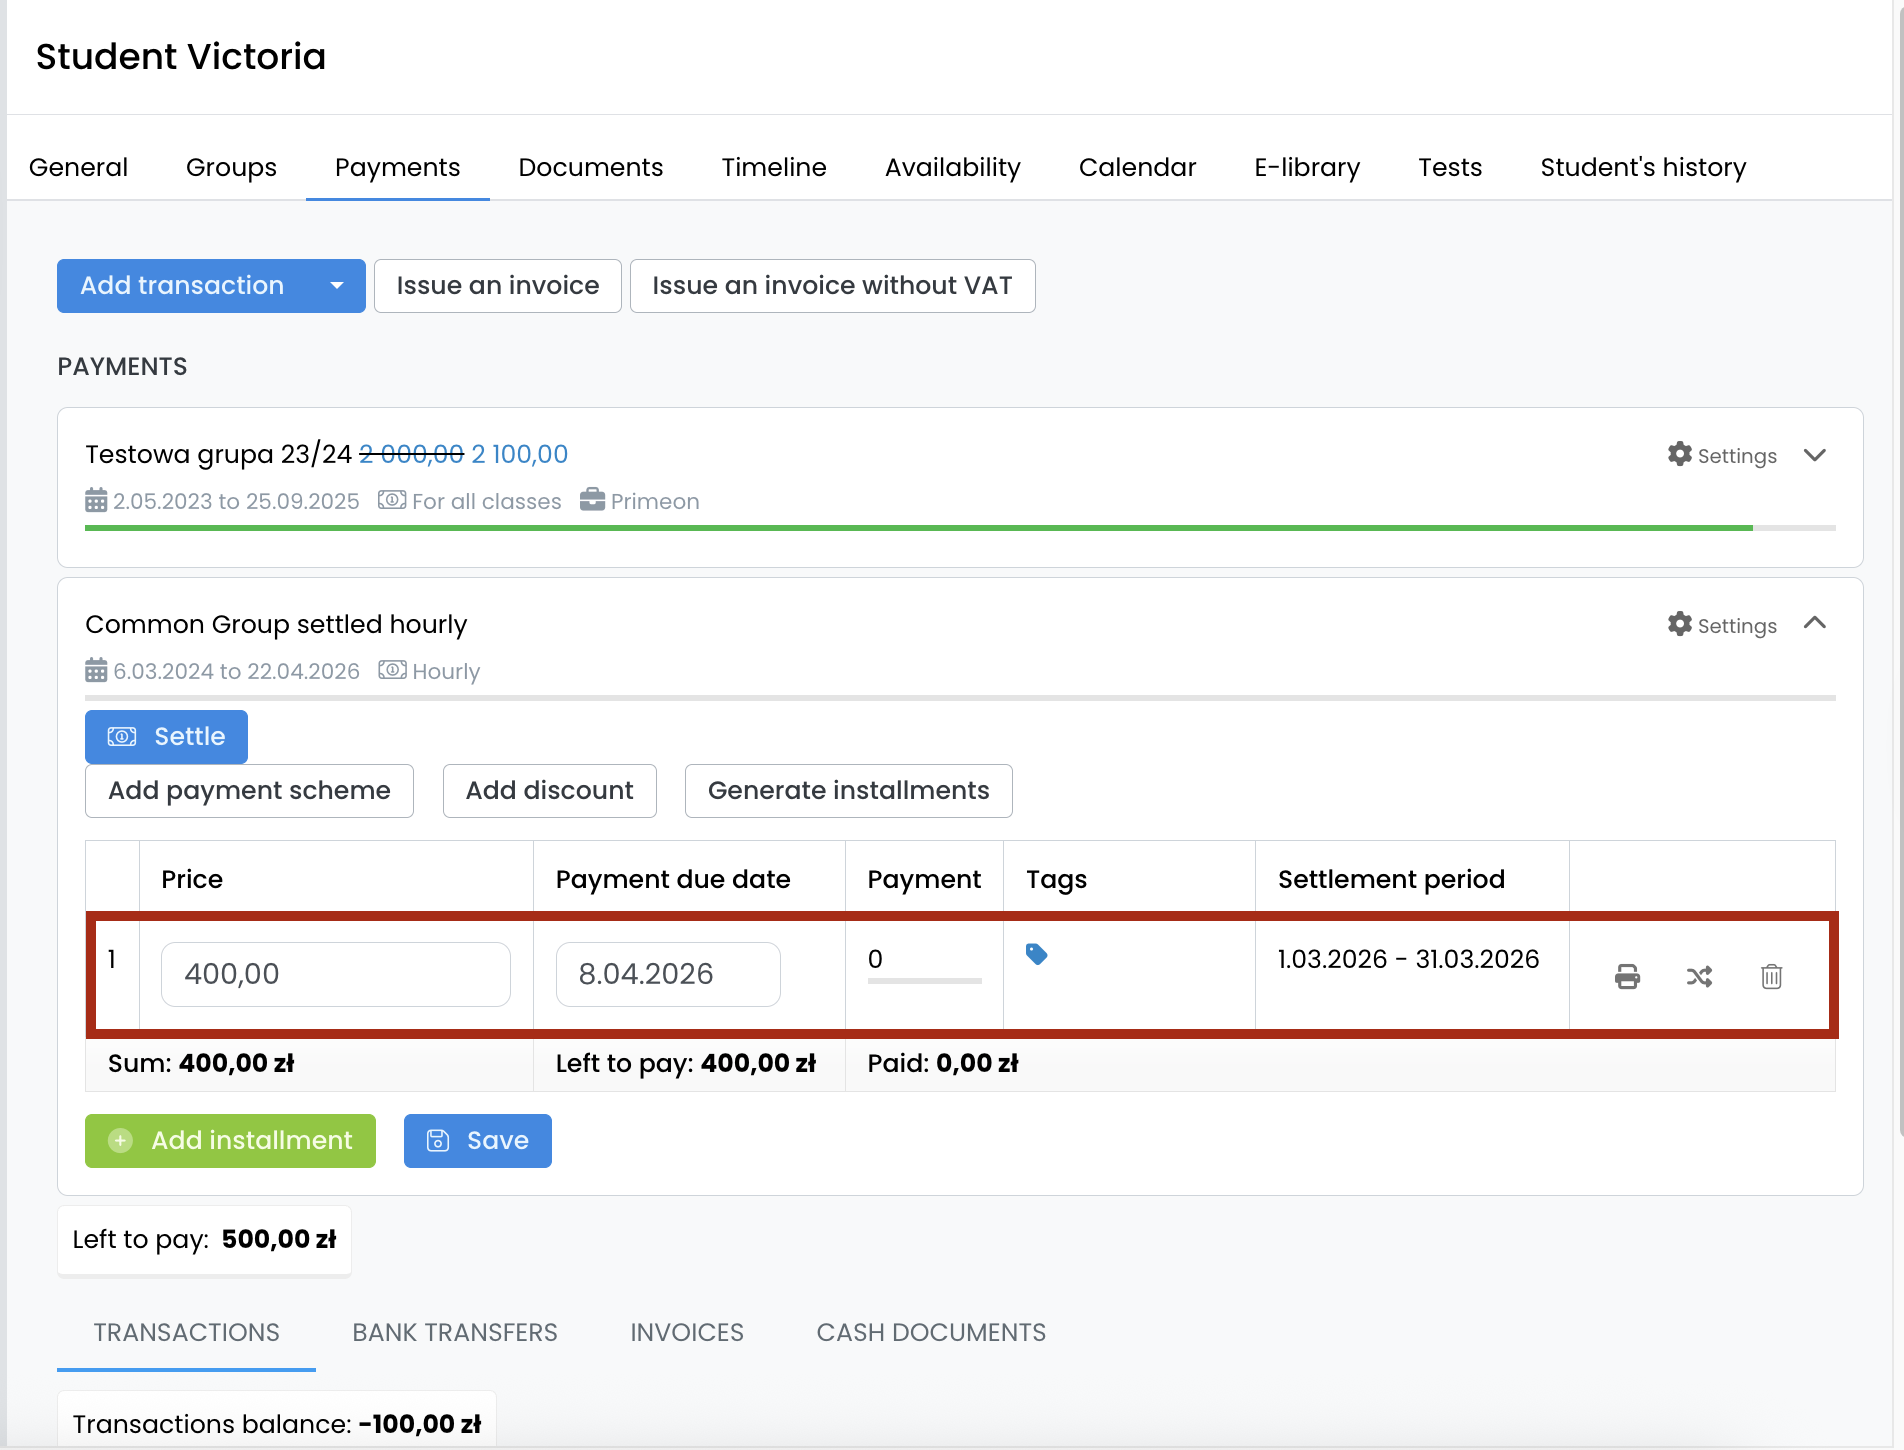
2. Choose the student and click on the Payments tab on the right-hand side.
3. Click on the Settle button.
4. Select the settlement period by setting the time range. Add a payment date so that the student knows when payment is due. If you want to expand the list of lessons from a given settlement, click on the name of the group.
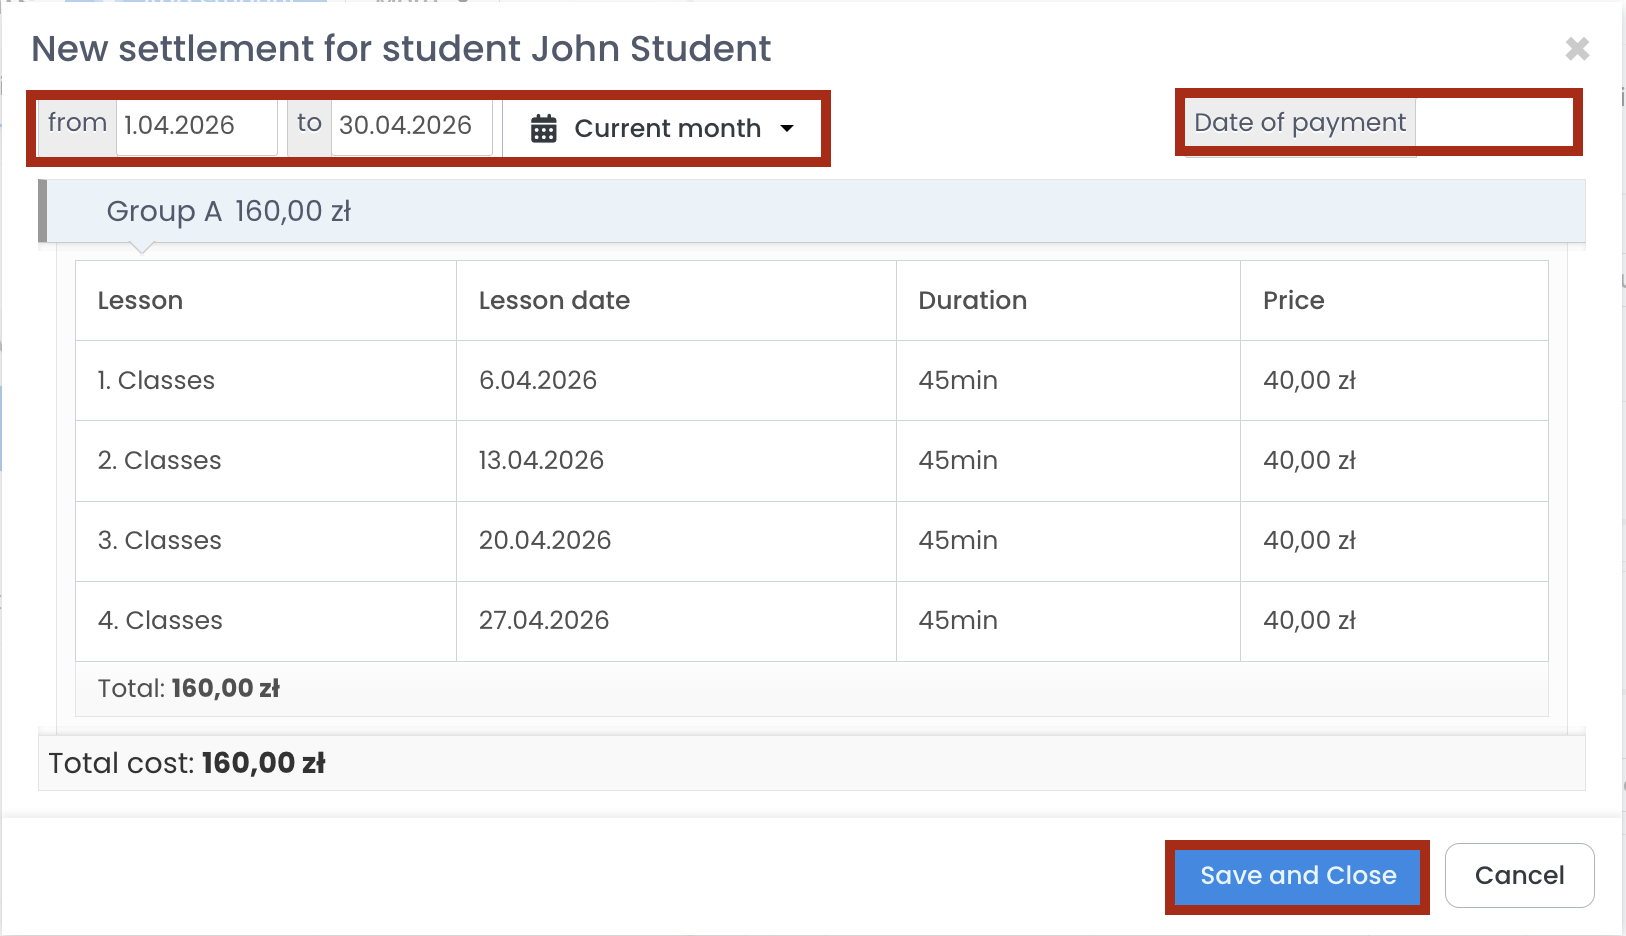
7. Click on the Save and Close button to create a new installment.
How to pay the settlement?
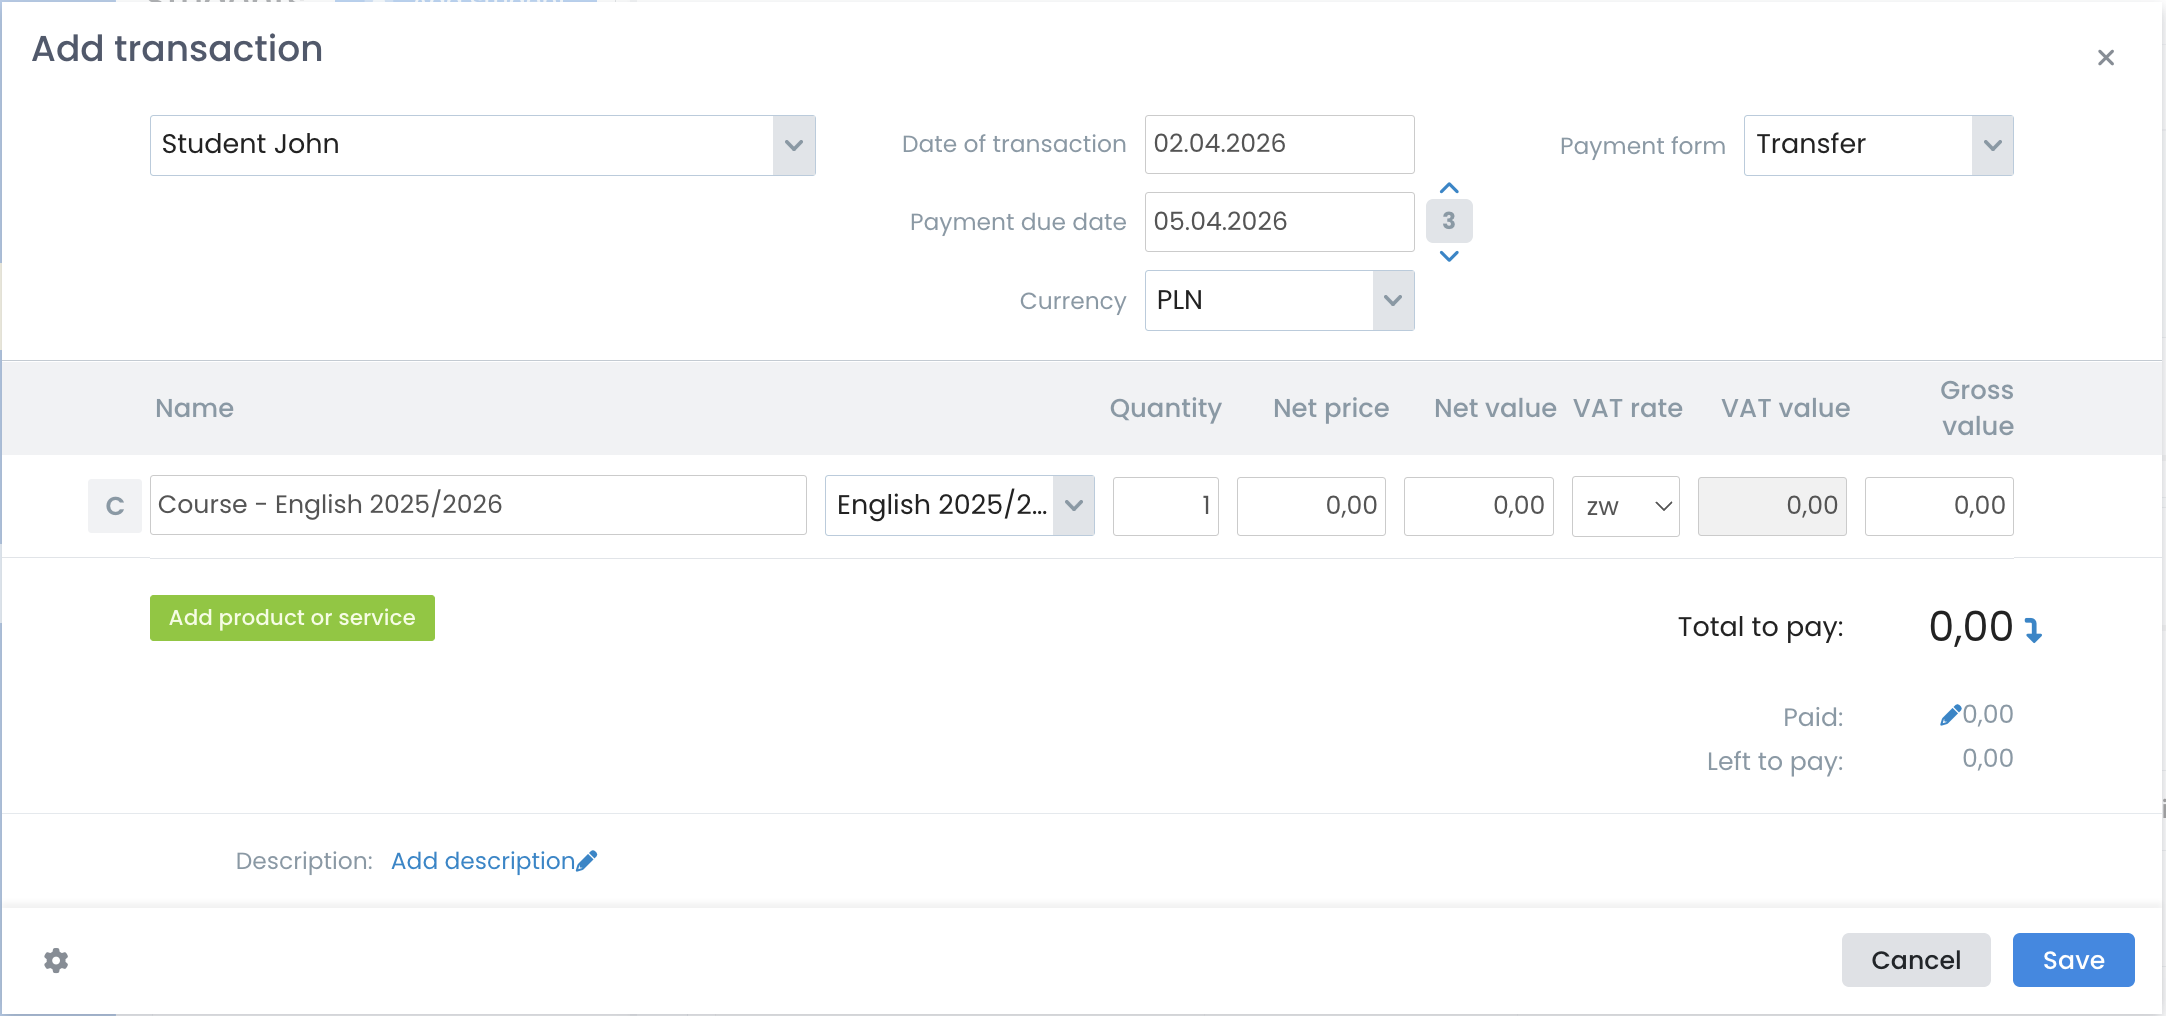
If you just want to add a transaction without the invoice:
1. Click on the Add transaction button.

2. In the new window, select the payment method (ie., cash or transfer), select the product, and you can also add a description of the payment. The payment amount is automatically taken from the installment; however, you can enter a different amount manually.
3. Click on the Save and close button or press Enter.
How to issue an invoice?
You can use our instructions ⇒ HERE
If the previous settlement has already been paid and the new settlement amount is lower, the student will have a credit (overpayment) on their balance. Conversely, if the new settlement amount is higher, a note indicating an outstanding balance will appear.
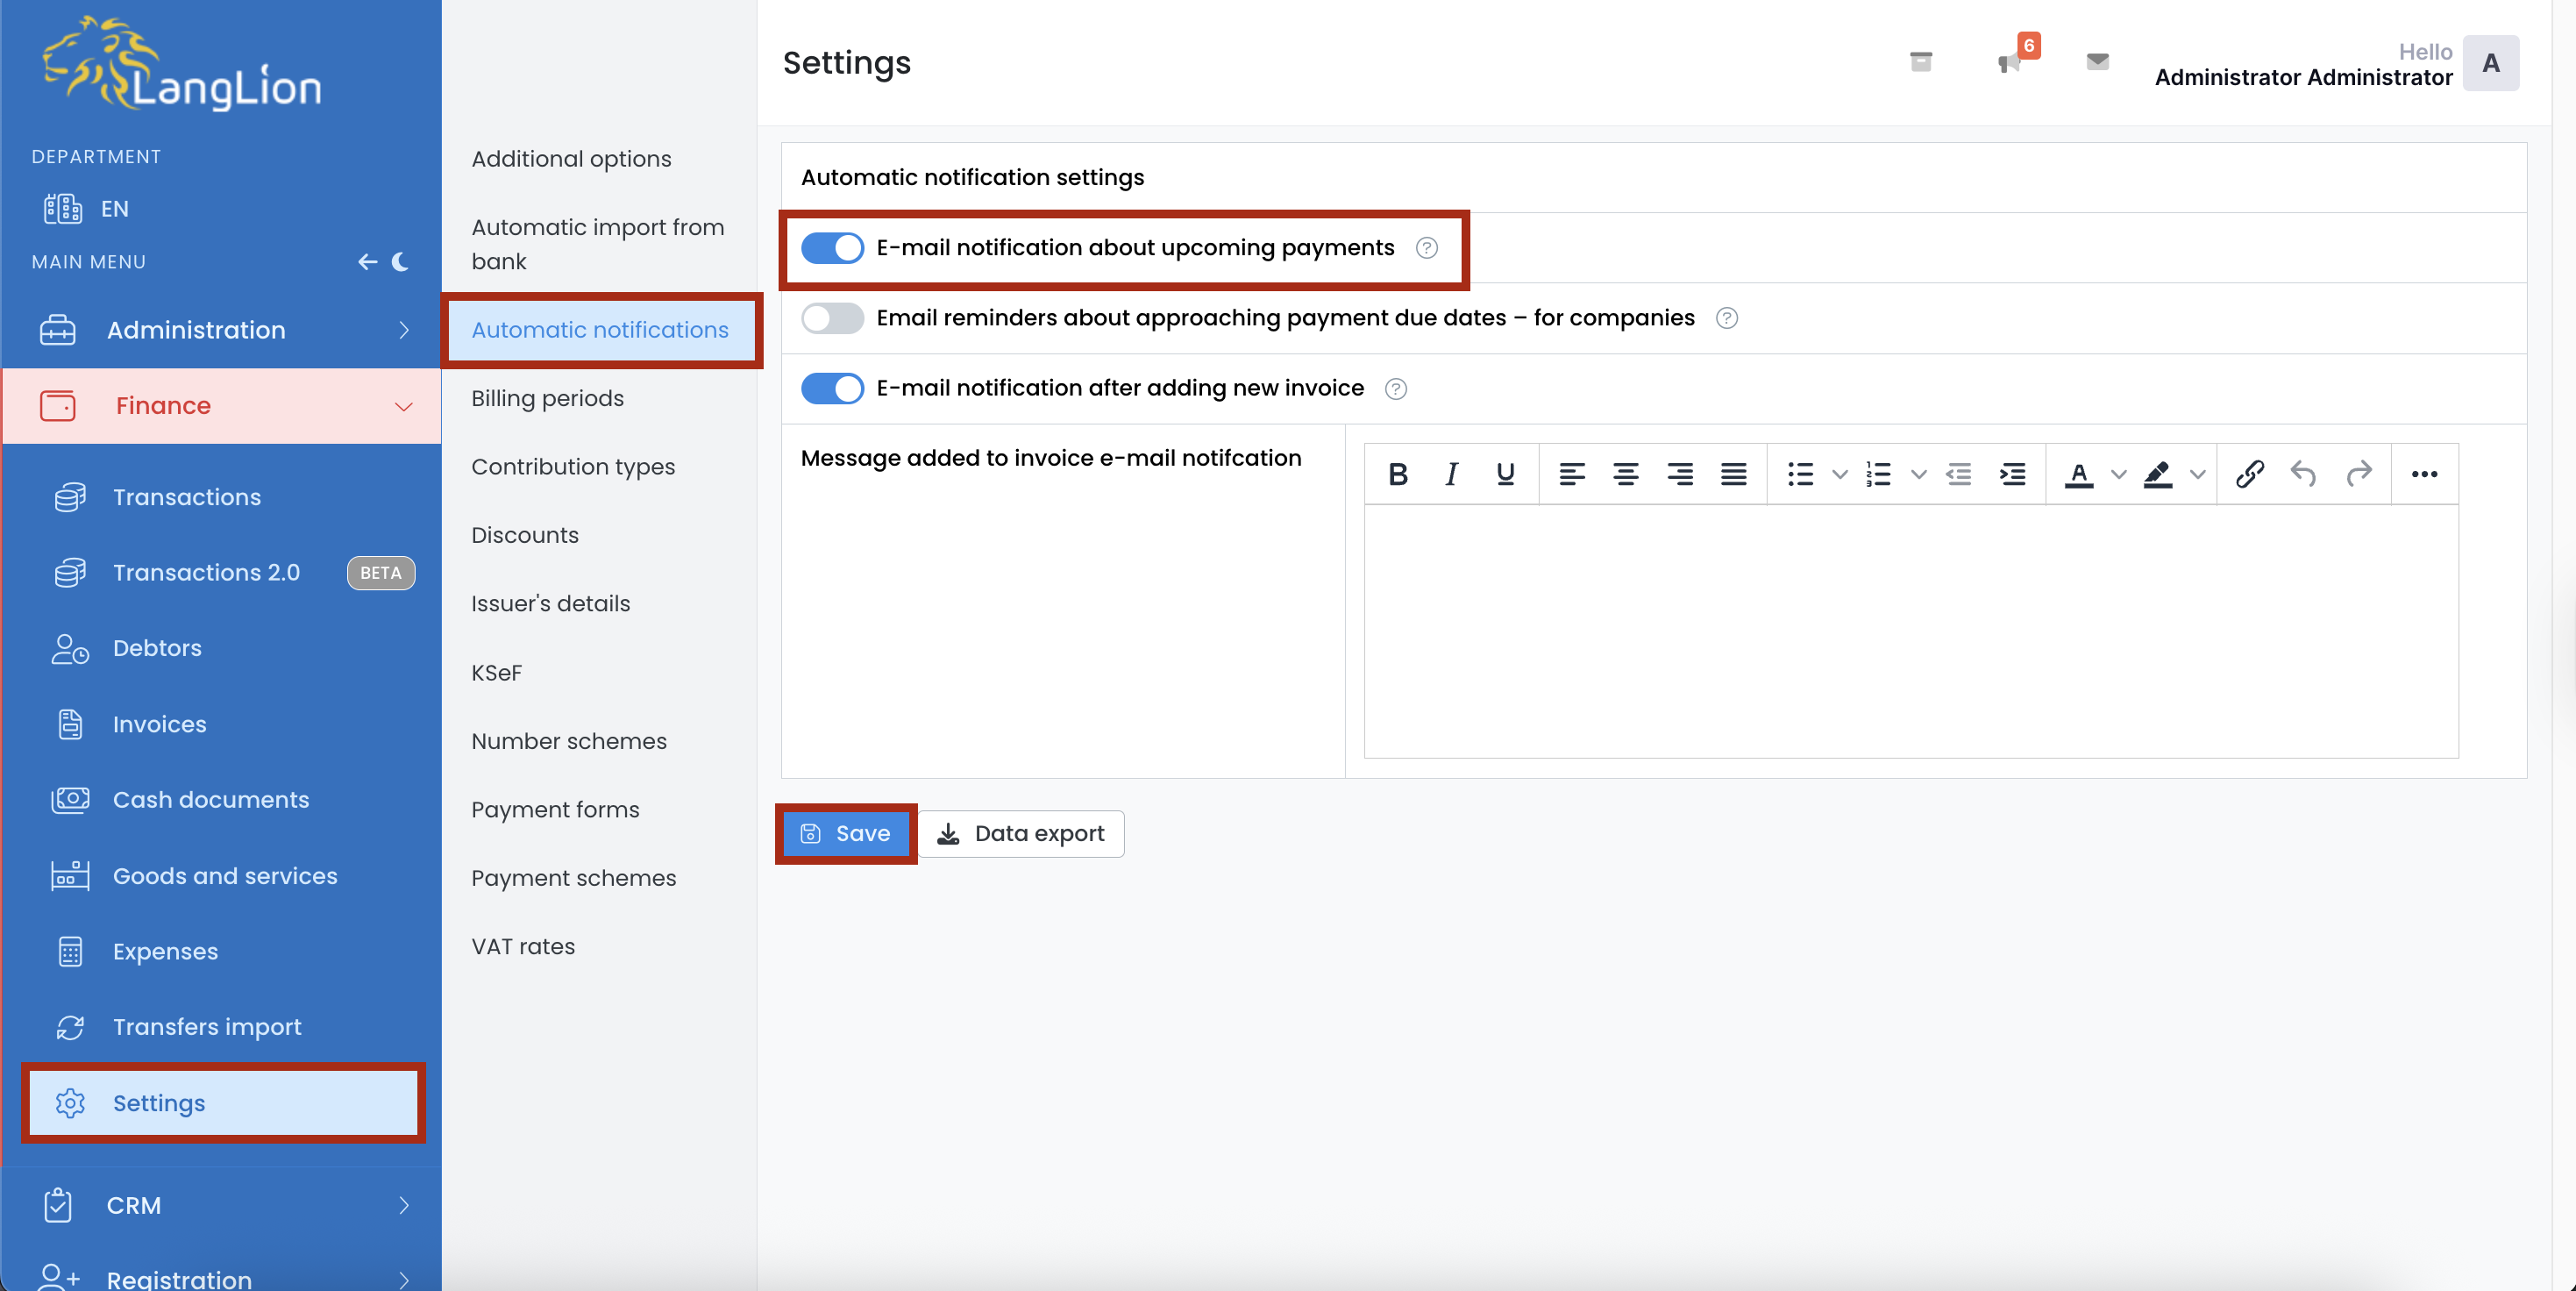
E-mail notification about upcoming payments
If you are using the Finance module, you can enable automatic notifications to inform students about upcoming payment due dates.
The notification is sent 1 day before the installment due date. If the Online Payments module is enabled, the student will be able to pay for the course directly from the email message.
To enable this feature, go to the Settings tab in the Finance module. Then navigate to automatic notifications and select Email notification about upcoming payments. Finally, save the changes by clicking the Save button.