Registration forms generator
The registration form generator allows you to create many forms of various types.
How to create an online registration form?
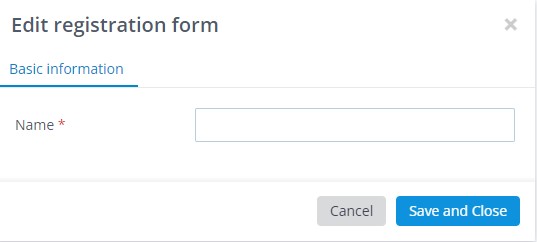
Go to the Registration module and choose the Forms tab and click on the Add your first form button. In the new window, enter the name of the form.

On the right-hand side of the screen, there are 8 additional tabs:
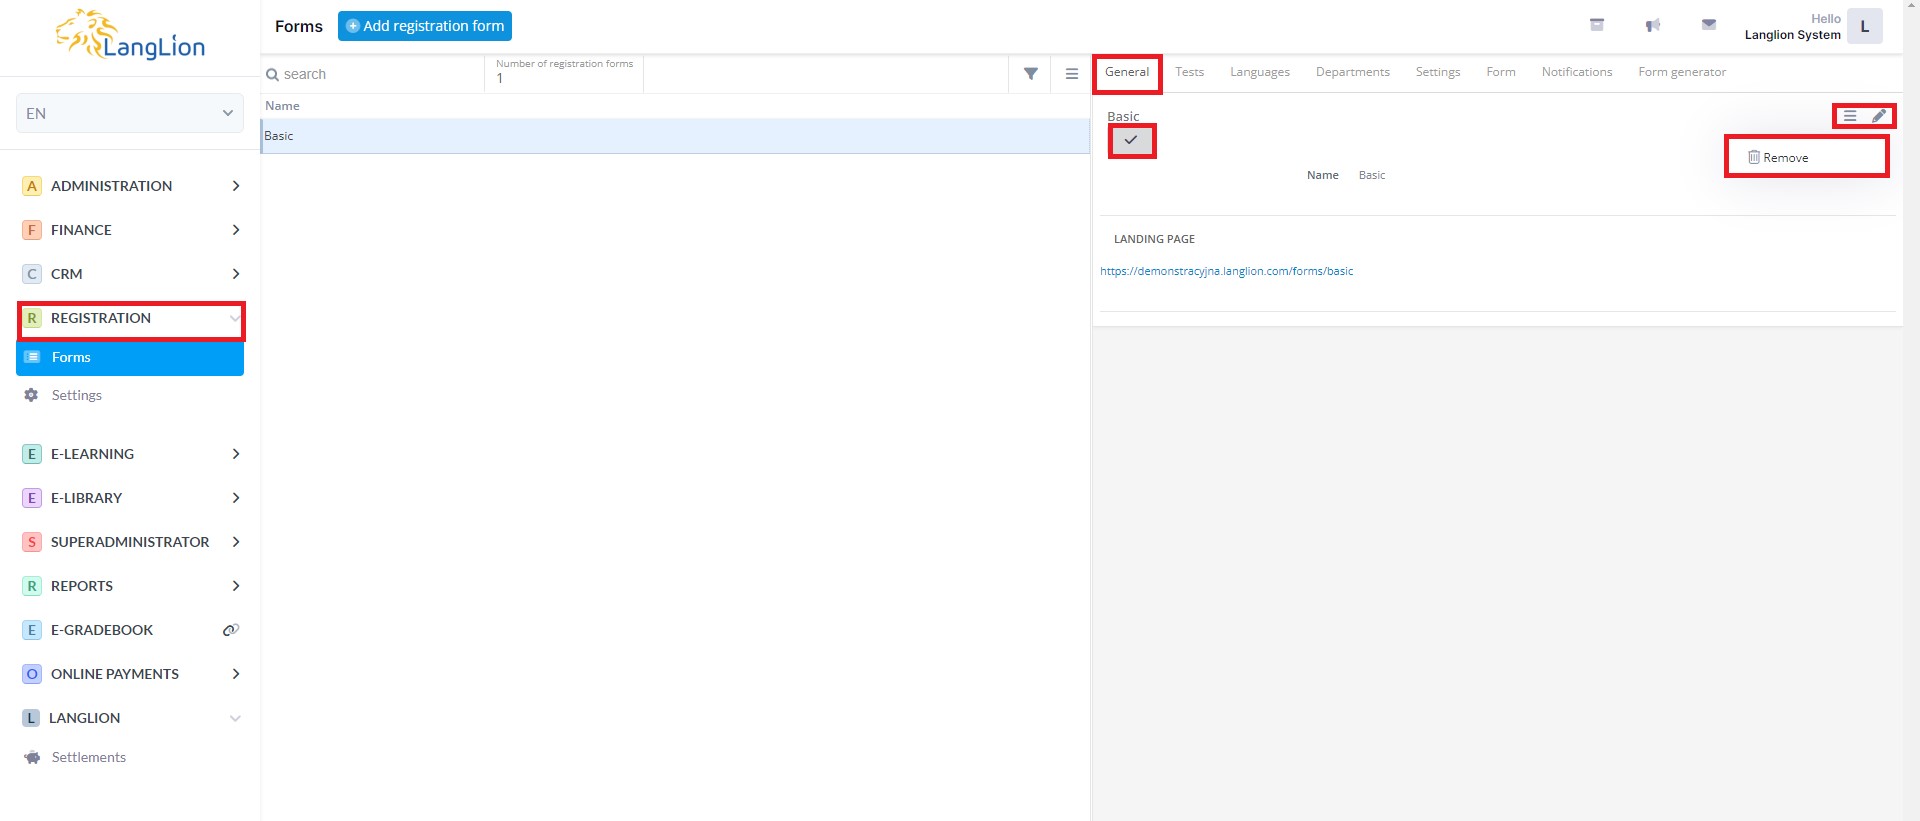
General
In this tab, you have the option to:
- mark the form as default
- edit the name of the form
- remove the form
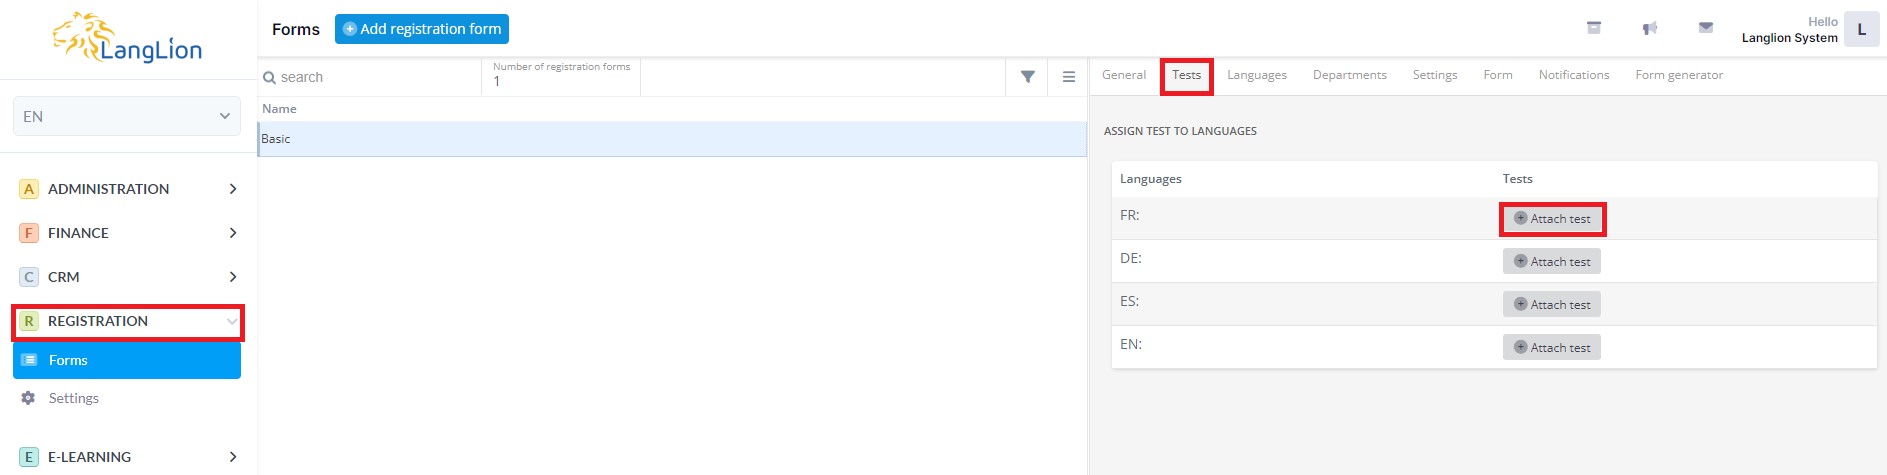
Tests
Here you can add a placement test for the selected language in the registration form. Please note, that this option is available only when you activate the E-learning module.
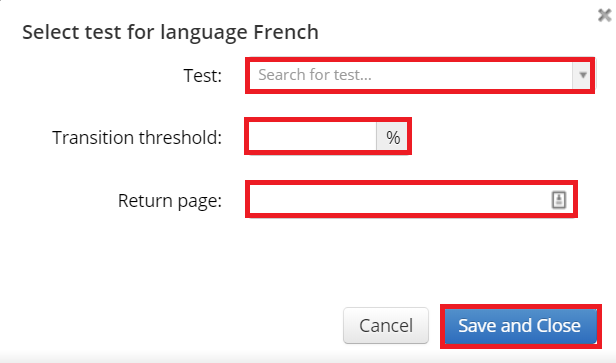
First, click on the Attach test button. Then, in the test adding window:
- choose the right test from the drop-down list,
- enter the transition threshold (percentage). You can add more than one test for the student to complete, each with certain transition threshold. Each subsequent test will be displayed if the transition threshold is reached,
- enter the return page to be displayed after the student completes the test. This may be the address of your school’s website.
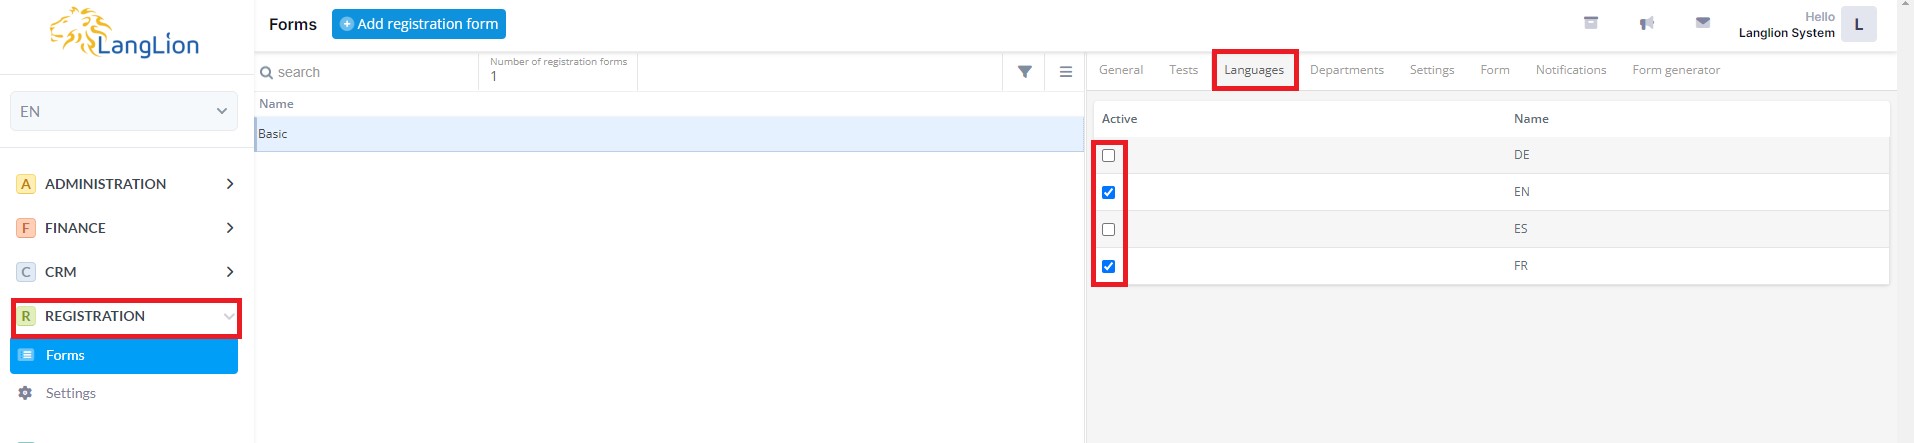
Languages
In this tab, you can choose which of the languages taught at the school will be visible in the registration form.
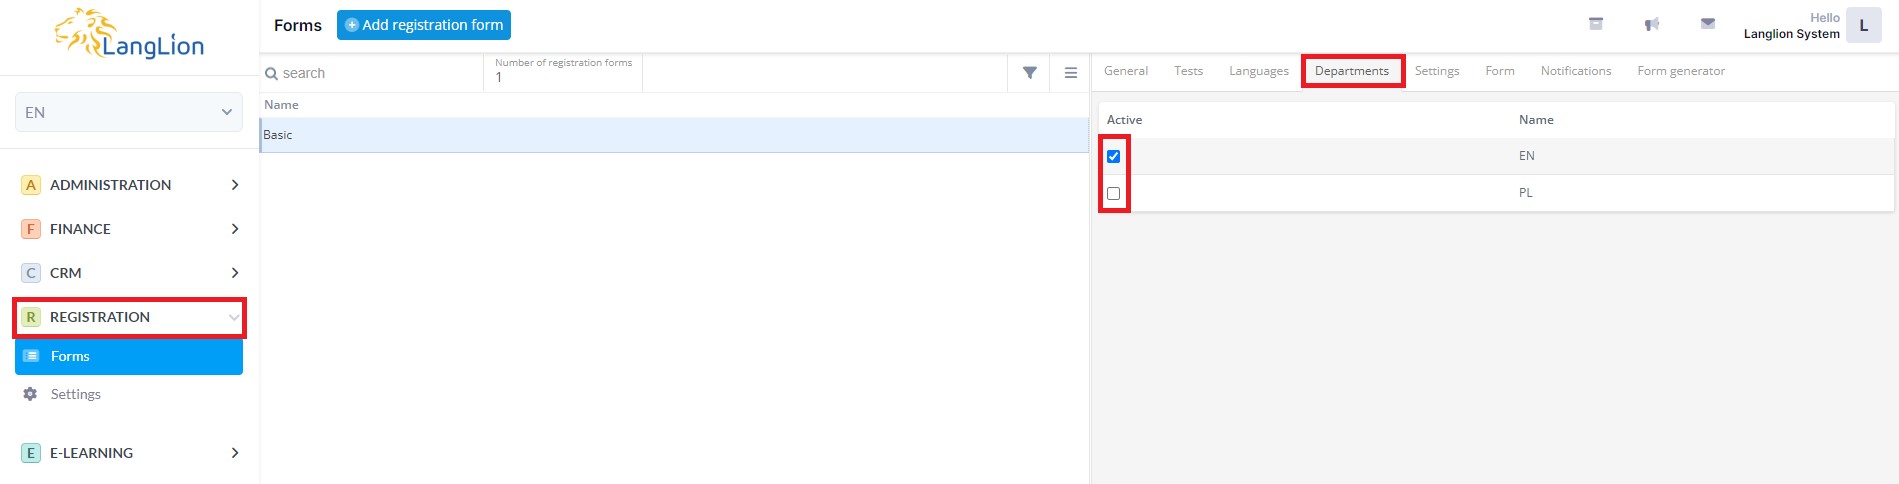
Departments
In this tab, you can choose departments to which future students will register. This option is available if you have more than one department and Superadministrator module is enabled.
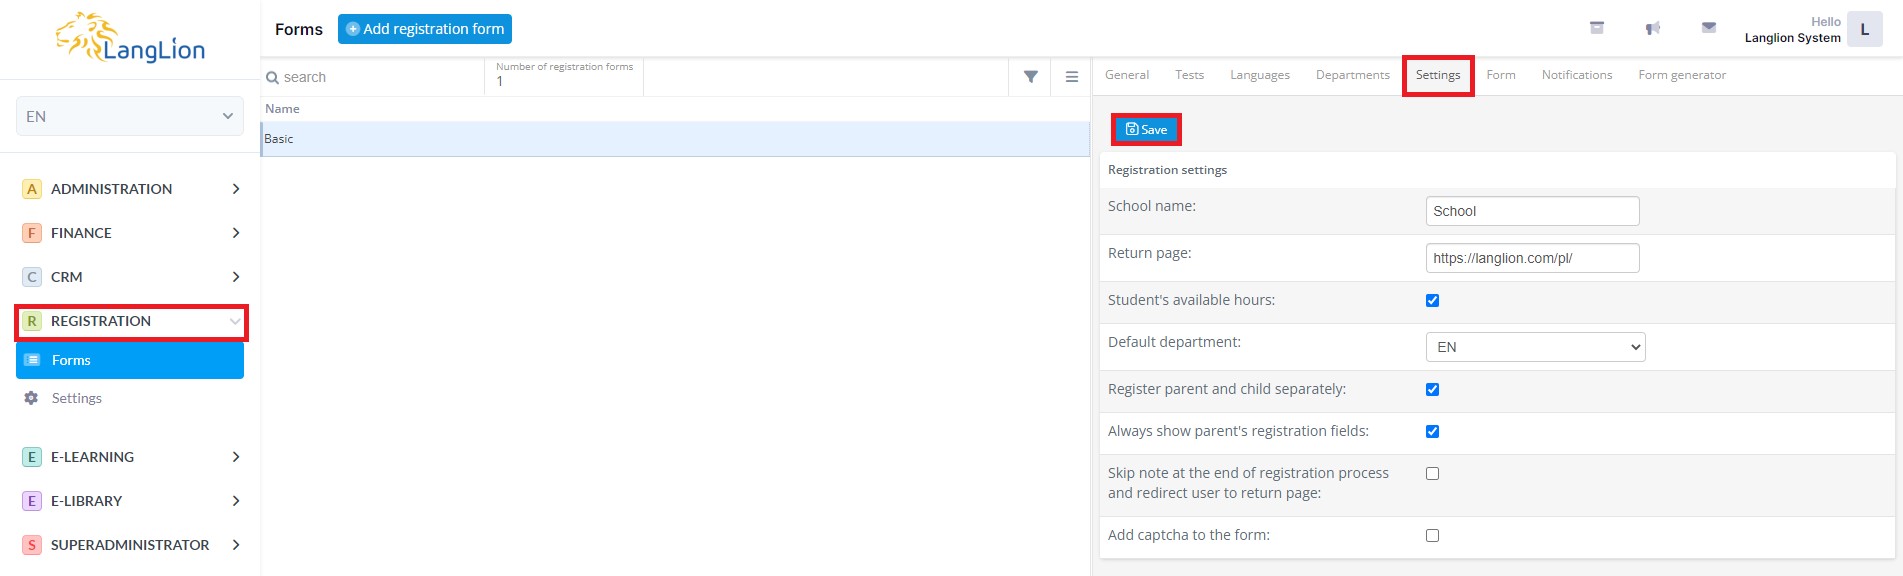
Settings
Each form can have separate settings and configuration.
- Enter the name of the school and enter its web address in the Return page field if you want the student to be redirected to your school’s website after completing the registration.
- If you enable the option Students available hours, you allow clients to indicate preferred days and hours in which they can attend classes. This will allow you to place students in groups that are convenient for them.
- If you have Superadministrator module active, you can set up the default department. This way, it will be pre-selected on the registration form, however, the student will still be able to change it.
- If you have parent accounts enabled, you can choose the option to divide the registration form, that is, Register parent and child separately. In this way, you enable the registration of adult students and enable parents to register their children- it is enough if the potential customer marks the option „Register your child” on the form and additional fields will be displayed below.
- If you want additional fields to enter your parent’s data to be visible all the time on the form, without having to click on the „Register your child” button, enable the option Always show parent’s registration fields.
- If you don’t want to display the default message after registration, you can display the return page instead. To do this, select the option Skip note at the end of registration and redirect to the return page.
After you finish configuring the settings, click on the Save button.
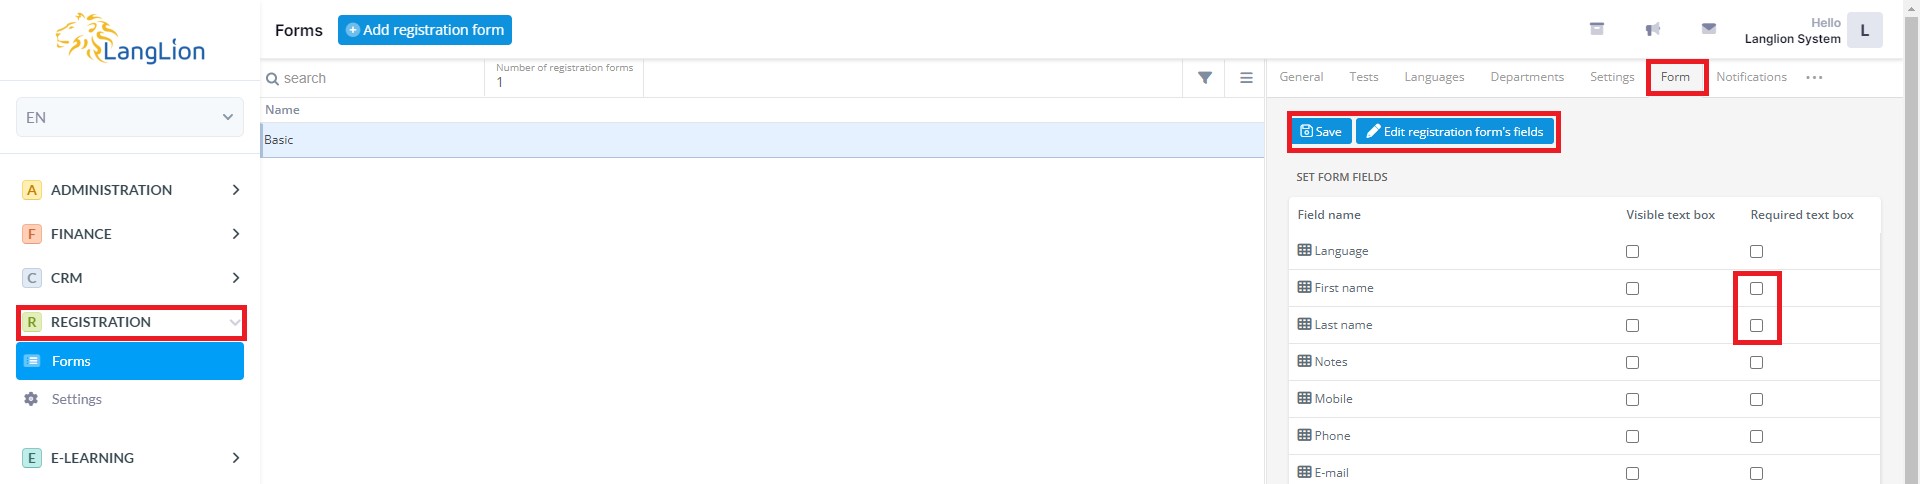
Form
The form fields are built-in and relate mainly to the personal and contact details of the student. To choose which fields should be included in the registration form, mark the selected Visible text box checkboxes. You can also mark these fields as required (Required text box) so without completing them, the student will not be able to finish the registration.
Among the form fields, there are consents obtained from the settings. The full text of the indicated consents will be displayed on the form. If you want to add a new consent, do so first in the settings according to our instructions.
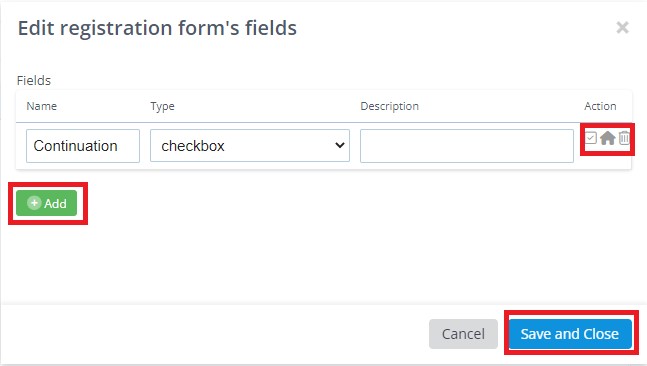
You can increase the number of fields by adding your own. To do this, click on the Edit form’s fields button. Each added field can also be used for another form.
After you finish configuring the form, click on the Save button.
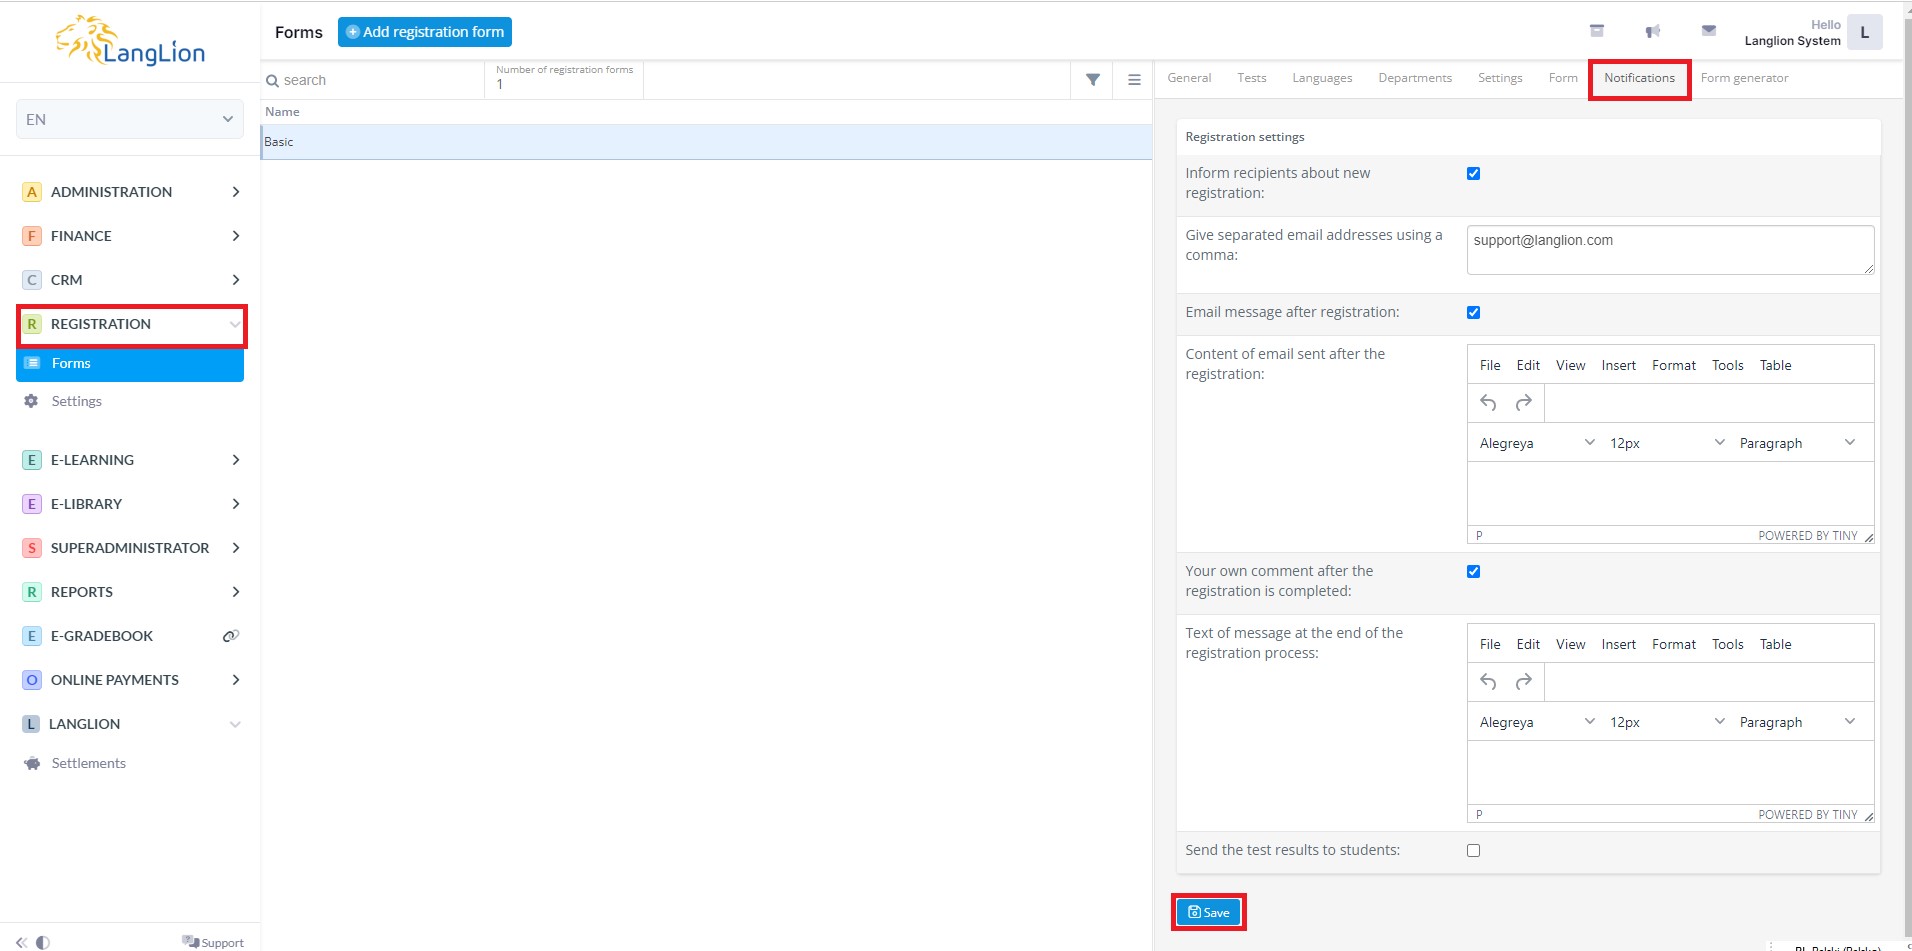
Notifications
- If you want to receive notifications about new students, enable the option Inform recipients about new registration and enter the email address. You can enter several email addresses to which a notification message will be sent.
- Enable the Email message after registration option if you want the new student to receive a message confirming his registration in the system. Then enter the content of the message.
- You can also set up the message which appears on the screen after completing registration. To do this, first turn on the option Your own comment after the registration is completed and then add the text.
- The student who solved the test is certainly curious about his result. If you want to send him the result of the placement test just enable the option Send the test results to students.
After you finish configuring the notifications, click on the Save button
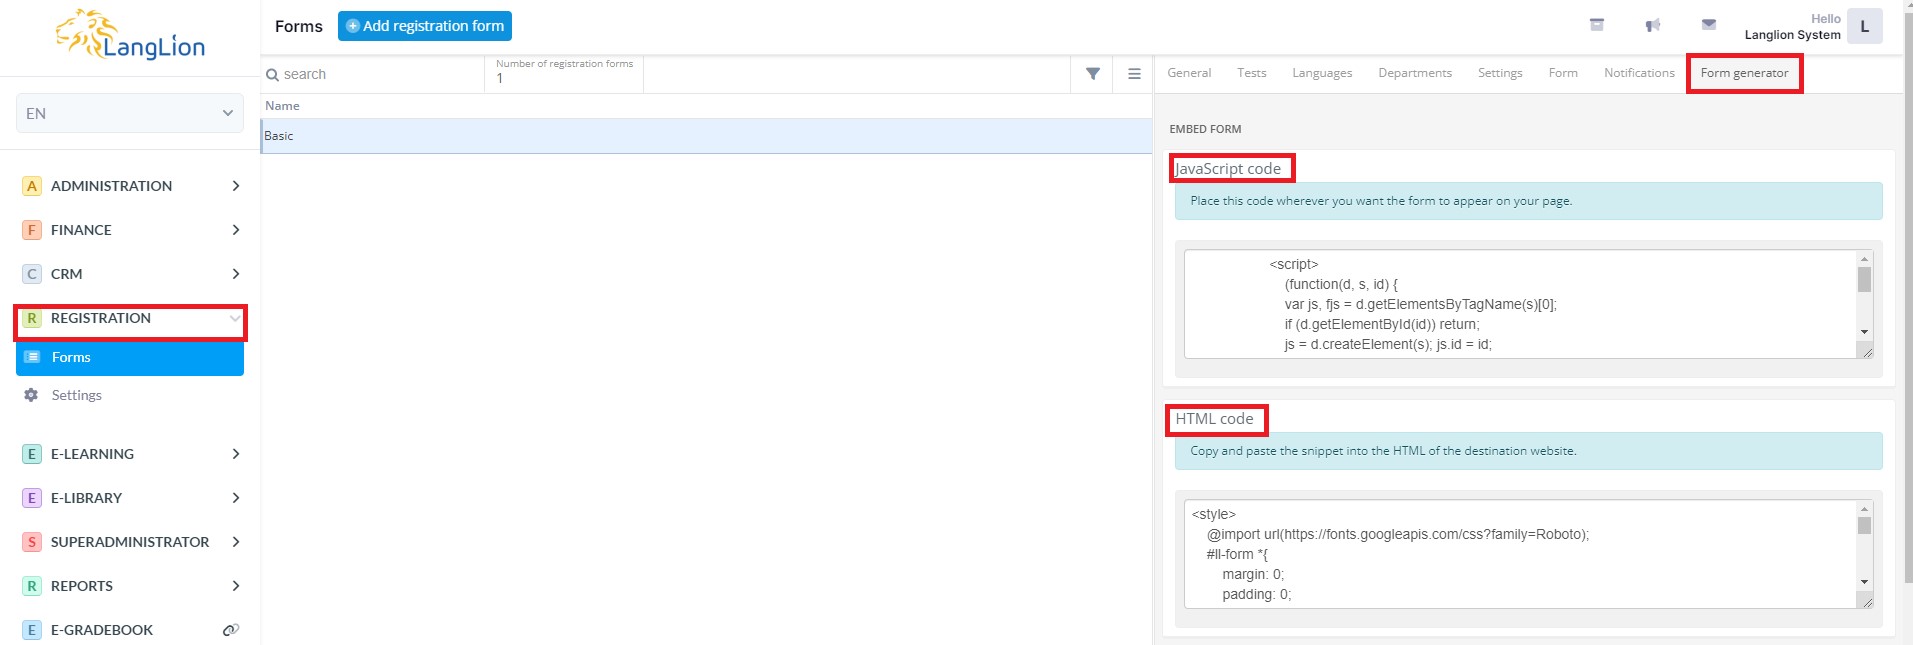
Form generator
The created form can be embedded on your school’s website. The form you have created has been automatically encoded. This means, all the properties of the form have been converted into a code, consistent with the code of the website – HTML. By embedding the form on the website, your potential students will be able to sign up using a computer or mobile device.
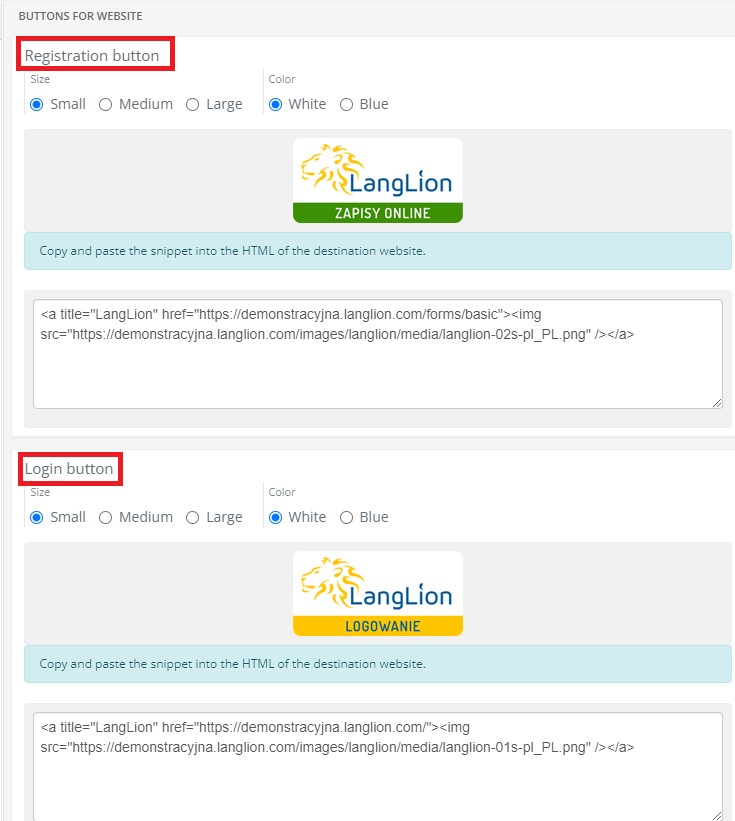
In order to embed the form, copy and paste the code available in the Form Generator tab into the source code of your school website. If you do not have adequate knowledge in the field of website development, contact the administrator of your school website and provide him with the generated registration form code. You can also use the button under which you will place the registration form.
In order for your form to update itself (each time you change its settings on the Platform), use the generated JavaScript code.
Remember, however, that the JavaScript code is more advanced, so it is more difficult to adjust the form’s appearance to the website (as opposed to the HTML code).
The user has the option of embedding any form on the school's website, but it will not be provided with a script to check the completion of the required fields. In this case, it is necessary to contact the website administrator to write and add such a script in order to verify the completed fields.
xyz - the name of the school