Teacher’s account – Classes
If the school has provided you with the option to manage a class schedule, you can change your lessons’ data, assign the status, add class details, or even delete and add new lessons.
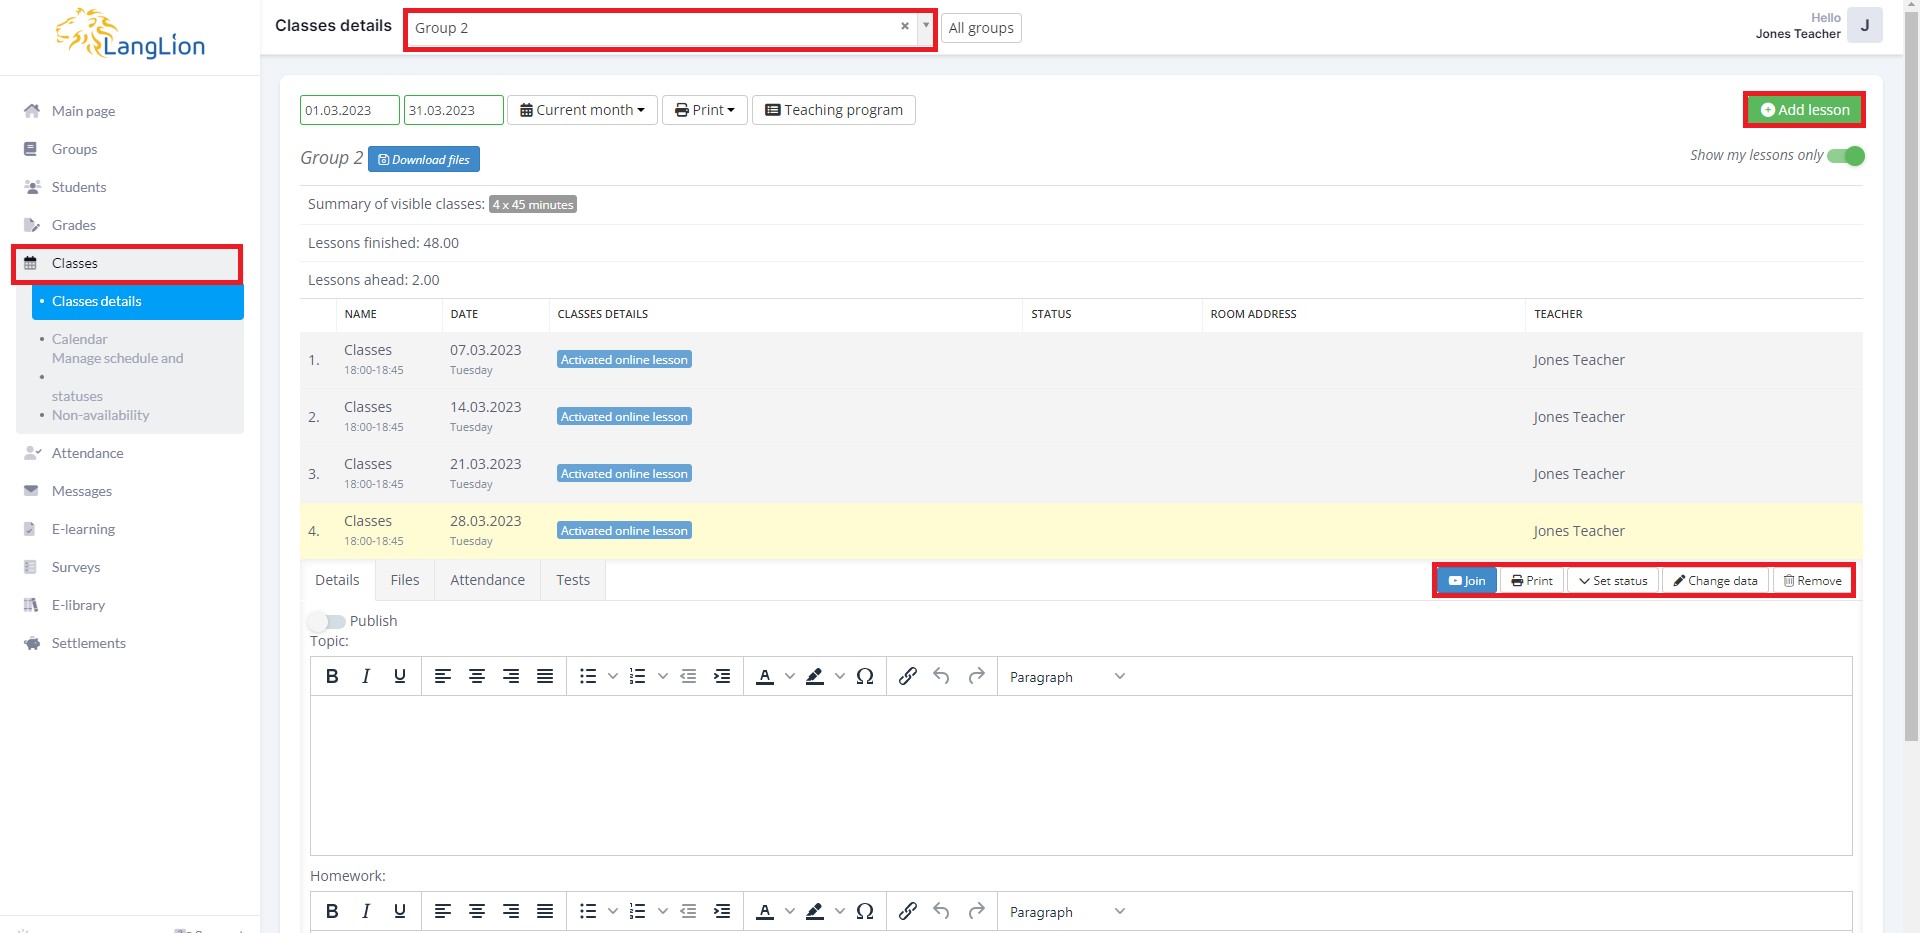
To edit the lesson, go to the Classes and Classes details tab.
Choose the lesson you want to change from the list and click on it. To edit data, click on the Change data button, or if you want to set the status, select Set status. To add a new lesson, click on the Add lesson button, or if you want to delete a lesson, select Remove.
Do you want to add the lesson subject and homework?
Click on the selected lesson on the list. In the Details tab, complete the form and click the Save button.
You can also copy all the lesson details from the previous lesson. To do this, just click the Copy from previous classes button.
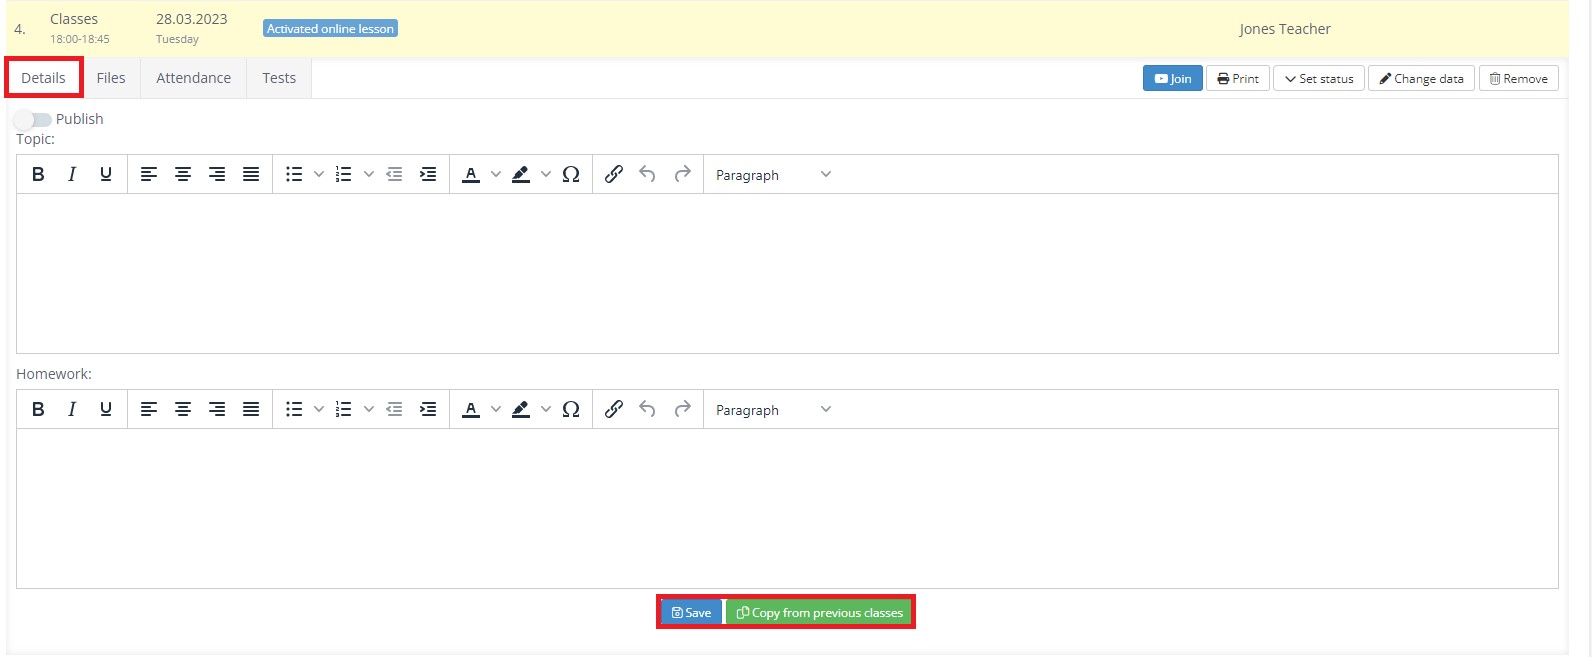
If you want to share the class details with students, check the Publish option.
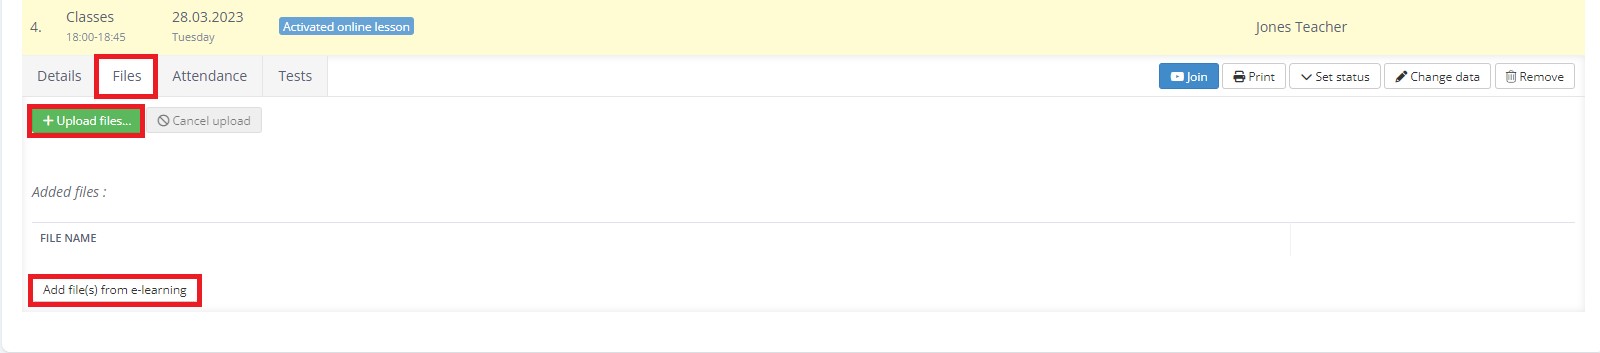
In the Files tab you can add teaching aids for the students, e.g. photos, audio files, or presentations.
How to do it?
Click on the Upload files button to add a file from your computer, or if you want to upload a file from the virtual disk space, select Ass file(s) from e-learning.
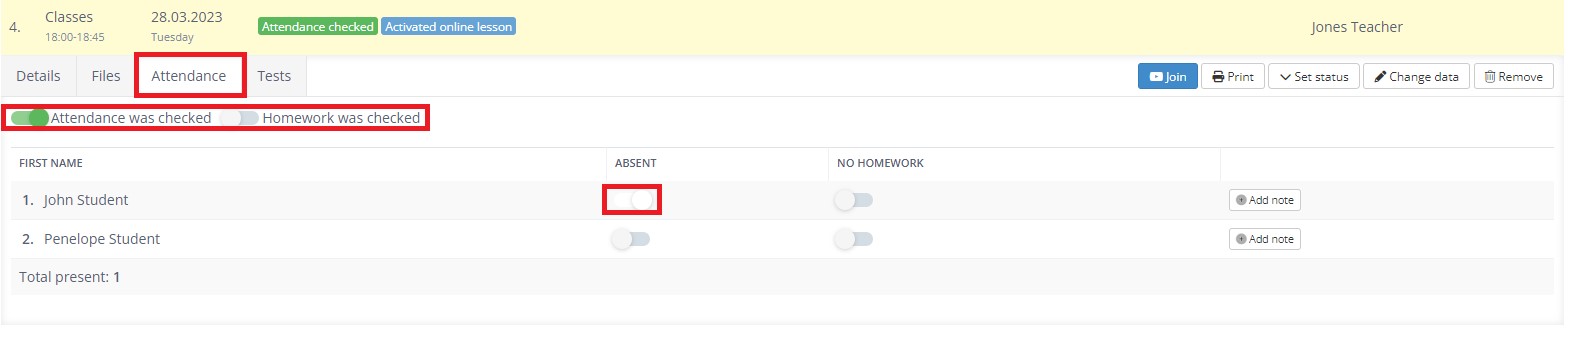
In the Attendance tab you can check the student’s attendance and homework. Check the Attendance was checked option and if any student was absent, check it next to his name. Do the same for the homework.
In the Tests tab you can add a test to the class. Click on the Add tests button, select one of the created tests, and click on the Add button.

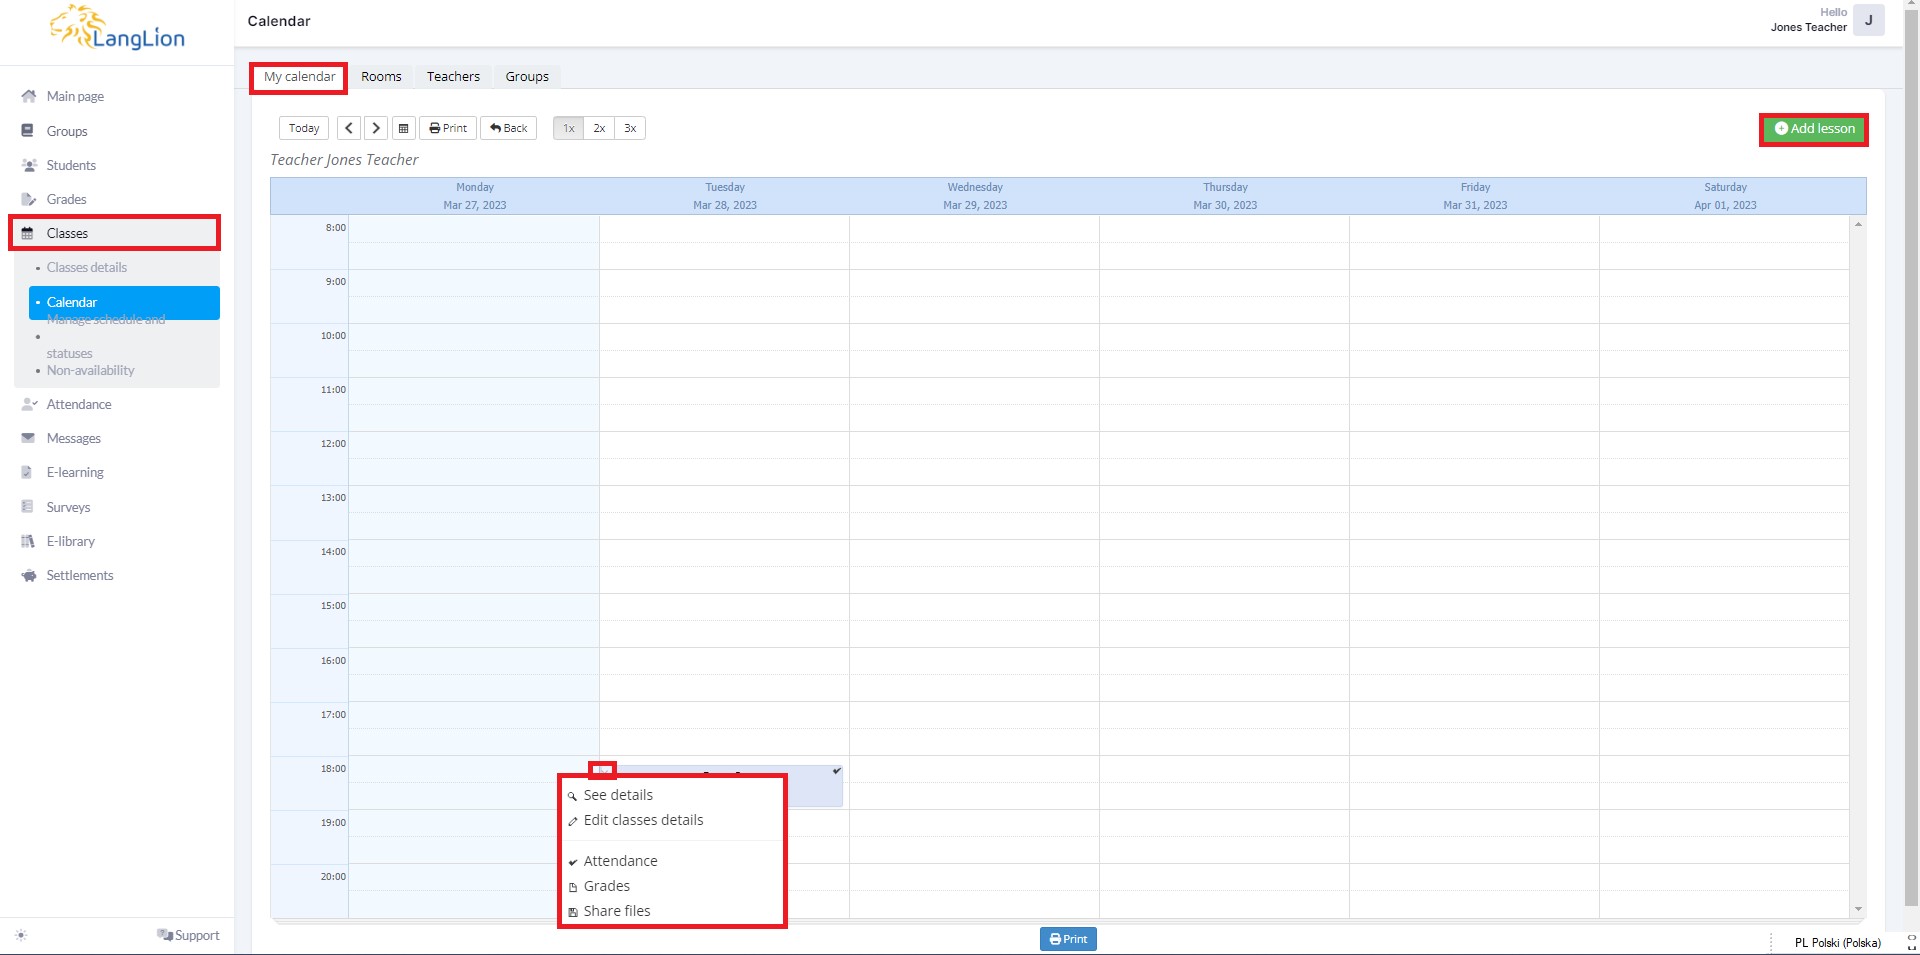
Your timetable is available in the Calendar section. From here, you can add a new lesson and, just like in the Classes details section, view and edit/add class details, check attendance, add grades, and share files.
The Calendar section displays the weekly timetable. You can print it using the Print button.
If you have the appropriate permissions, you can also see the rooms plan in the Rooms tab, the rota of all teachers in the Teachers tab, and the group timetable in the Groups tab.
You can also manage the plan from the Classes – Manage schedule and statuses tab.
On the calendar, select the lesson you want to change the data for. Using the „drag and drop” method, move the lesson to the selected place in the calendar. The system will automatically save changes.
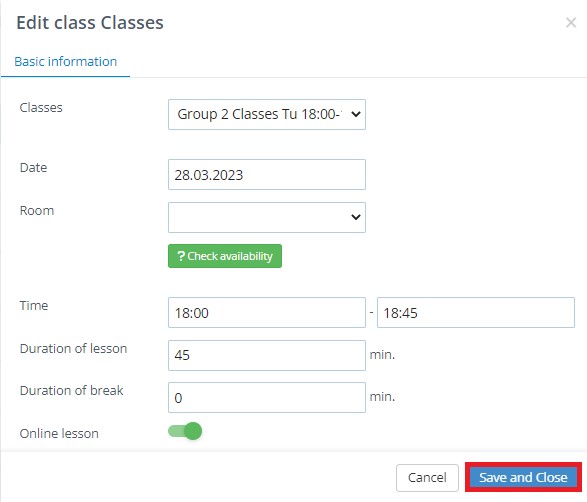
If you want to change the data manually, click on the menu in the upper left corner of the tile and select the option Change data. In the edit window, enter new lesson data and confirm by clicking on the Save and close button.
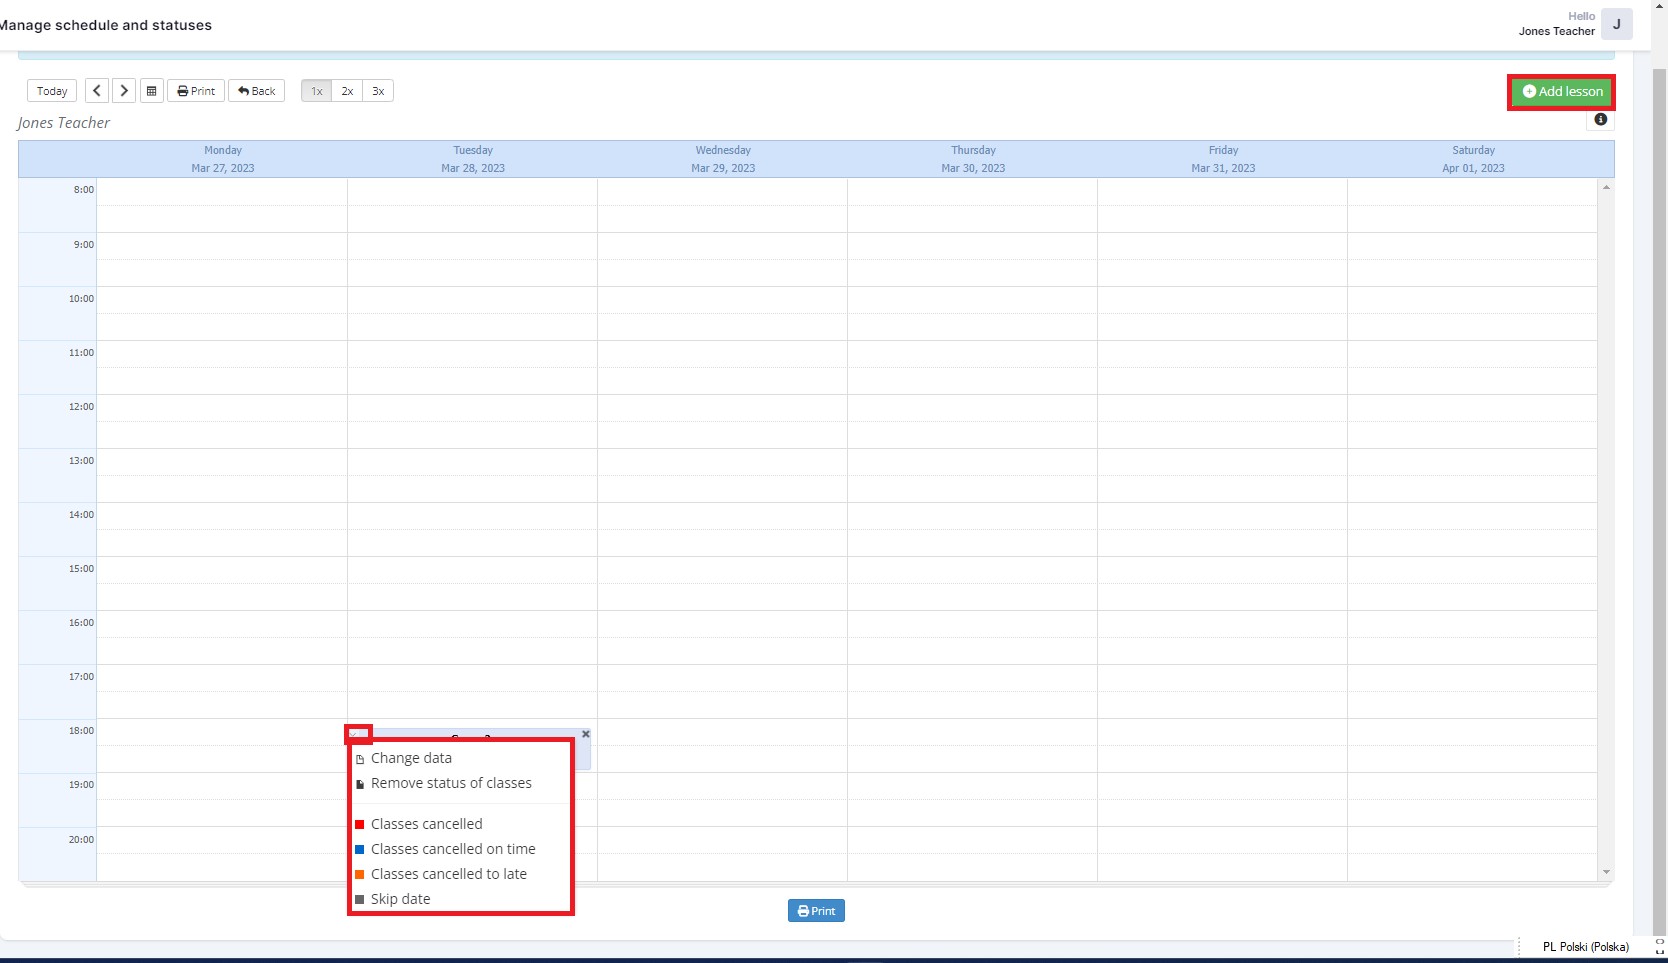
If you want to give a lesson a specific status, for example, mark the lesson as canceled, or remove a status, proceed just like described above, but in the menu click on the selected status and confirm the system message at the top of the page.
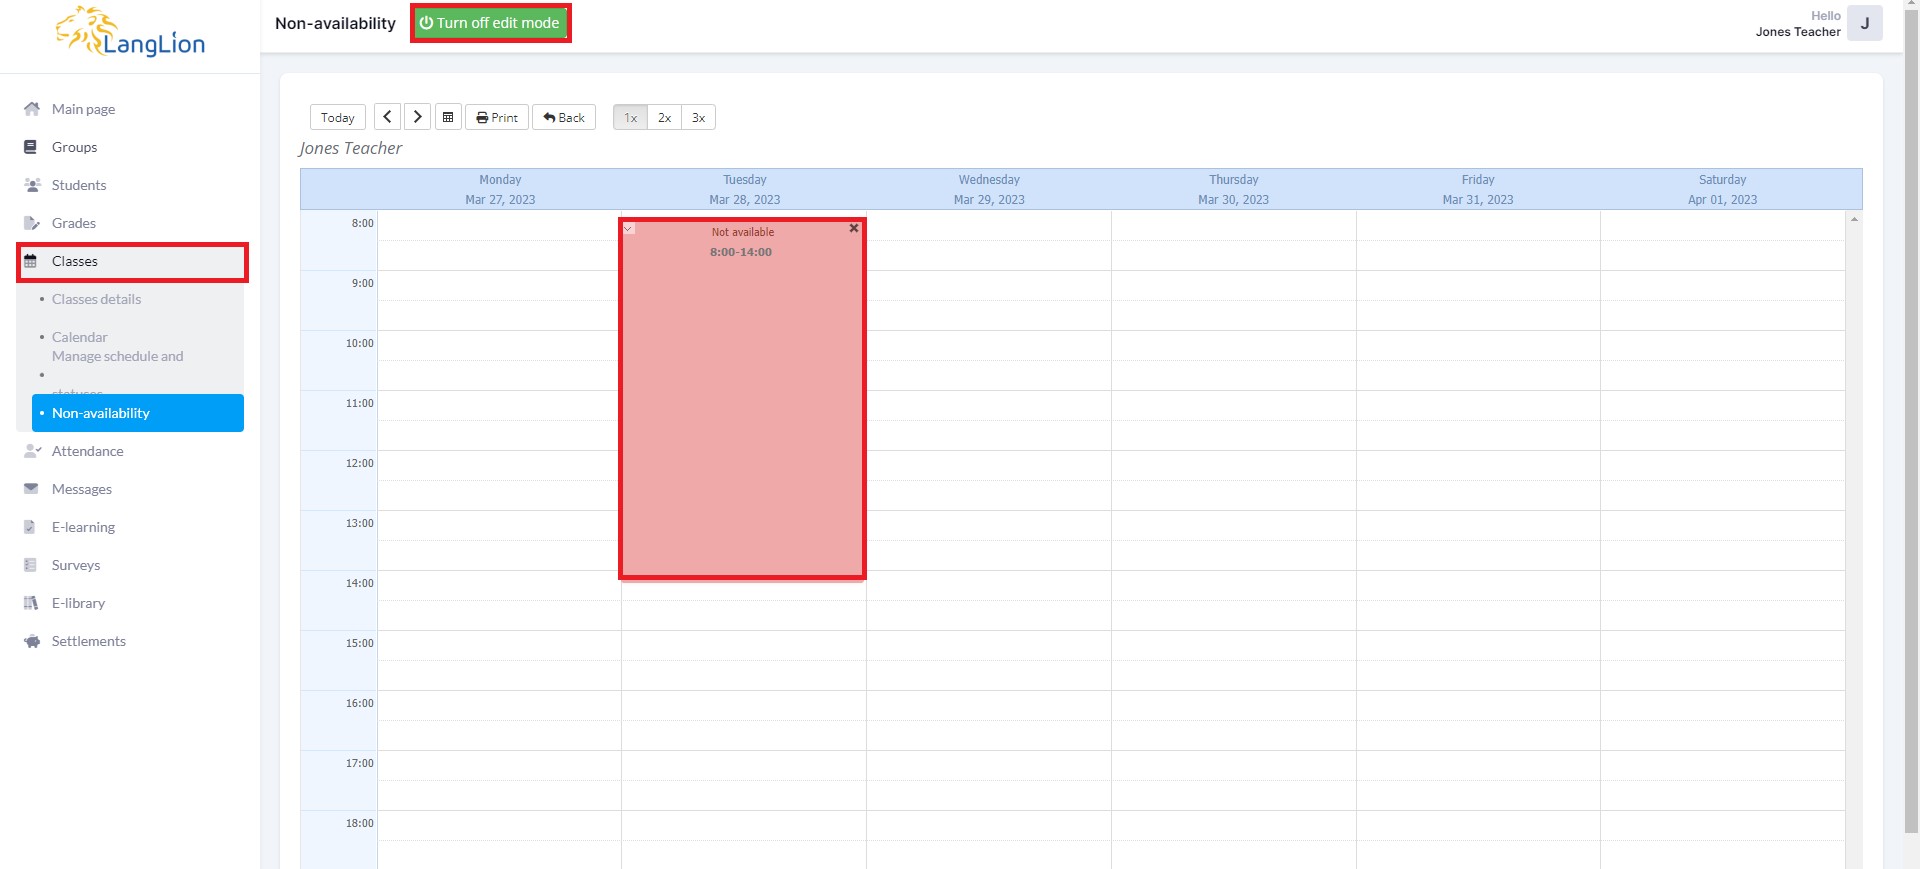
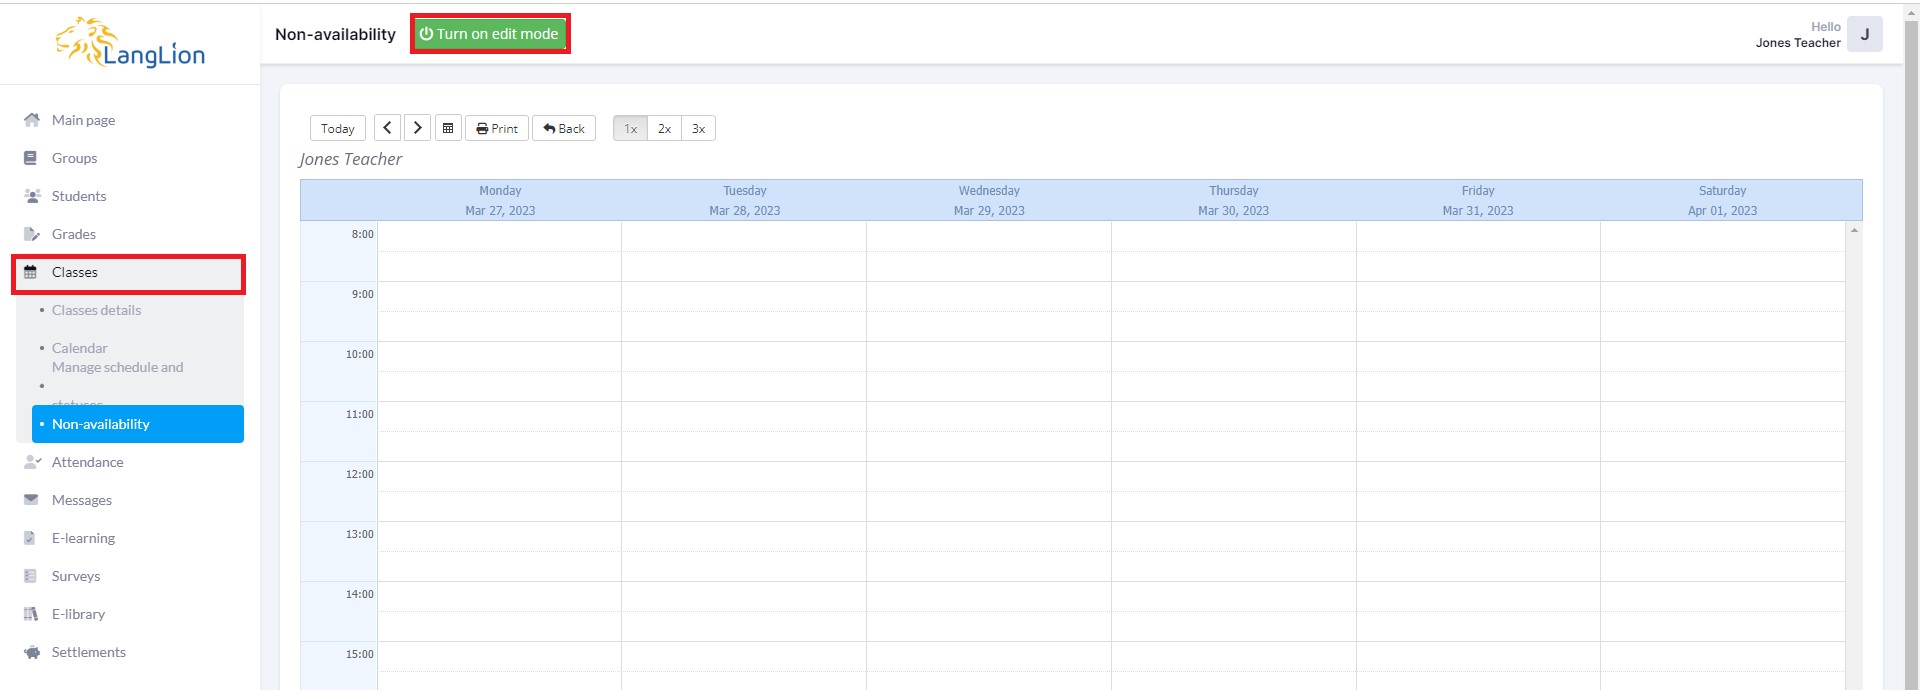
In the Non- Availability section, you can add a date of your unavailability.
How to do it?
It’s easy, you just need to turn on edit mode first, by clicking the Turn on edit mode button.
Then, click on the date on the calendar in which you want to mark your unavailability. In the edit window, enter the date and time range and confirm by clicking on the Save and Close button.
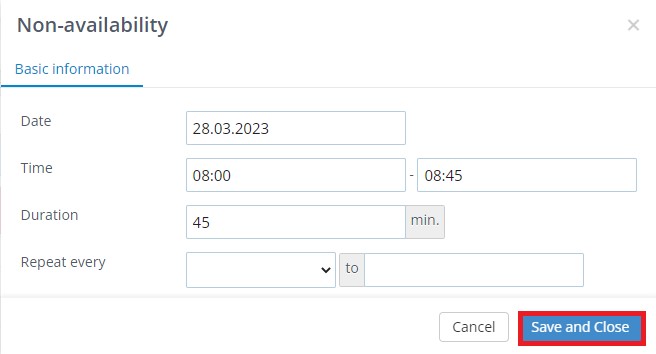
Done. Enter the next unavailability in the same way, or click the Turn off edit mode button.