Contact groups
Creating contacts groups makes it easier to send mailings and system messages.
How to create a contact group?
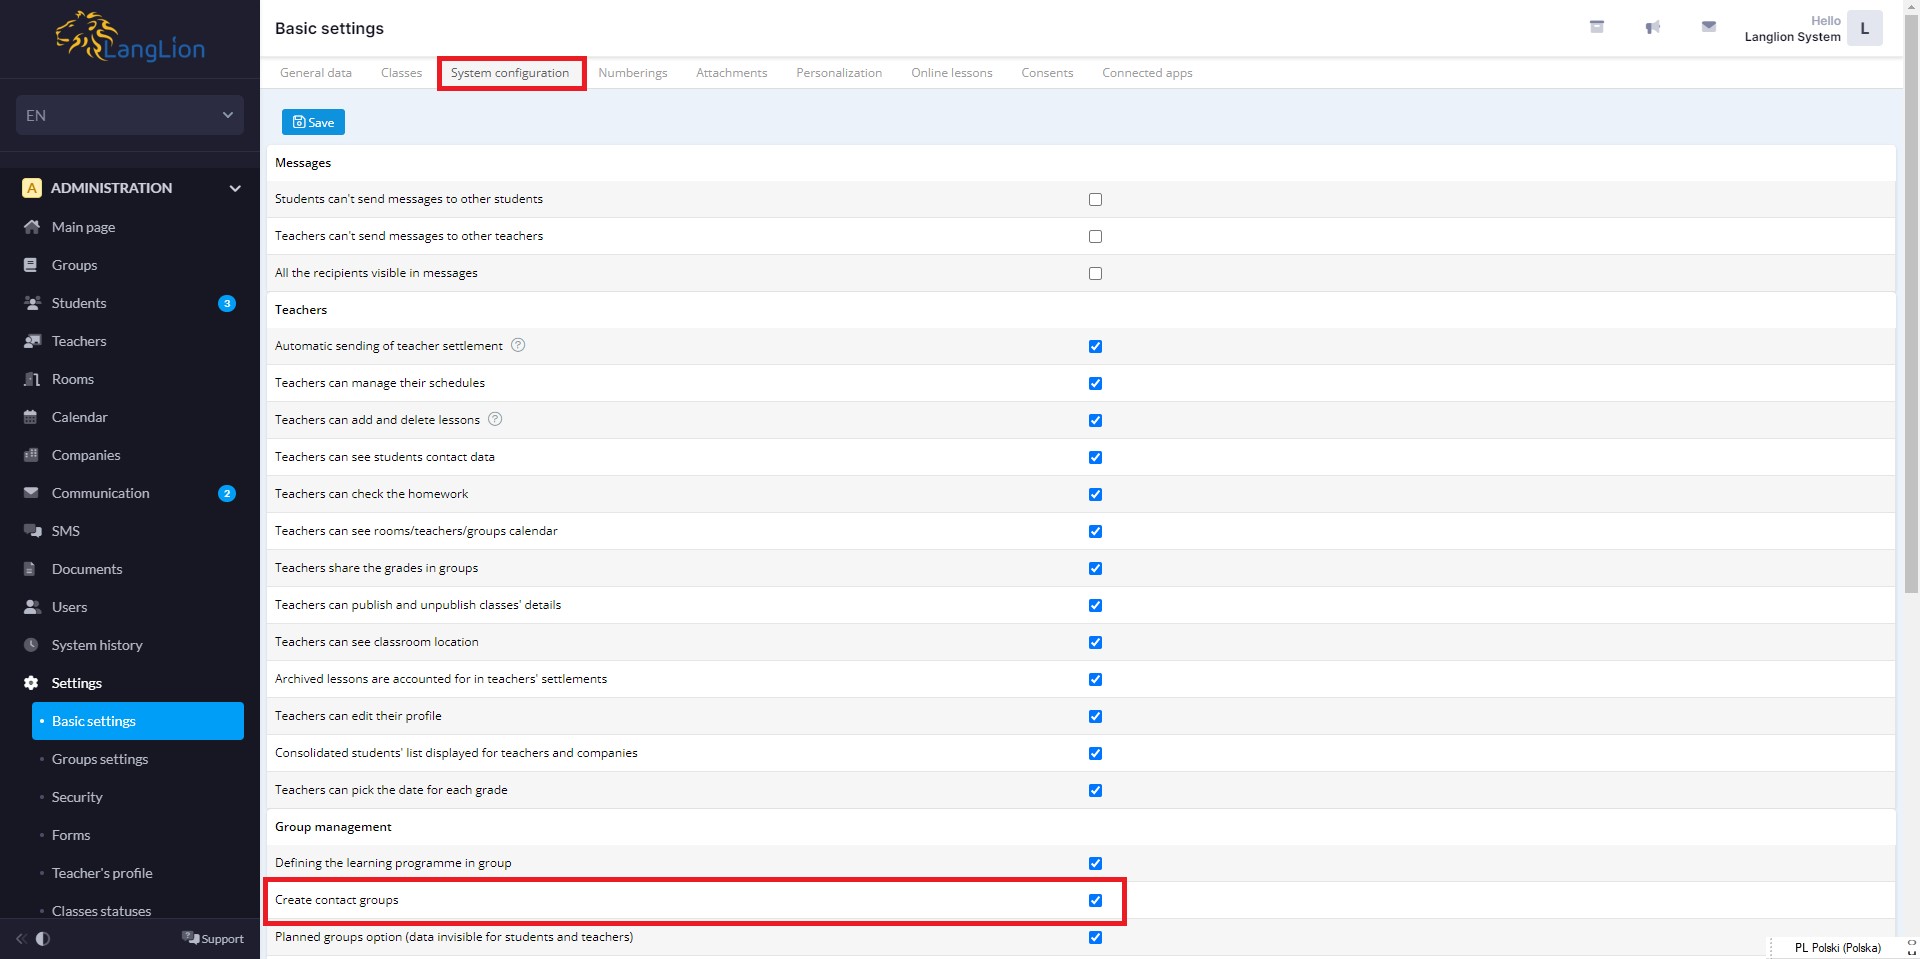
- Go to tab Basic settings in Administration module, then choose Systemem configuration, mark Create contact groups and save changes.
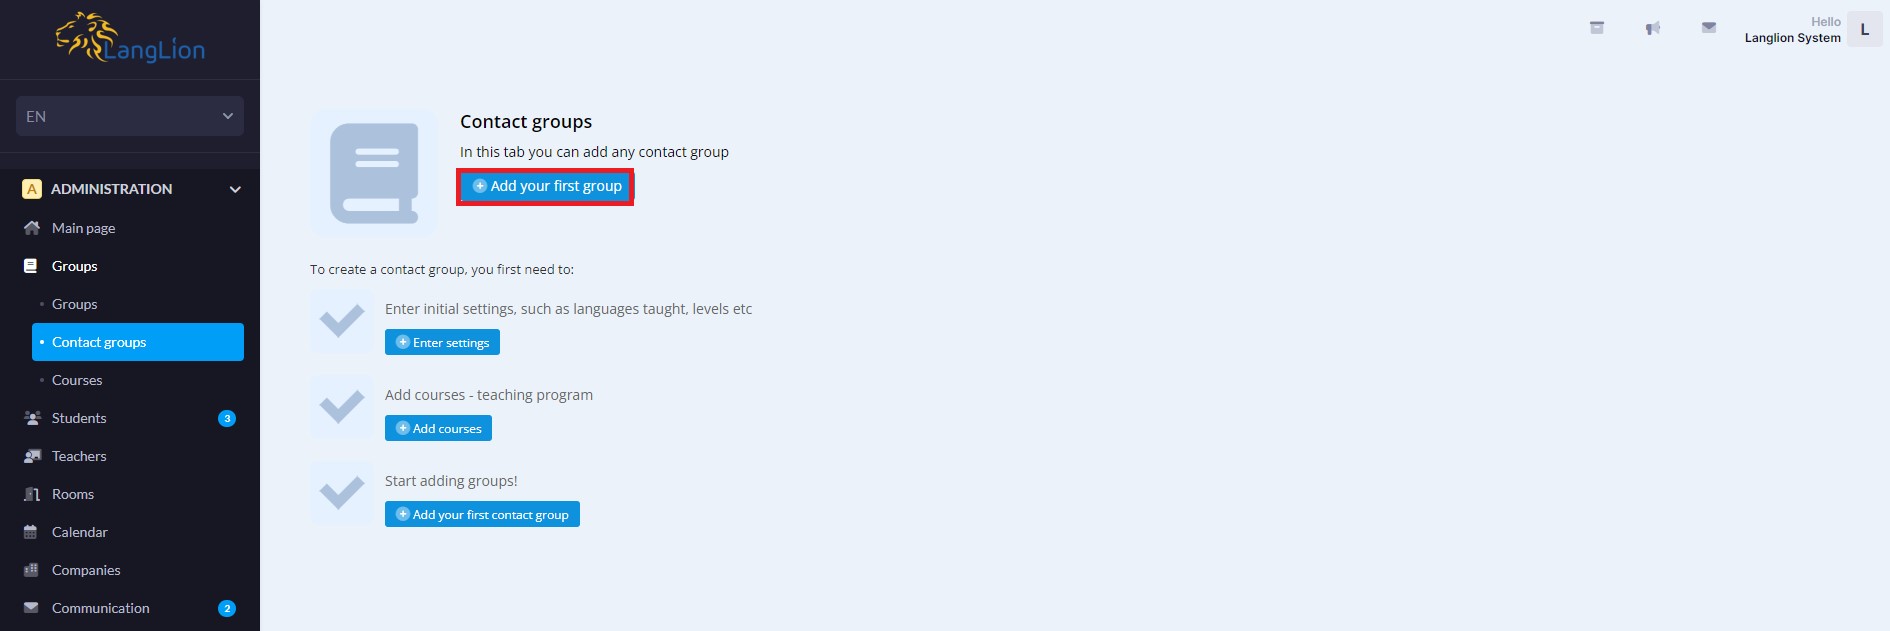
2. Go to Contact groups in tab Groups. Click on Add your first group.
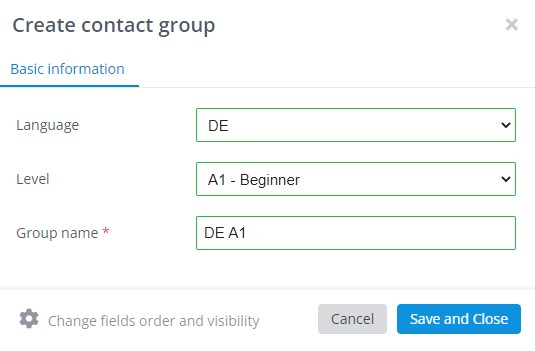
In new window enter a group name. You can also add additional information about the level and language. Remember to save changes.
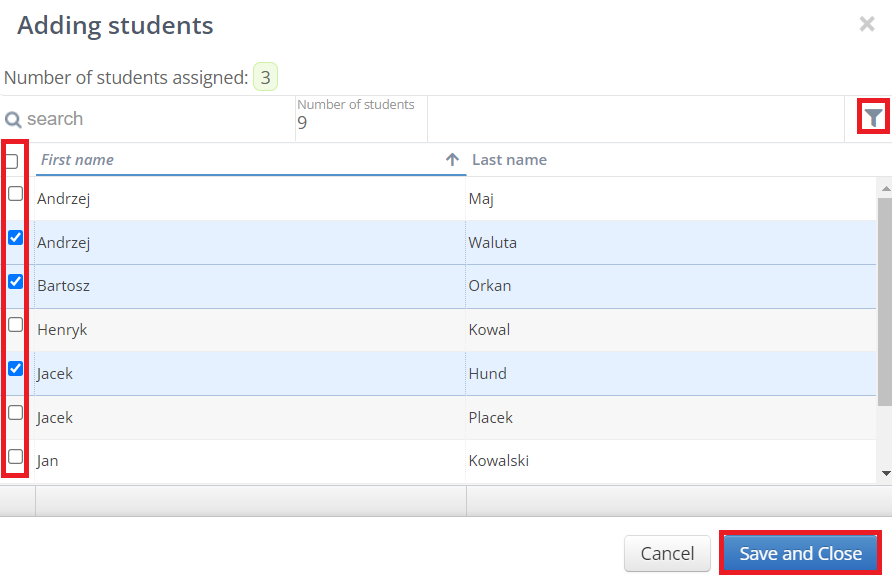
3. Now you can assign students to Contact group. Mark them on the list and click Save and Close. You can use filter to easier find students.
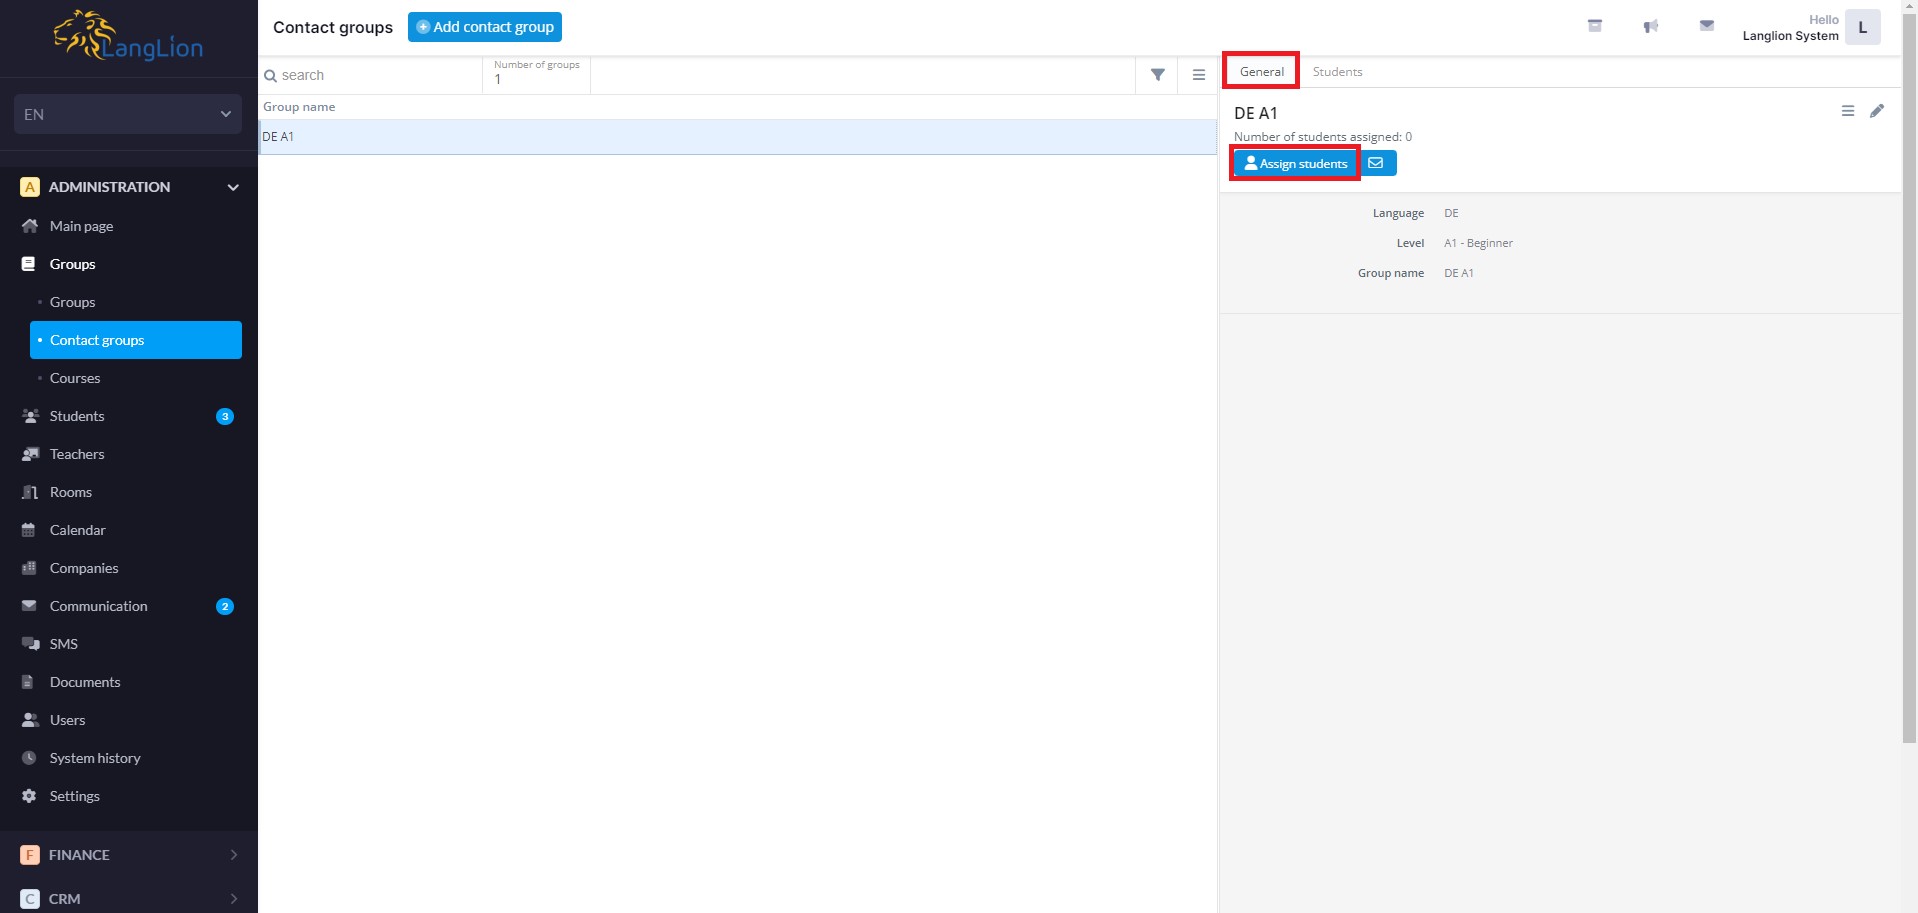
List of assigned students you will find in tab Students.
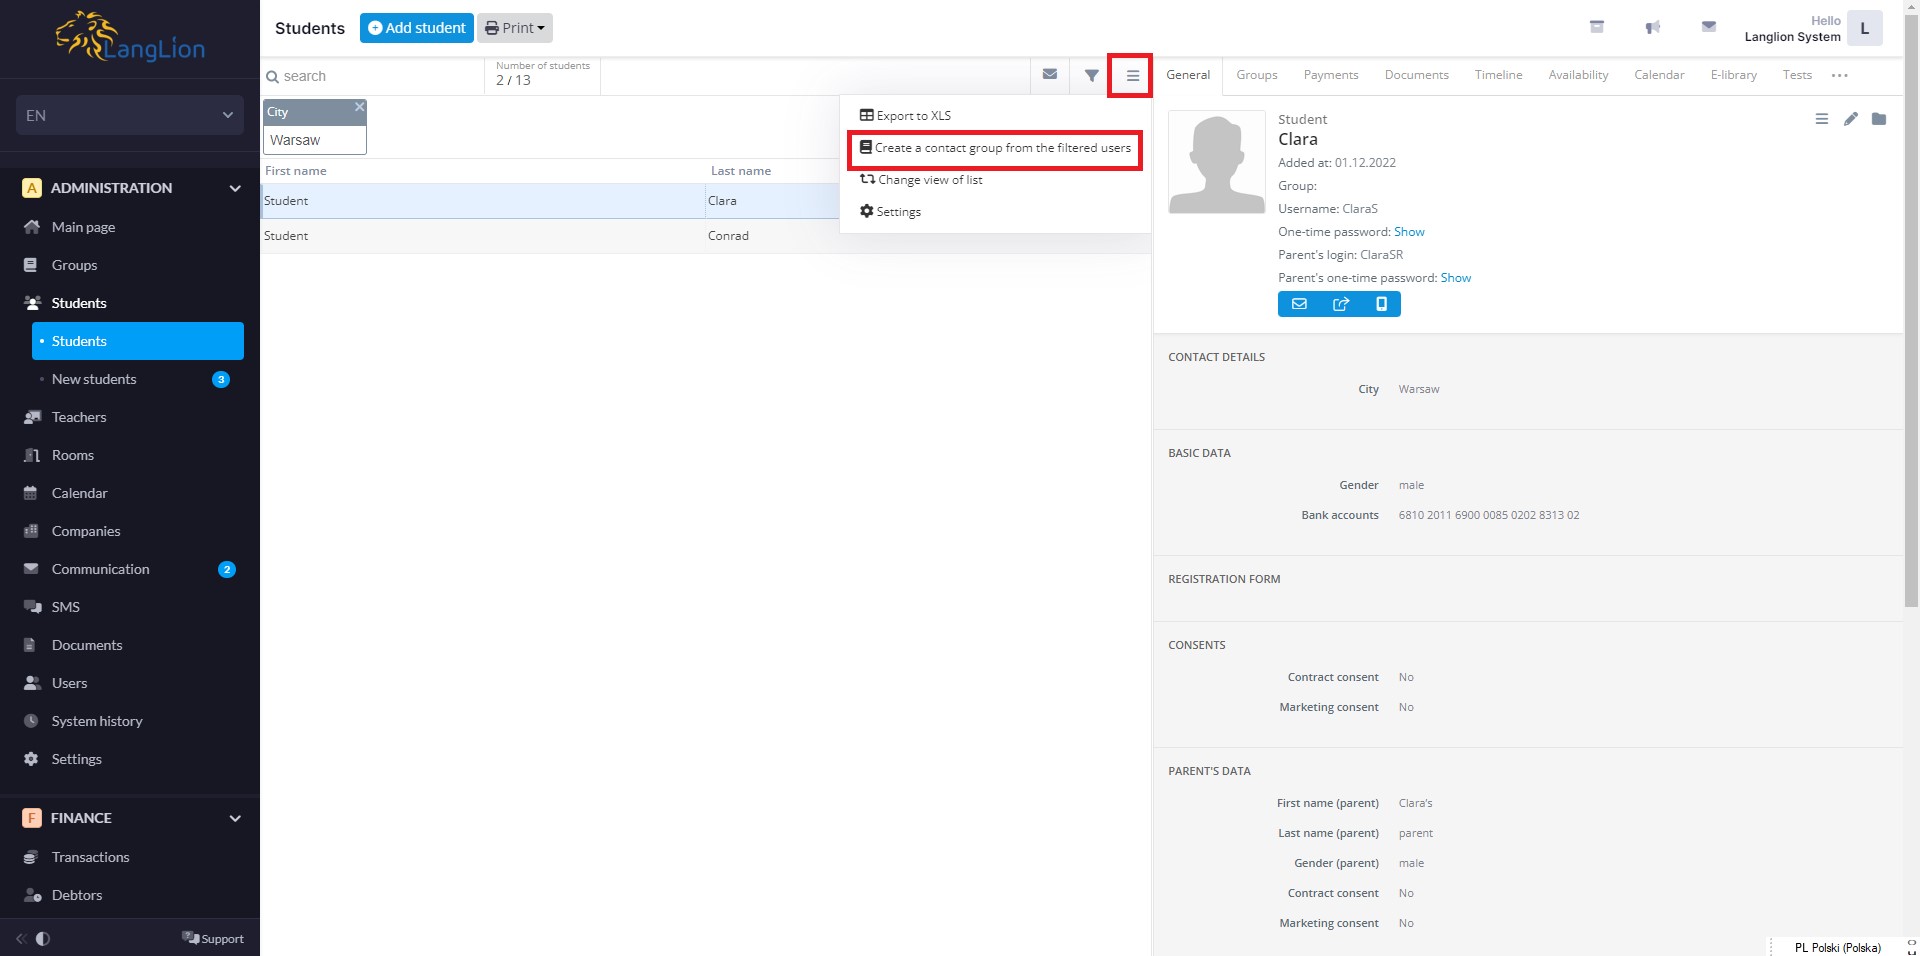
There is also a second way to create a contact group.
Go to the Students tab, select the appropriate people using filters, eg those from a specific city. Then click on the More option and select Create contact group from filtered users. Confirm the system message and proceed to editing the group itself. In the new window, you can give it an appropriate name.