How can I assign a student to the group?
Assigning a student to a group is one of the basic steps but that will allow you to further manage him and his course in the LangLion Platform. If the student is not assigned to the group, you won’t be able to check his attendance, add grades or accept payment for classes. How to assign a student to a group?
You can do it in two simple ways.
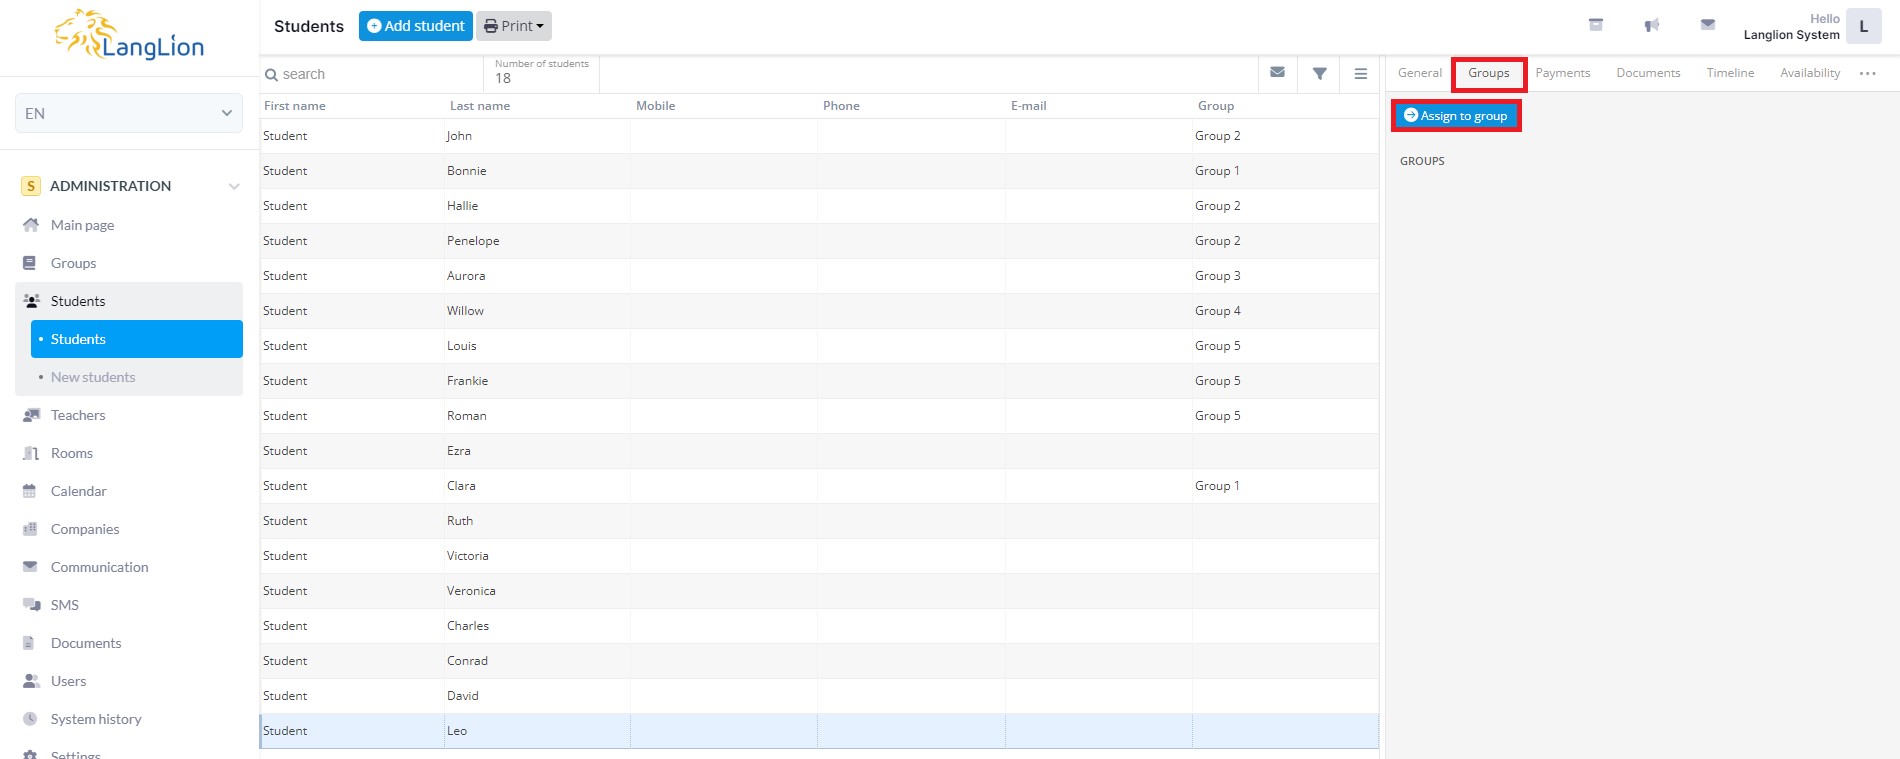
- Go to the Students tab and select the student from the list. Now go to the Groups tab on the right-hand side of the screen.

2. Click on the „Assign to group” button.
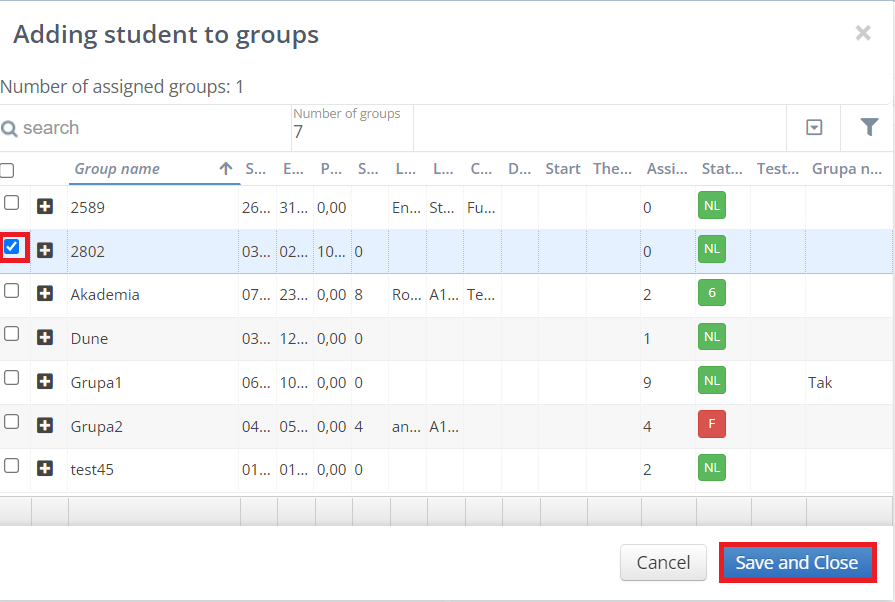
3. Select the group from the list of groups and click on the „Save and close” button. You can assign a student to several groups at the same time.
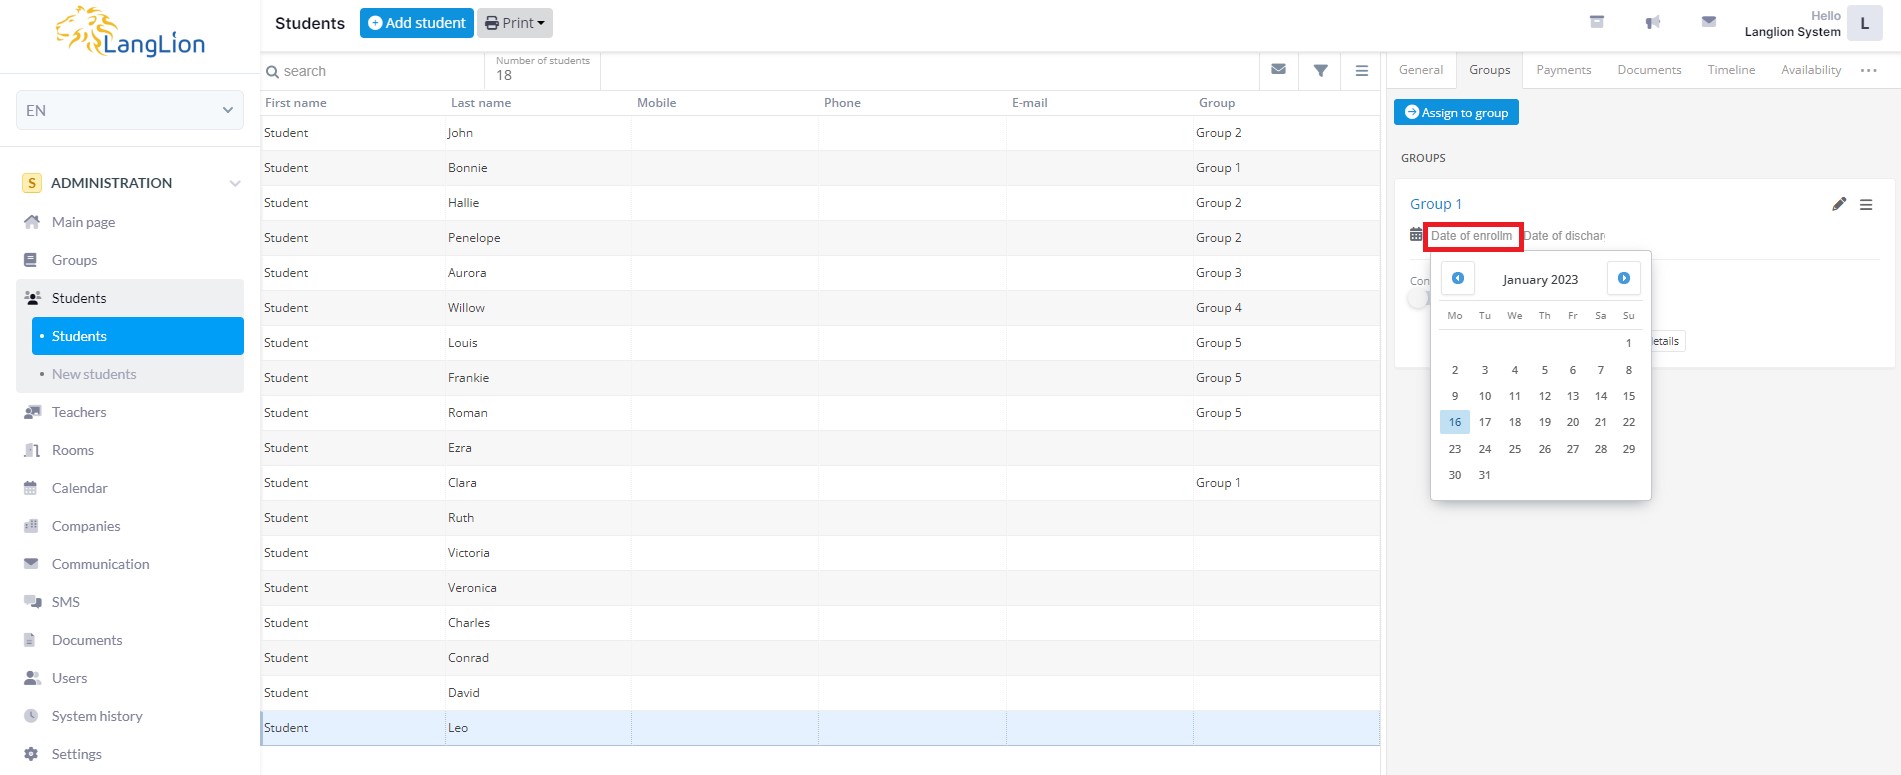
How to enter the date of enrollment in the group?
Just click on the „Date of enrollment” field and select the appropriate date from the calendar.
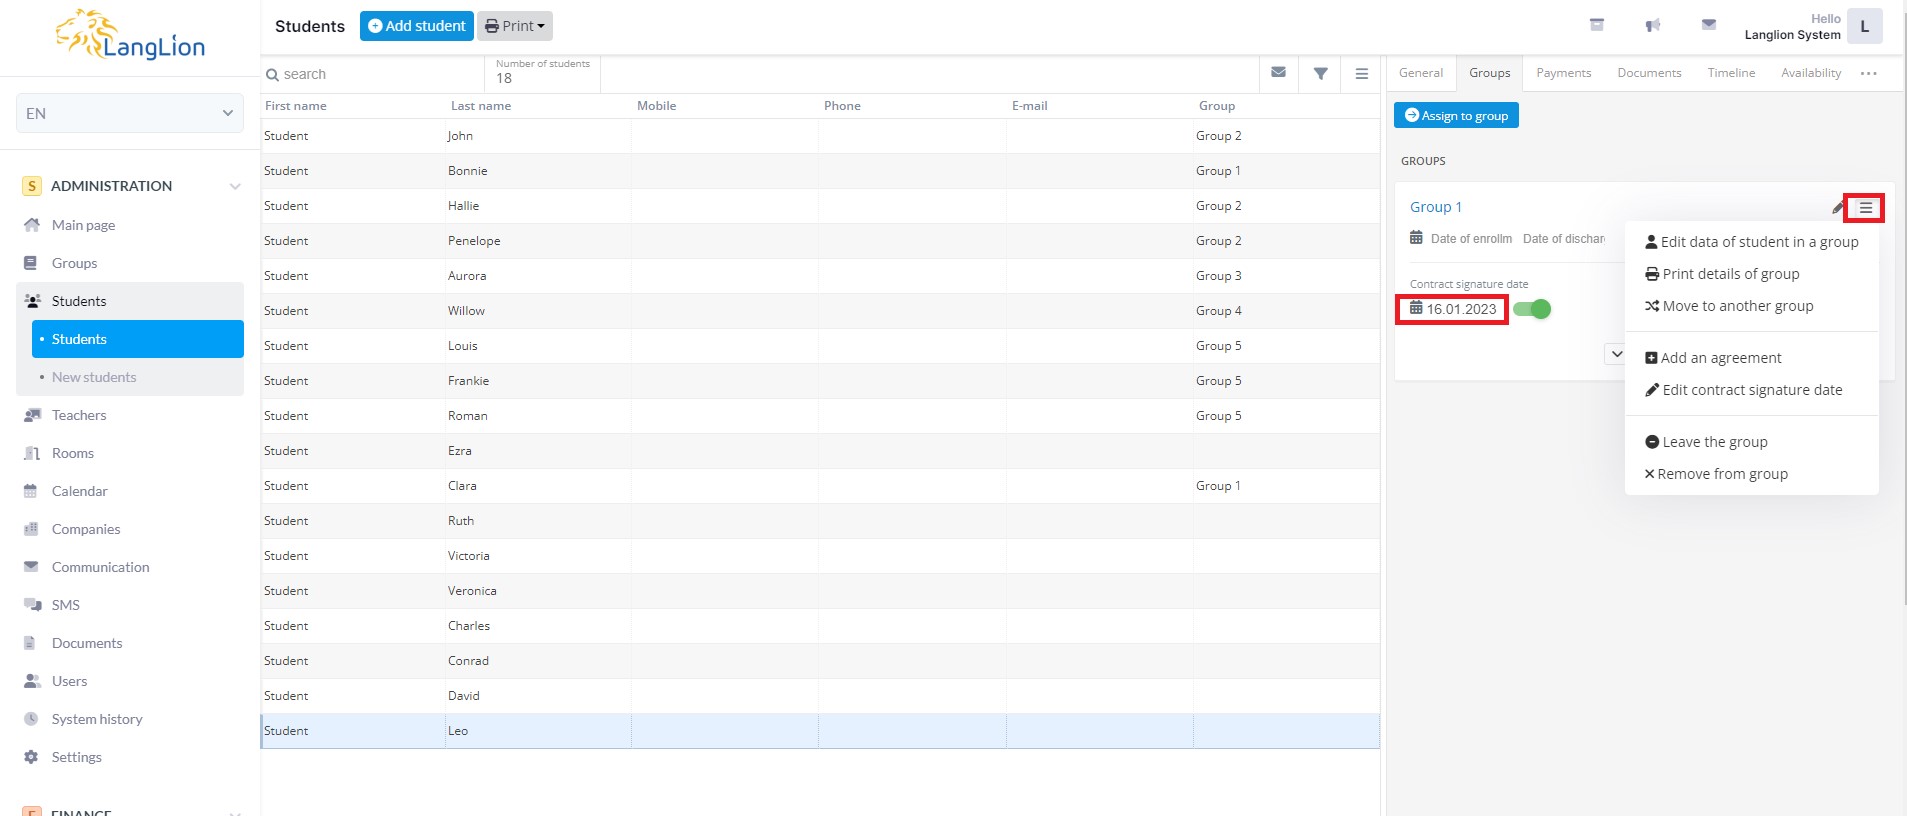
From here, you can also unsubscribe or remove a student from the group, add a contract or change the date of signing it, edit the student’s data in the group, e.g. changing the type of settlement, print group details, or transfer the student to another group.
The second method of enrolling a student in the group is as follows.
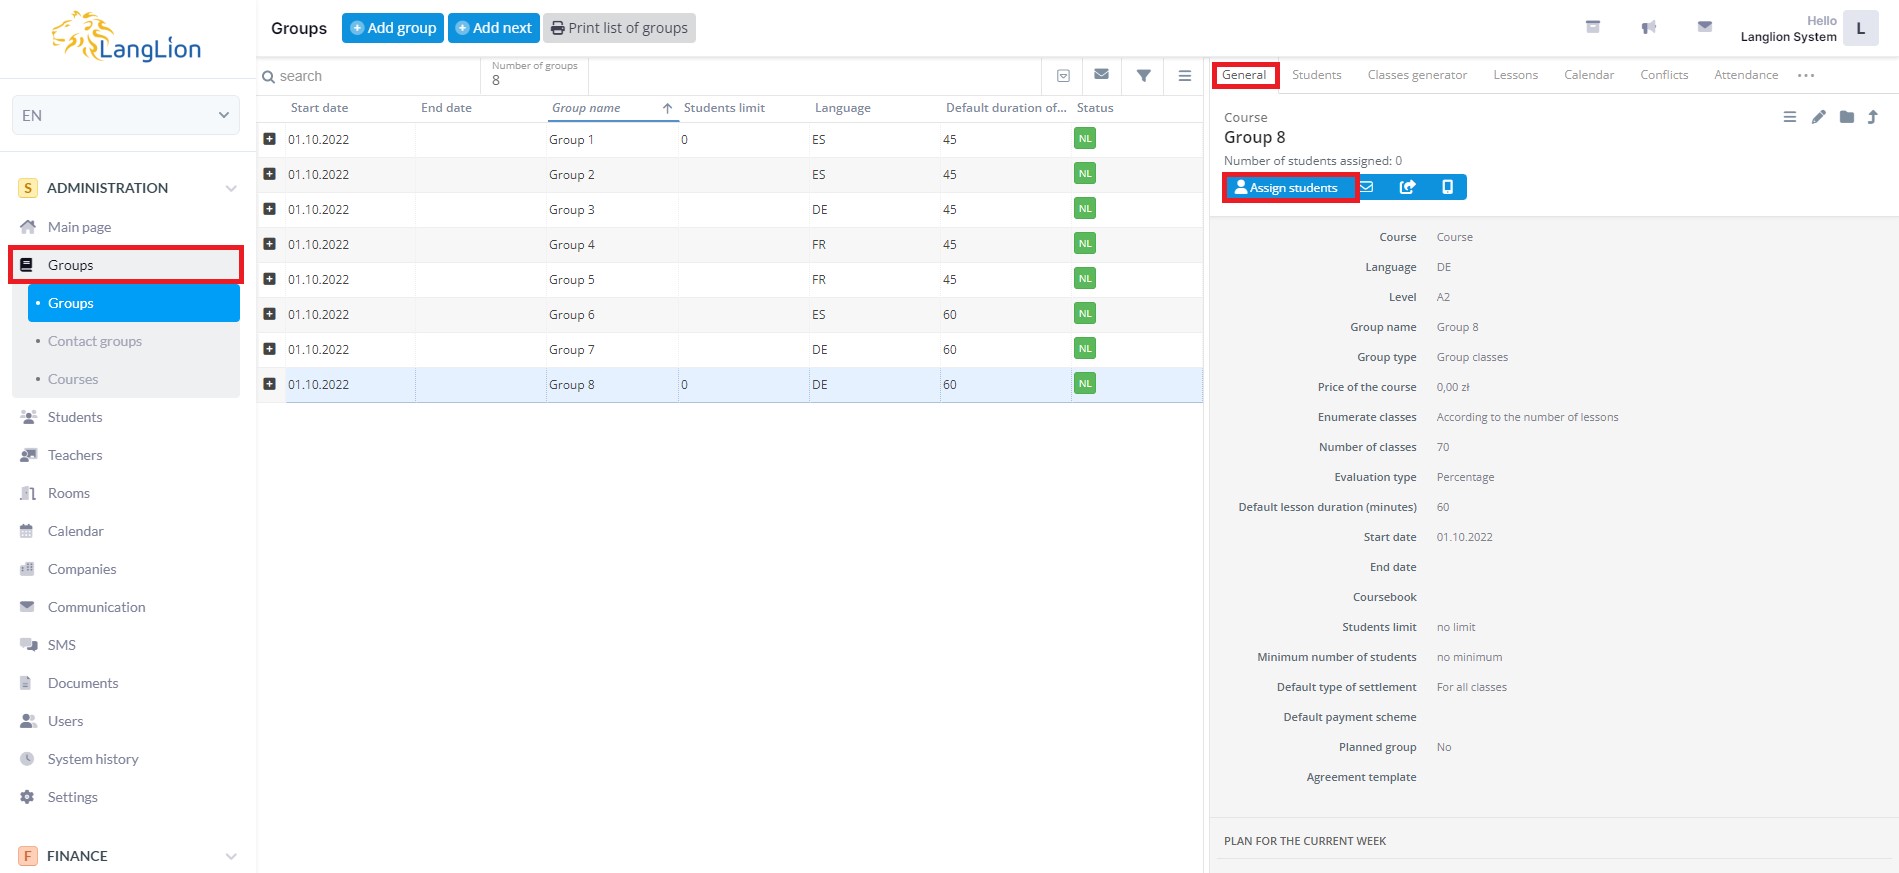
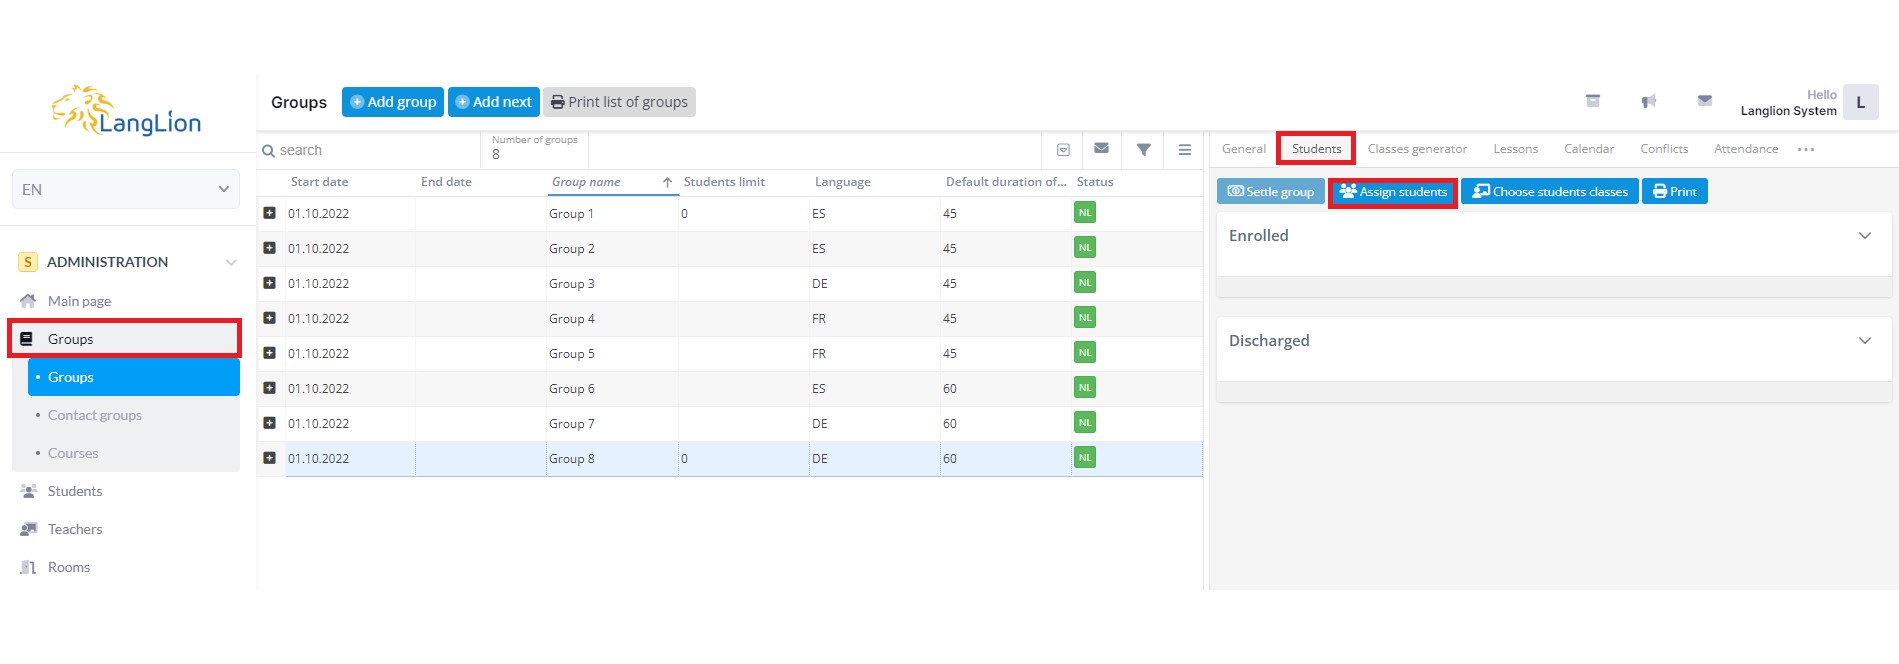
Select group in „Groups” tab and click the „Assign students” button in the „General” tab.
The option of assigning a student to a group is also available in the „Students” tab. From this tab, you can also assign a student to a group.
From the list that appears, select the people who will be attending classes in the given group and save the changes.

As in the first method, it is necessary to enter the date of enrollment of the student into the group by editing his data in the group.