Transfers import
How to import transfers?
First, you need to select a default payment form for the transfers import. To do this, go to the Settings tab in the Finance module, select the Payment forms, and indicate the default form for importing payments, usually, it is simply „transfer”.
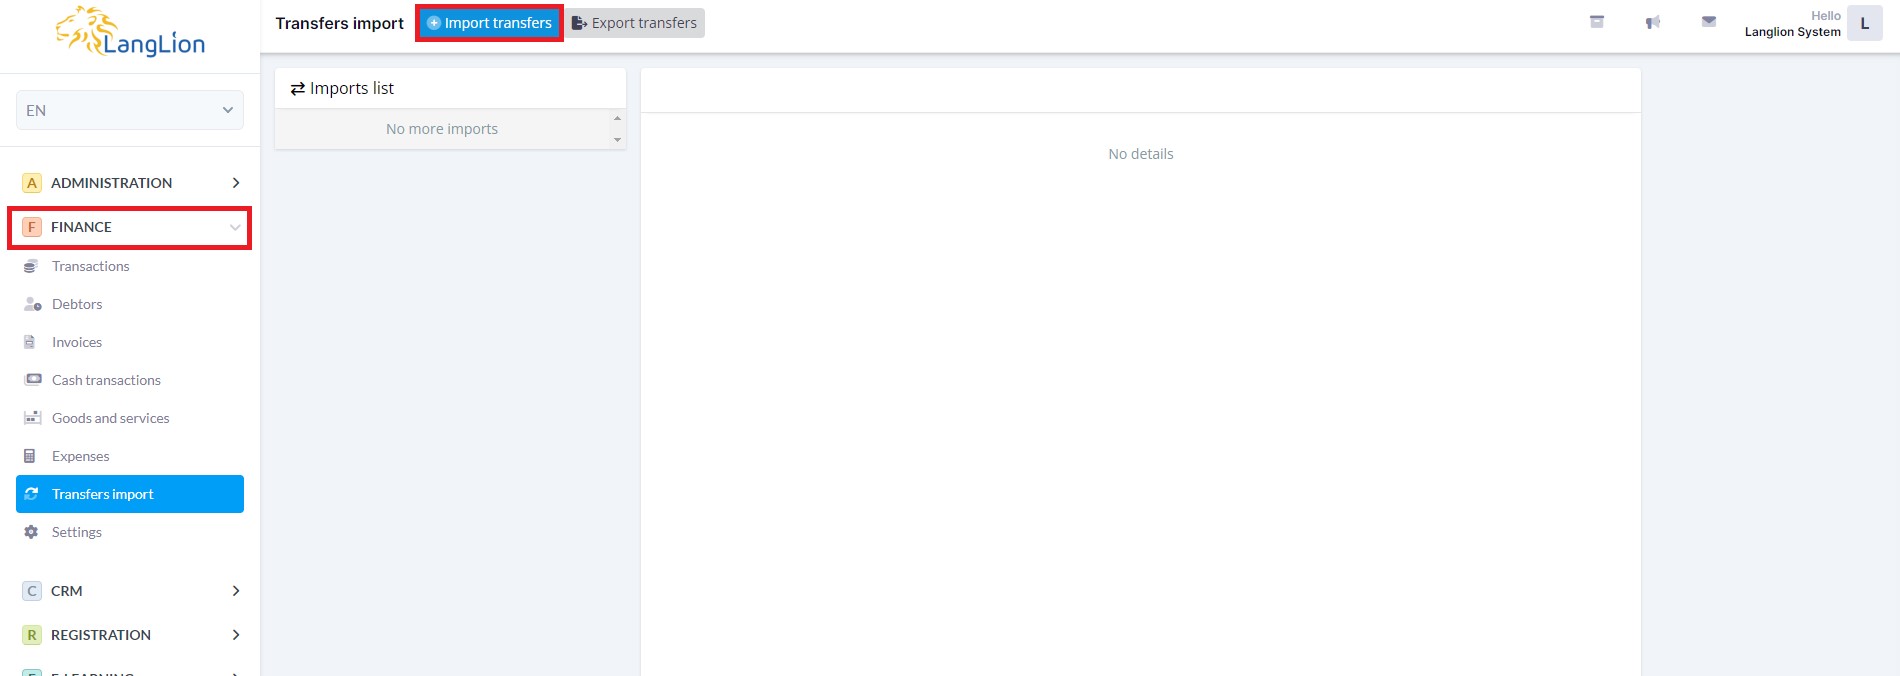
After that, go to the Transfers import tab and select the Import transfers button.
Add the file in the appropriate format, select from the list of banks the one you are using and then click Save.
You can also import transfers using our universal template, regardless of which bank you have an account with. If you want to receive such a universal file, please write to us at support@langlion.com.
Mass collect
Do you use the mass collect service in your bank? Thanks to this option each of you your students is assigned an individual virtual account to which they can make payments for the course.
If you use the service, you can choose to import the payments by the recipient’s account. All you have to do is select To account in the Match based on option.
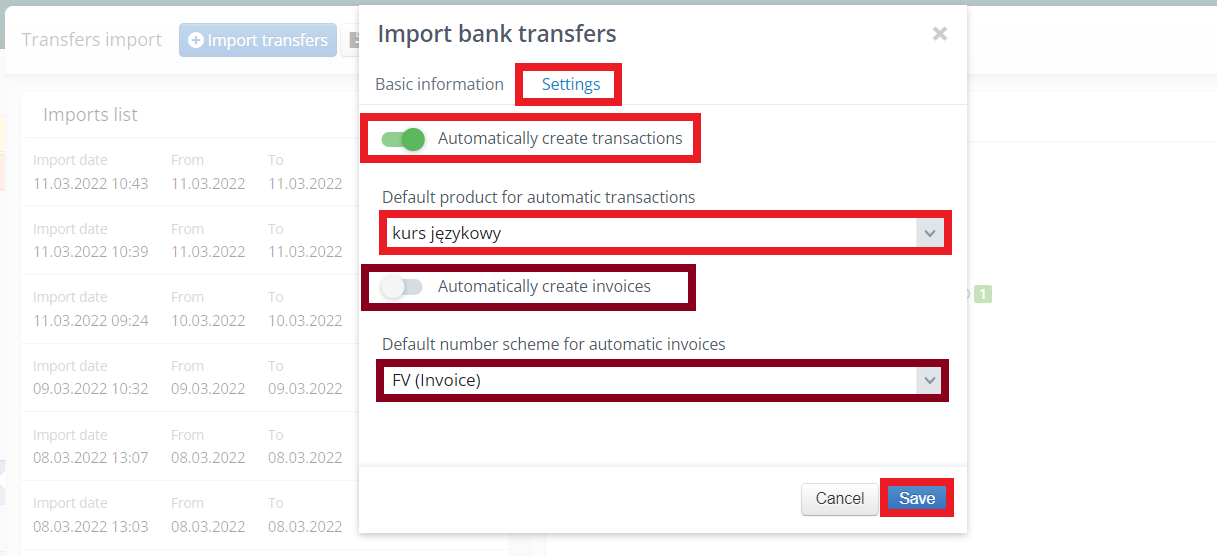
Next, in the Settings tab check if you want to automatically create transactions. If you checked this option, choose the default product for the automatic transactions.
Automatically create invoices option
If you chose the automatically create transactions option, you can also select the automatically create invoices option. Thanks to that, for every payment in the Auto tab, the system will create automatically a transaction and an invoice.
If you checked this option, choose the default number scheme for the automatic invoices.
Automatic sending of invoices option
Your work can be even more automated thanks automatic sending of invoices option. Invoices, immediately after they are created, can be automatically sent to the e-mail addresses of the students.
To enable this option go to the Finance -> Settings -> Additional options tab, and check the Automatic sending of invoices/cash documents to the user’s email address option.
You can also complete the content of the e-mail sent with the attached invoice.
Automatically create transactions option
If you choose the automatically create transaction option, after importing a file, transfers will be split into three categories.
In the Solve manually tab will be payments that the system has assigned to the student, but the user has assigned to no or many groups.
To see the details, click the more option (3 vertical dots icon on the right). From this level, you can cover or add a transaction, issue an invoice or delete the transfer.

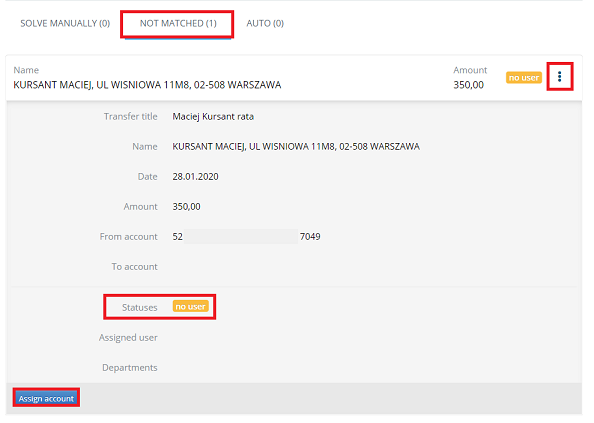
In the Not matched tab will be payments that the system is not able to assign to specific users because they have no account number assigned or the same account number is assigned to many users. There will also be payments that the account number has been matched to the company, and duplicate payments, i.e. payments imported earlier with the same date and value.
To see the details, click the more option (3 vertical dots icon on the right). From this level, you can assign the account number to the student – click the Assign account button, search for the student, and save changes. If the student is assigned to one group only, the system will match the payment to the group automatically and create the transaction.
You can also import the transfer again if you add the account number manually to the student’s data.
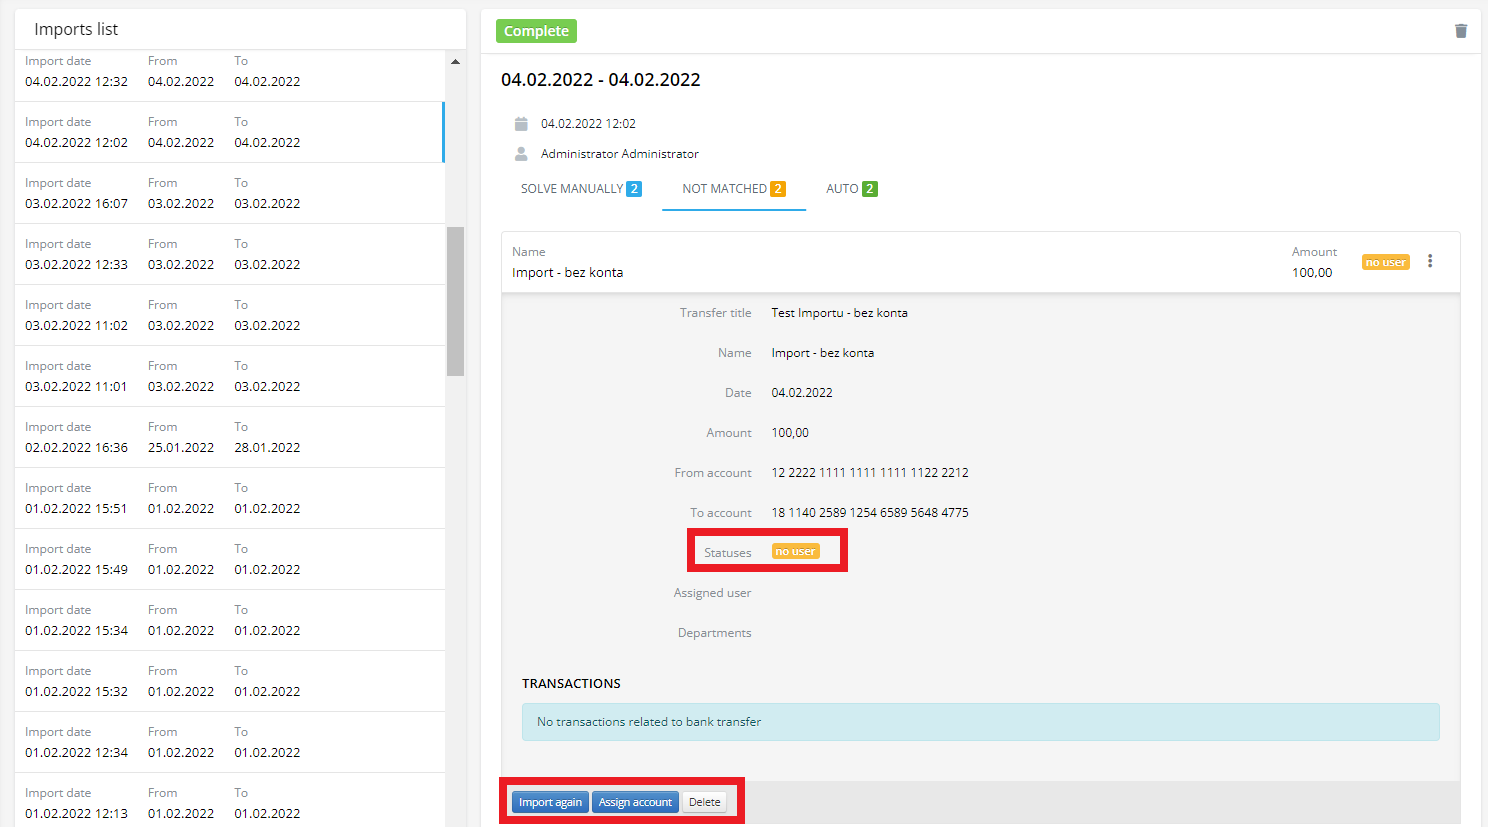
In the case of the company’s payment, you can assign it to the previously created transaction for payment or add a new transaction or invoice.
In the Auto tab will be payments which account numers the system matched with the students, who have been assigned to one group.
If the student has a transaction on the same amount to be paid, the system will mark the transaction/invoice as paid.
If the student hasn’t the transaction to be paid, the system will create a paid transaction automatically and match it with the student’s group.
You can also here add an invoice or delete the payment.
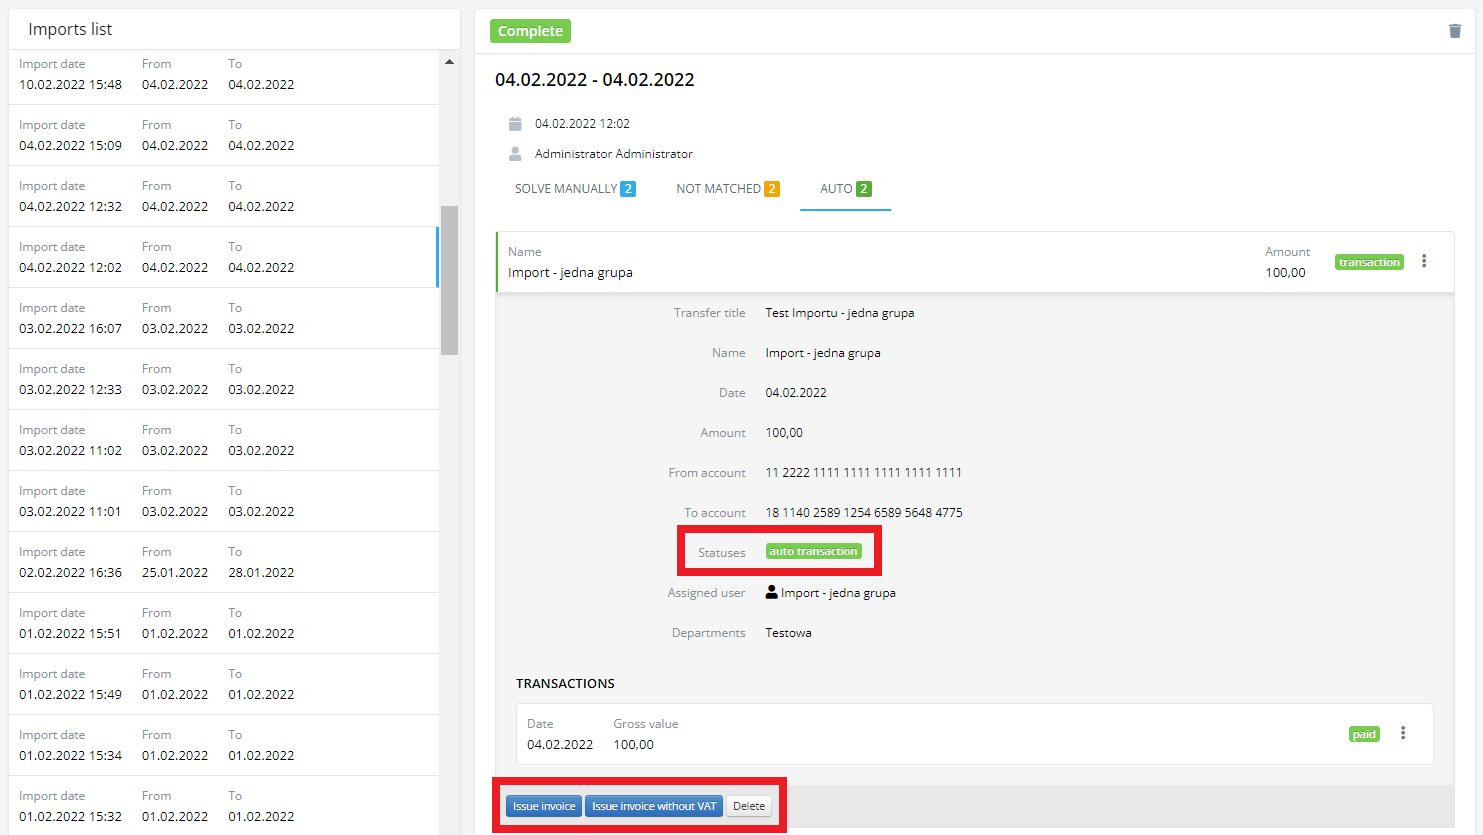
Transactions which has been created automatically can not be edited. You can only change a description or delete them.
Manual create transactions option
After importing the file, the system will indicate the payments that it will be able to match to the transactions of students/contractors based on the account number assigned to them, the amount of the payment. When the system matches users with transfers, it will be moved to the Auto tab.
In the Not matched tab will be payments that the system is not able to assign to specific students or contractors because, for example, they have no account number assigned or the transaction is duplicated (there is a payment with the same date, value). To see the details, click the more option (3 vertical dots icon on the right). From this level, you can assign the account number to the student – click the Assign account button, search for the student, and save changes.
Now, the system will check if the user you assigned has any transactions to be paid and will compare it with an imported transfer. If the transaction and transfer match, it will mark the transaction/invoice as paid and move the transfer to the Auto tab.
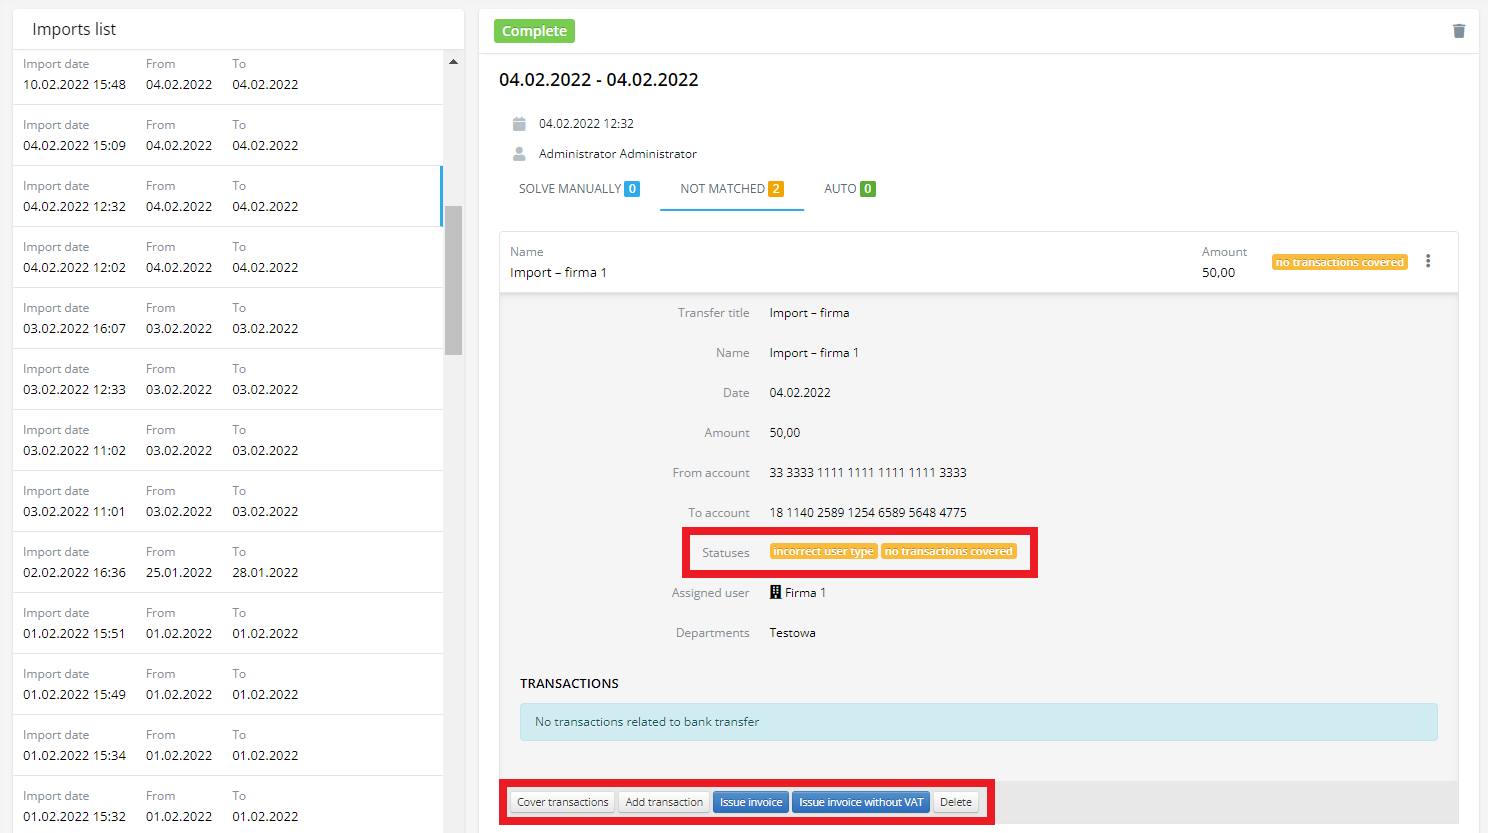
If you assign the user but the transfer cannot be matched with any transaction or invoice, will be displayed the no transactions covered status. For example, the value of transfer does not correspond to the student’s transaction, or there is no transaction/invoice created and waiting to be paid.
If there is no added transaction or invoice that the imported transfer can mark as paid, you can add it from this level. Click the dots icon, and then the Add transaction option. You can also issue an invoice from this place.
If there is a transaction or several transactions that this transfer should mark as paid, click on the Cover transactions button, and select the transaction to be paid.
Now, the status will change to transaction added.
In the Solve manually tab, you will see all the transfers that the system matched with users but cannot match with transactions.
If there is no added transaction or invoice that the imported transfer can mark as paid, you can add it from this level. Click the dots icon and then the Add transaction option. You can also issue an invoice from the same place.
If there is a transaction or several transactions that this transfer should mark as paid, click on the Cover transactions button, and select the transaction to be paid.
To easily assign accounts from which contractors make payments to their accounts in LangLion, you must import the file for the selected period of time, and link the account to the student from the Not matched tab. It can even be a file with payments that have already been manually registered in the system because you can delete the file and the account numbers will remain assigned to the students/contractors. Thanks to this, each subsequent import will be able to find the right student and assign him a payment.
As before, the student has been assigned a payment plan, and by adding payments you have marked which of them has been paid.
These transactions were listed both in the Student Payments tab and in the Finance module. Payment is assigned to the transaction. For deferred transactions, i.e. those that are due for payment, the payment list is empty. It shall be completed when the (partial or total) payment is confirmed.
In the case of transactions added by a non-deferred payment method, the transaction has a payment associated with it immediately and is marked as paid.
By importing transfers, you enter into the system mass information about payments. In a situation where the account number is associated with the student/company and this student/company has a transaction/invoice to be paid (deferred payment), the system checks whether the value is correct and matches the transfer to the transaction.
If the student does not have a transaction/invoice to be paid in their history but only, e.g. a list of installments or a list of lessons settled in advance, or has a transaction with another form of payment assigned, the value of the imported transfer goes to the Solve manually tab (if he recognized the student by number account, because if not, it will go to the Not matched section first).
After expanding the details, 4 buttons will appear:
- Cover transaction – to indicate which transaction the transfer should mark as paid,
- Add transaction – to create a transaction that a given transfer should mark as paid,
- Issue invoice
- Issue invoice without VAT – both to create an invoice that the transfer should ark as paid.
When you don’t create transactions before the transfer import, you have to use the „Add transaction” option. The system will prompt the course product and student groups by selecting the first unpaid installment (you can choose a different student group). For students billed hourly in advance, indicate the group and lessons for which the student pays. Just like when adding transactions from the student side. Doing so from the import side leaves the option to search for students on the list, checking what amount they have transferred.