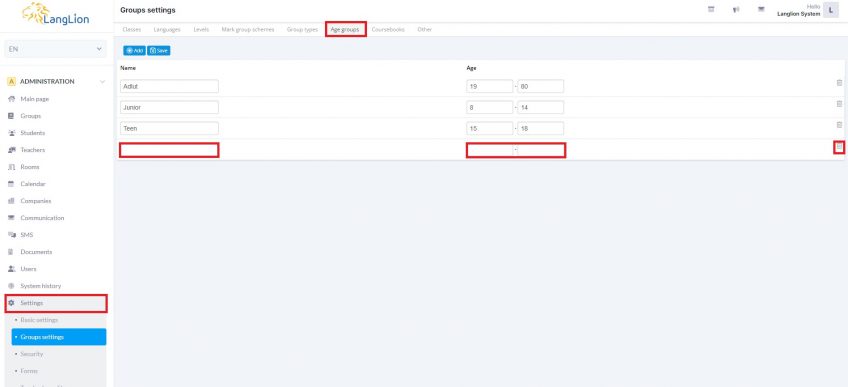
Group Settings – Age groups
What are the age groups?
These are additional properties assigned to the courses. Thanks to this, it is possible to filter courses according to the age group criterion.
How to add an age group?
1. Select the Administration module and the Settings tab.
2. Go to the Group settings tab.
3. Click on the Add button.
4. Enter age group name and enter the age range.
5. When finished adding groups, click Save.
If an age group has been entered incorrectly, you can delete it by clicking on the trash can icon.
Age groups have been added to the system. Now you can assign them to a course.
How do I assign an age group to a course?
1. From the Administration module select the Groups tab and then Courses.
2. In the next step, click on the selected course and edit it.
3. Select given age group from the drop-down list
4. To save your changes, click Save and close.
The age group has been added to the course, now you can filter the list of courses by the age group criterion. To do this, select Filter.
In the next step, click on the Age groups criterion and select the specific group by which you want to filter the list of courses.


