Payment per hour in advance
Hourly billing takes into account the number of classes, price calculation base and the rate for classes. This billing variant is used when the student pays for a certain number of hours (eg when purchasing additional lessons before the final exams). He can choose the number of lessons to be paid or choose the time range in which the lessons are to be paid.
How to enable this type of settlement?
You can easily set up payment in advance type of settlement in the group or individually for the student.
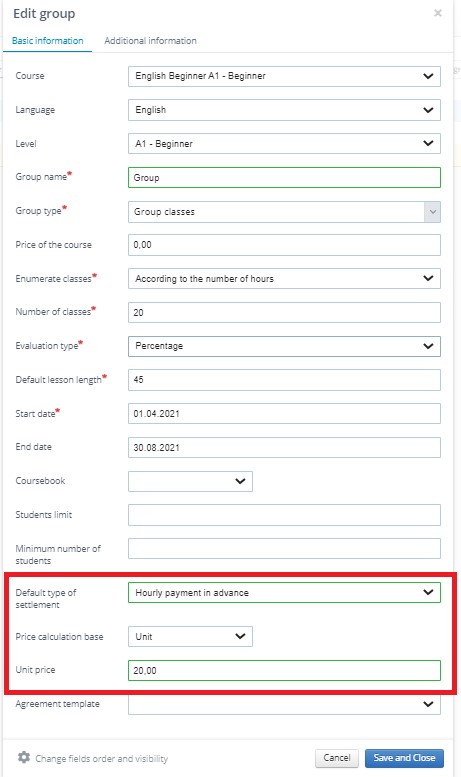
When creating a group, select Hourly in advance option in the Default settlement type field.
Now, you can choose whether you want Unit or Lesson set up as a price calculation base.
What is a price calculation base?
The basis for rate calculation is important when converting the price for classes in the event of a change in their length.
Select LESSON if you want the student to pay the same rate regardless of the length of the course
Select the UNIT if you want the system to calculate the rate when the length of the class changes.
This way, all students assigned to this group will have this type of settlement.
Payment per hour in advance can be also assigned to particular students:
1. Select the student from the list.
2. Go to the Payments tab and click on the Settings icon.
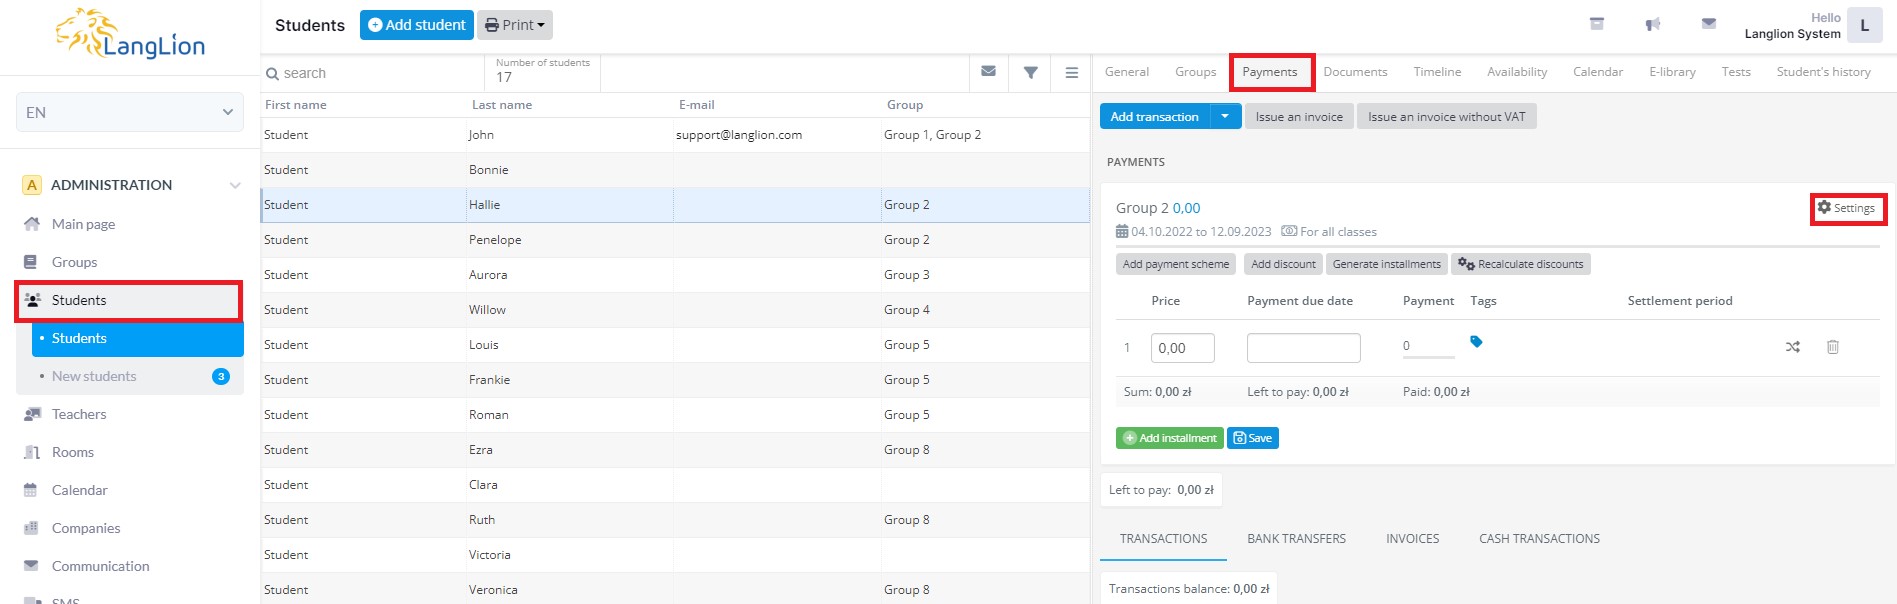
4. Set up Hourly payment in advance type of settlement, choose price calculation base, enter unit’s price and click on the Save and Close button.

How to settle the student hourly in advance?
If you just want to add a transaction, click the Add transaction button. In the window that appears, set the transaction date and payment method, click the Add product or service button, select the course product and then select the group for which you are adding the transaction from the list of groups. The list of student lessons will appear. The system will show you the lessons of the student from the start date of the group.
Choose the lessons for which the student will pay. You can enter the amount due in the field above the list of lessons or by clicking on the list of classes, select those which the system should mark as paid.
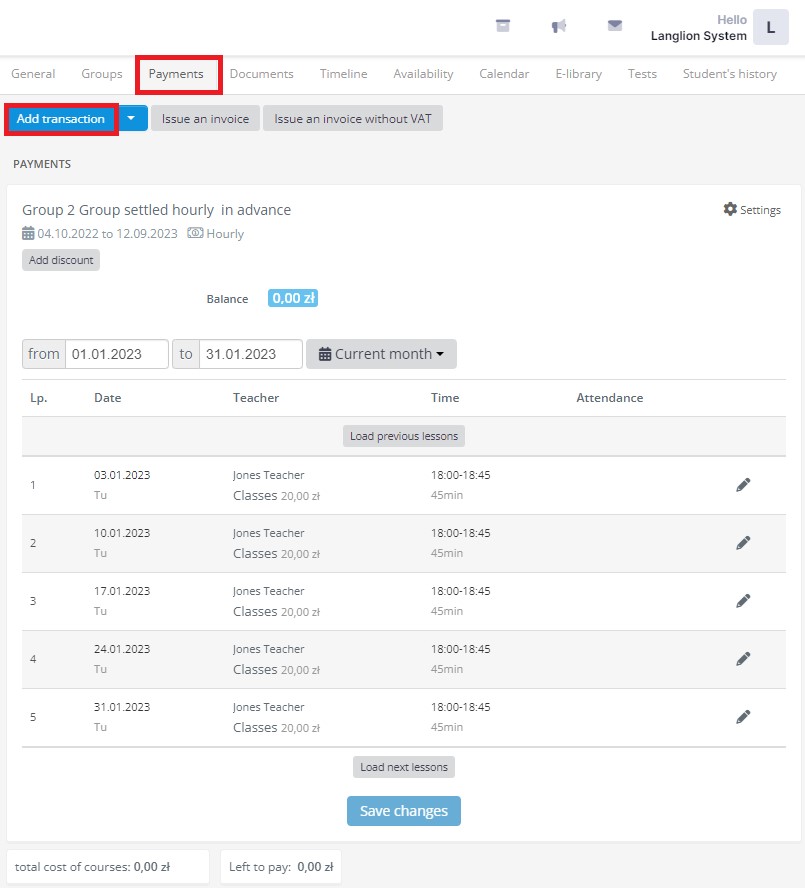
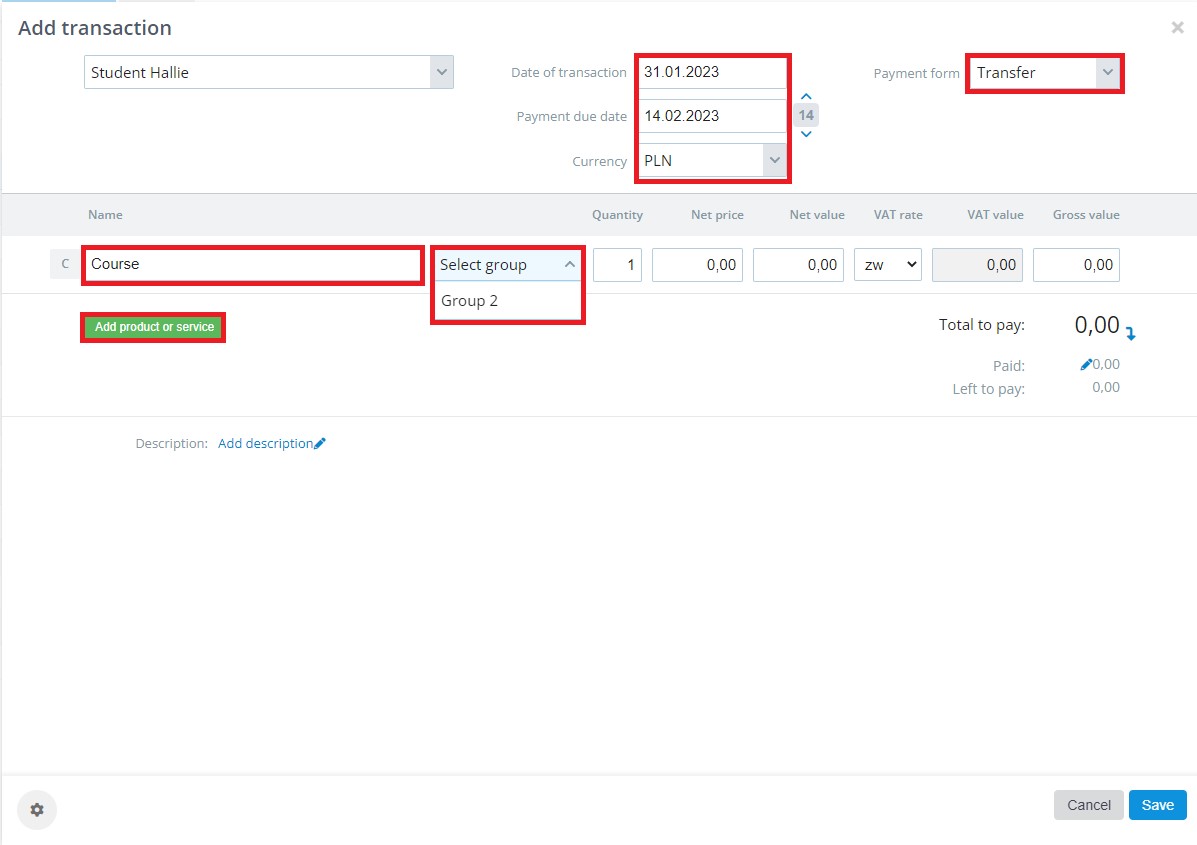
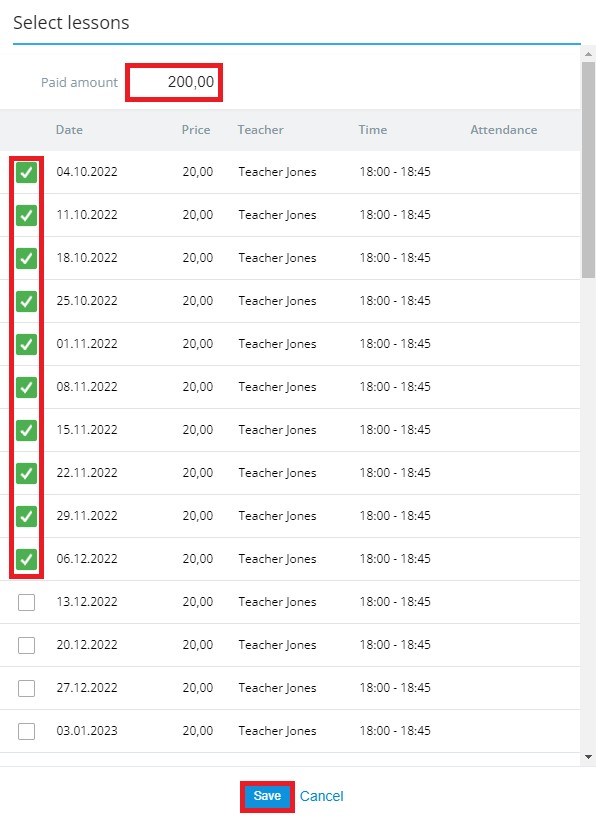
To confirm the transaction, click on the Save and close button or press Enter.
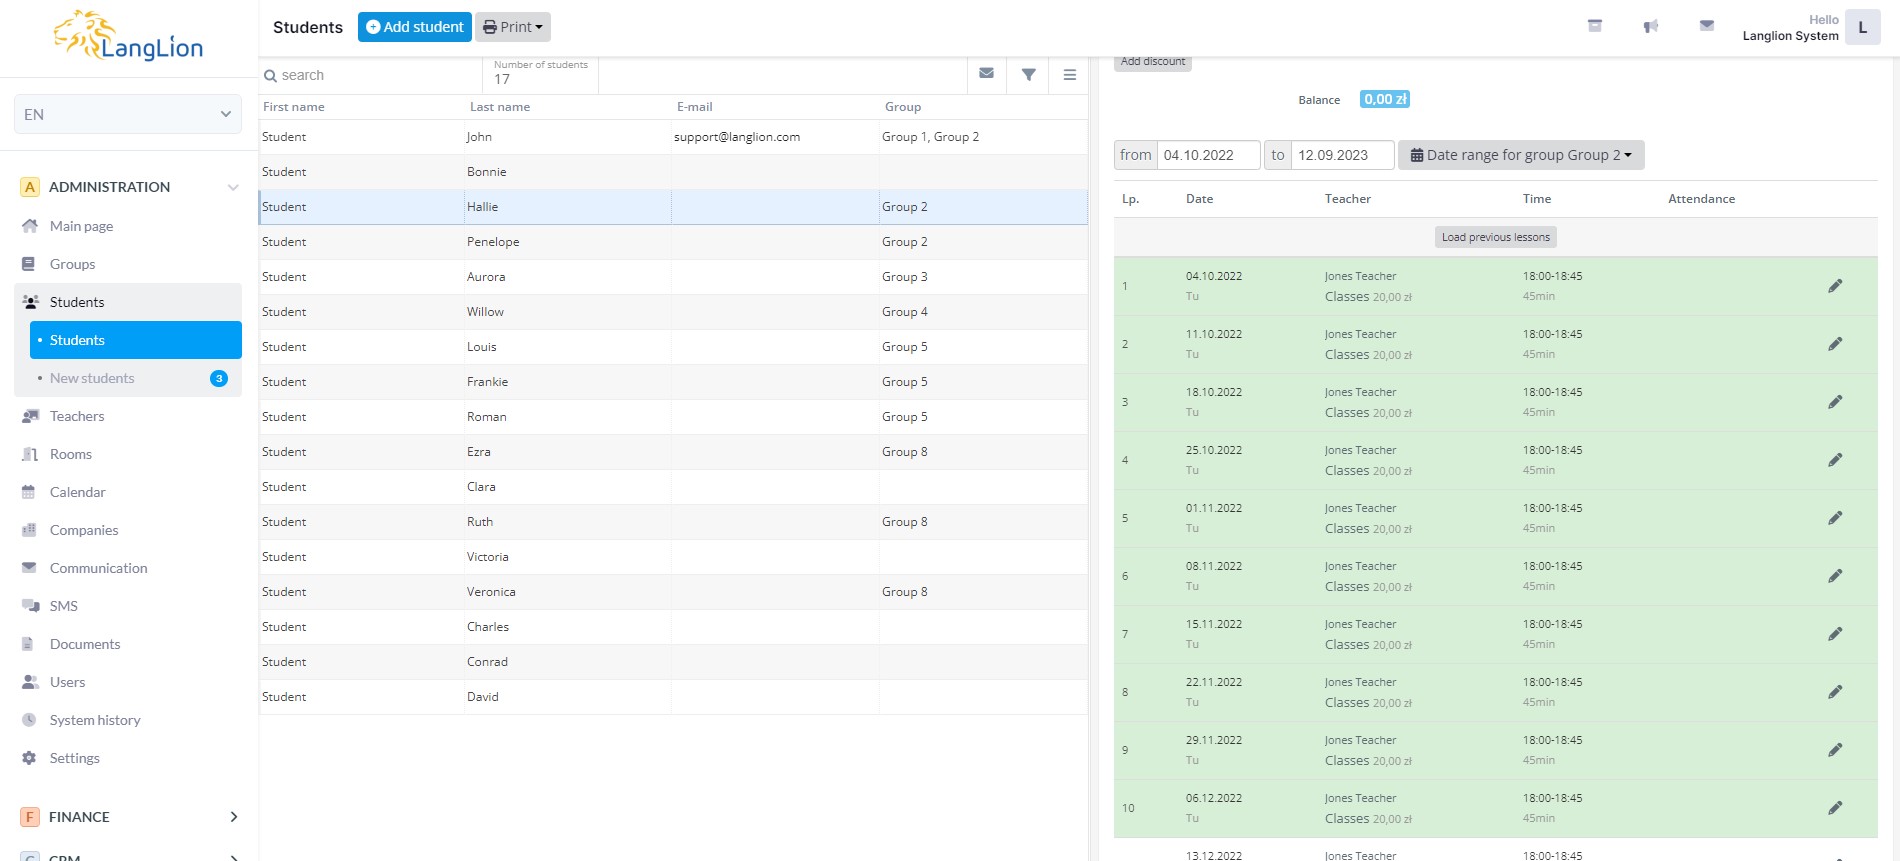
In the student Payments tab, the paid classes will be highlighted in green.
If you want to issue an invoice you can use this instruction ⇒ HERE
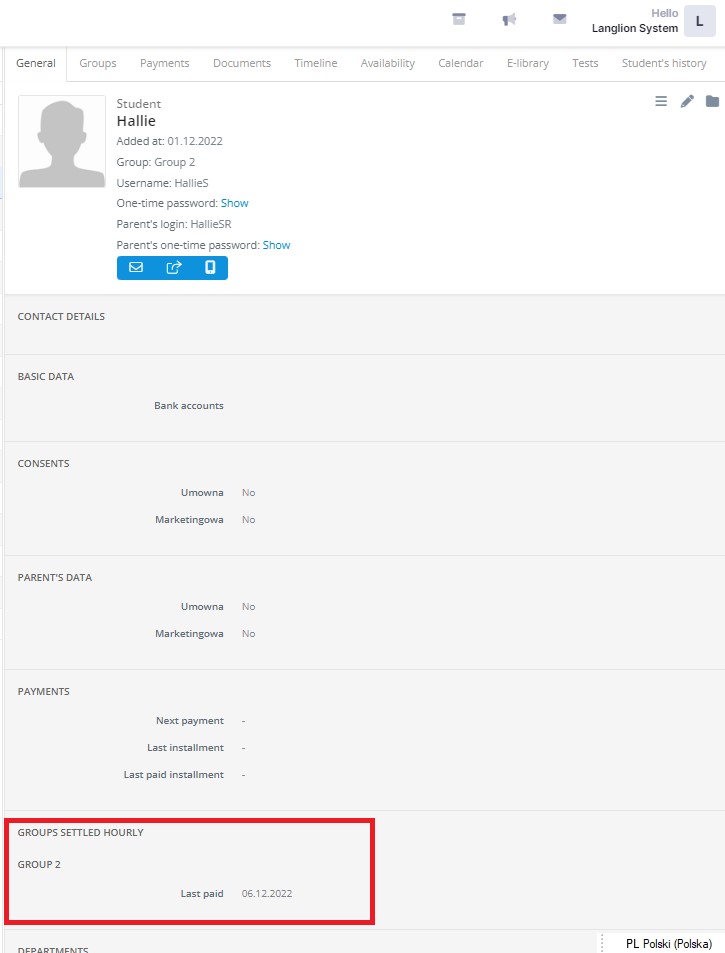
In the student General tab, you will see the information about the date of the last paid lesson.
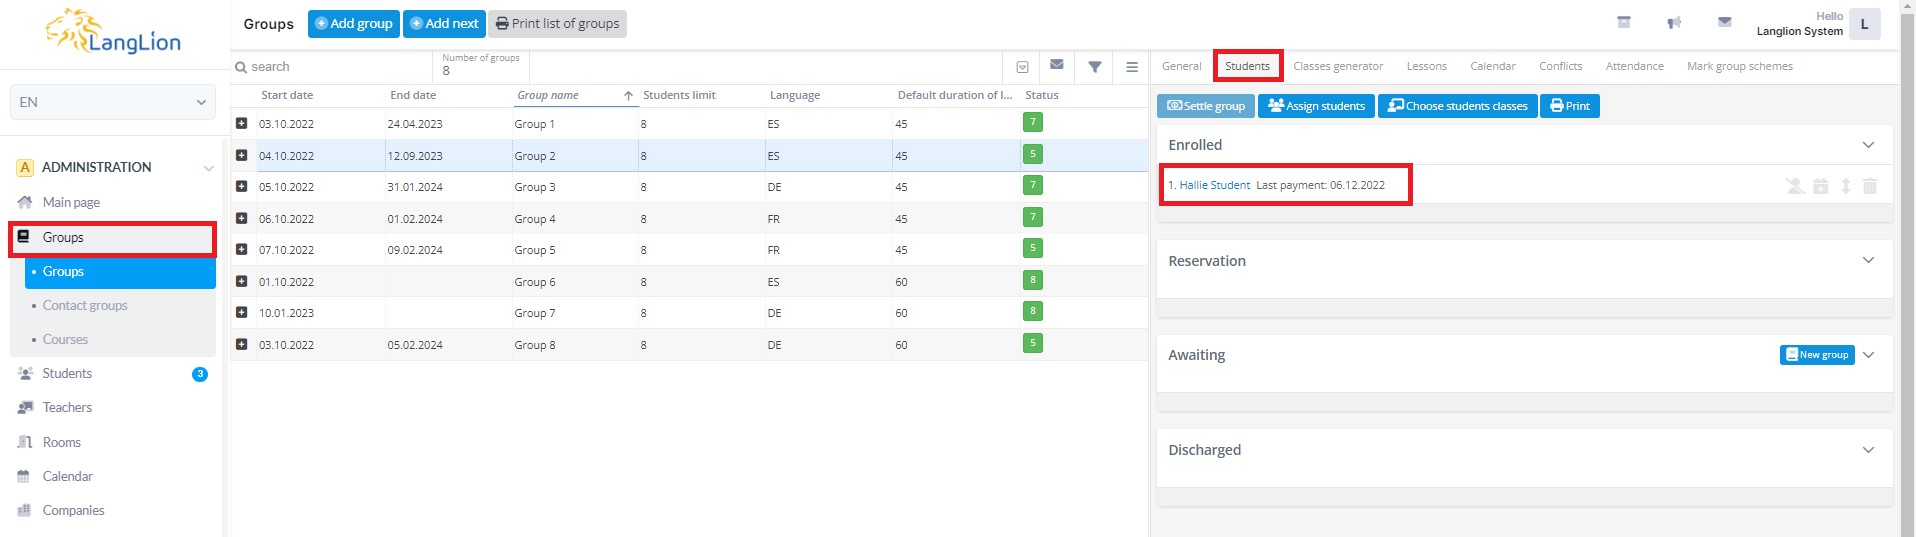
On the list of students in the group you will also see this info.
Once you add the transaction, you can issue and print an invoice or cash document. Remember that cash documents can be added automatically to a transaction or invoice.