Planned and regular group
End of summer holidays is a very intense time before the beginning of a school year. While preparing for a new semester, there’s a classes scheme being created for particular groups, teachers being assigned etc.
We have a possibility to „hide” groups from students and a teacher. It won’t be visible for them.
How to mark a group as planned?
First, turn on the system option which allows to mark groups as planned. Go to the Administration module and select the Settings tab. Click on the System Configuration tab and enable the Planned groups option. Save changes, log out and log in again.
Now you can mark groups as planned groups.
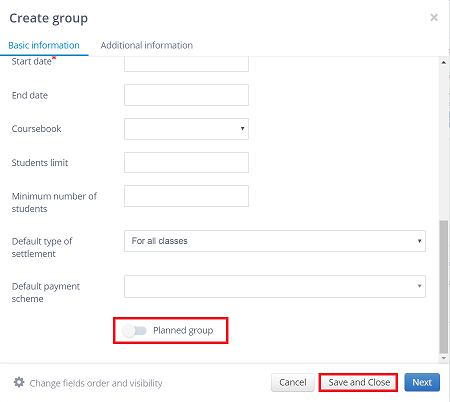
1. Go to the Groups tab in the Administration module and create a new group (or edit existing one).
2. Complete the fields of the edit form.
3. Mark the option Planned group.
4. Save changes.
Now the group is marked as planned (on the list of groups it is highlighted in orange and on the calendar is signed as planned). From now on, all her data will not be visible to the teacher and the student.
Soon classes will begin, how can I mark a group as regular?
1. Go to the Groups tab.
2. Select the planned group and edit it.
3. Disable the option Planned group.
4. Save changes.
From now on both the teacher and the students assigned to the group will find details of the class schedule or payment schemes in the E-gradebook.